

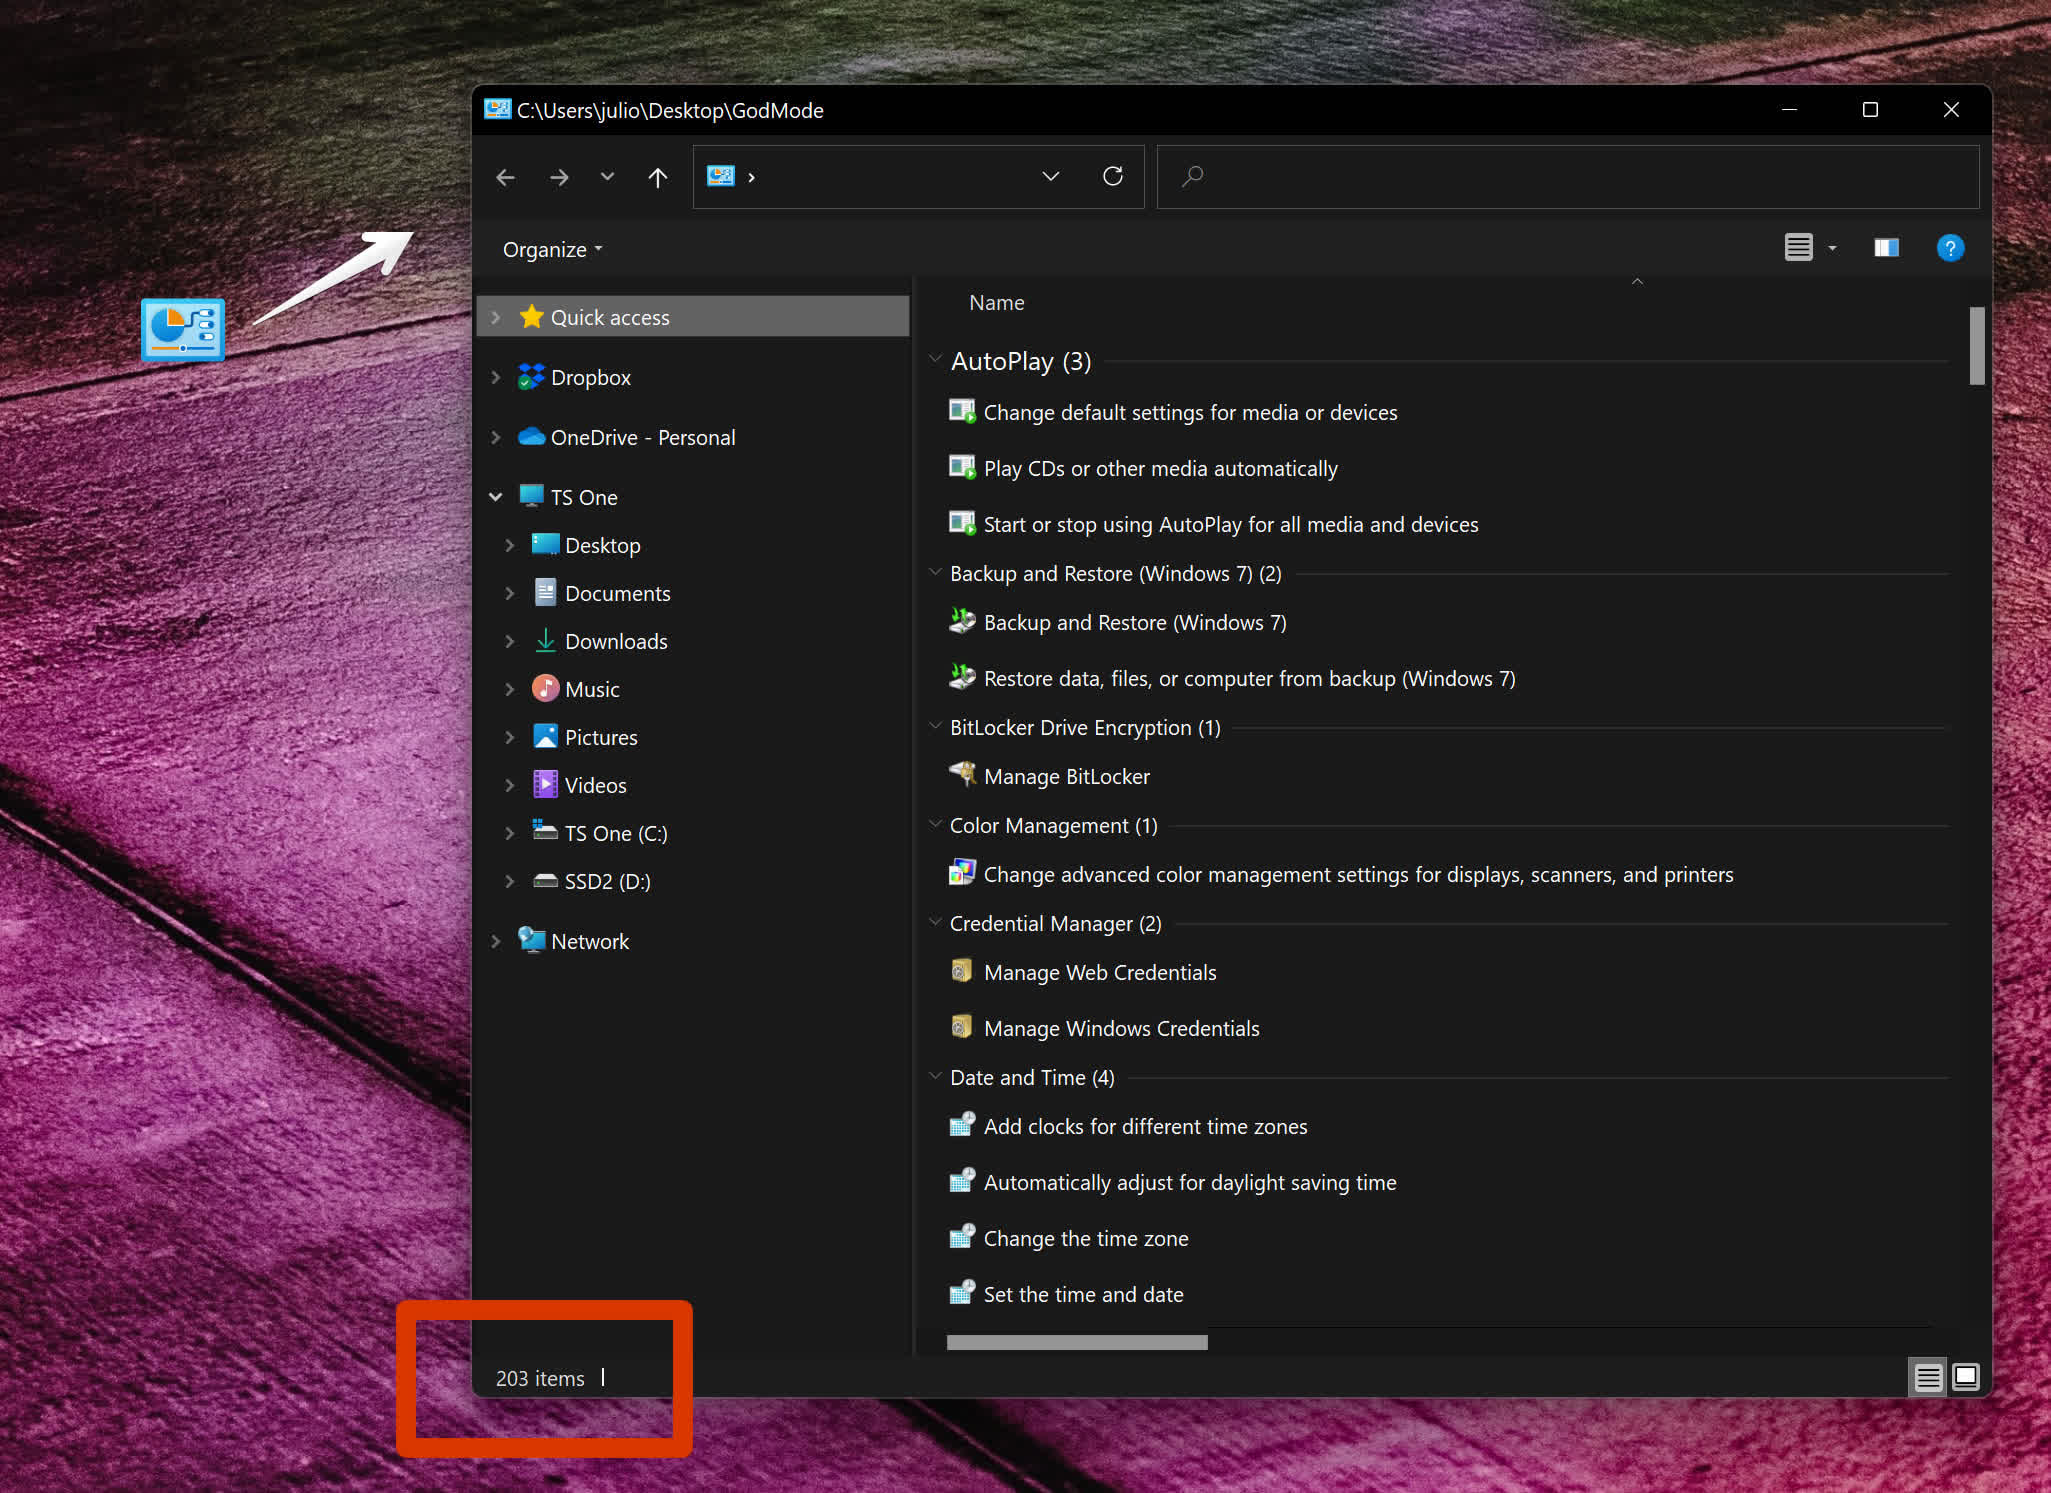
Many of you may be familiar with Windows God Mode. It does not make your PC immortal, nor grant you infinite ammo. Instead, Windows God Mode puts an icon on your desktop that gives you quick two-step access to any setting you might need, with over 200 setting menus available.
Windows God Mode originated with Windows Vista in 2007. It’s since stuck around without changing and can be activated in Windows 10 and Windows 11. The God Mode menu is effortless to create but can be hard to remember as it requires entering a long sequence of characters.
Put a God Mode icon on your desktop by pushing “up, up, down, down, left, right, left, right, B, A.” No, wait. Wrong cheat code. Just follow these two simple steps.
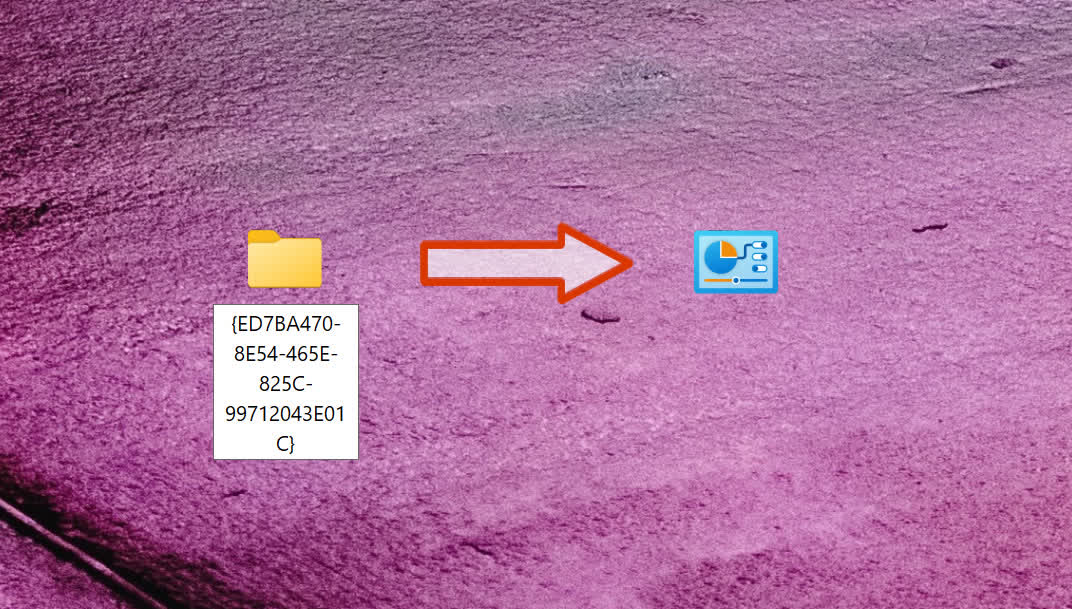
- Right-click on your desktop and select Create Folder.
- Now name it: GodMode.{ED7BA470-8E54-465E-825C-99712043E01C}
Copy and paste the above name to make it easier for you. The folder icon will transform into what looks like a small control panel. Congratulations! You have activated God Mode!
Now what?
God Mode is quite handy if you hate trying to navigate through the ever-changing Windows Control Panel a.k.a. Settings menu. In fact, God Mode is merely a nickname. Its real name is “Windows Master Control Panel shortcut,” but around 2010, bloggers coined the name Windows God Mode, which is much easier to refer to.
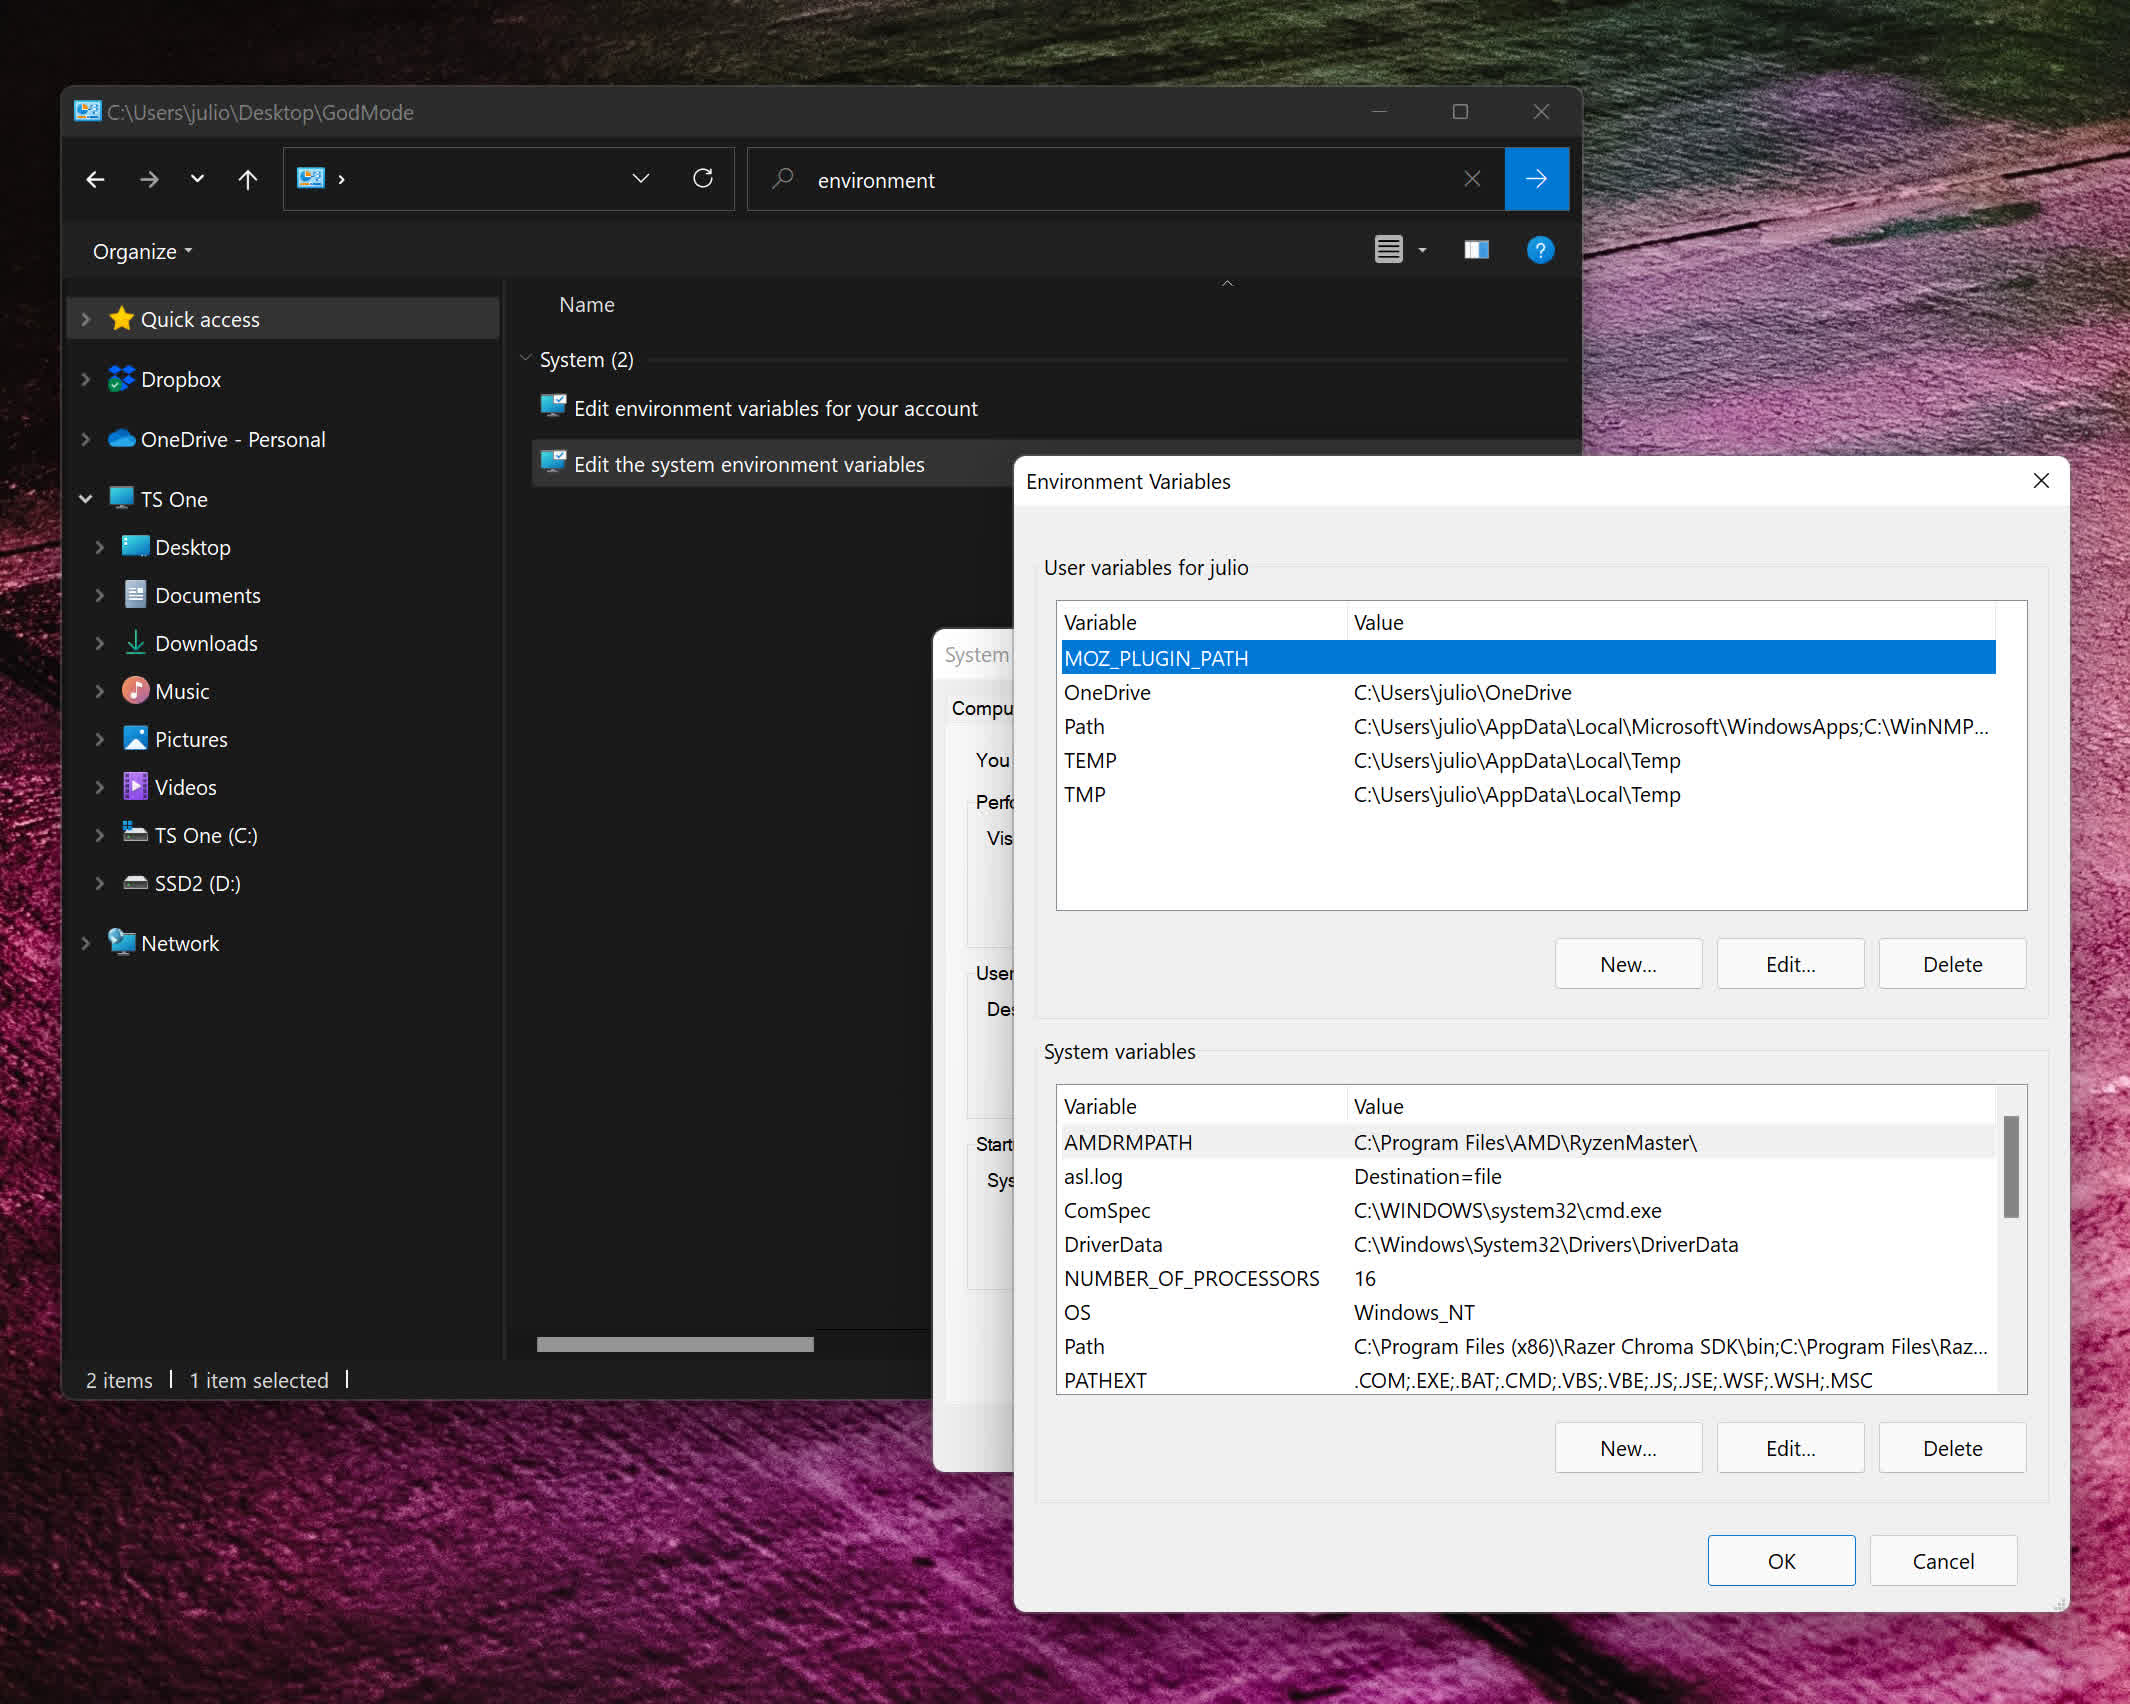
When it was discovered (or leaked), it was considered a “power-user” feature, but it’s just quick access to all the tweakable settings in Windows. For example, under “Date and Time,” you can toggle automatic daylight savings off or on or set your time zone, date, and time. You can also add clocks for different time zones. There are, of course, more advanced settings like Environment Variables or creating and formatting hard disk partitions.
Why not just access these settings via the normal control panel? As mentioned before, God Mode gives you immediate access to every control in Windows, including some you will not find in the regular Settings app. Some options are buried deep within sub-menus and are not easy to find.
For example, the path to get to the Environment Variables mentioned above is Settings > System > About > Advanced System Settings. A slightly shorter route is Control Panel > System > Advanced System Settings. Conversely, it’s only one click away within the God Mode folder.
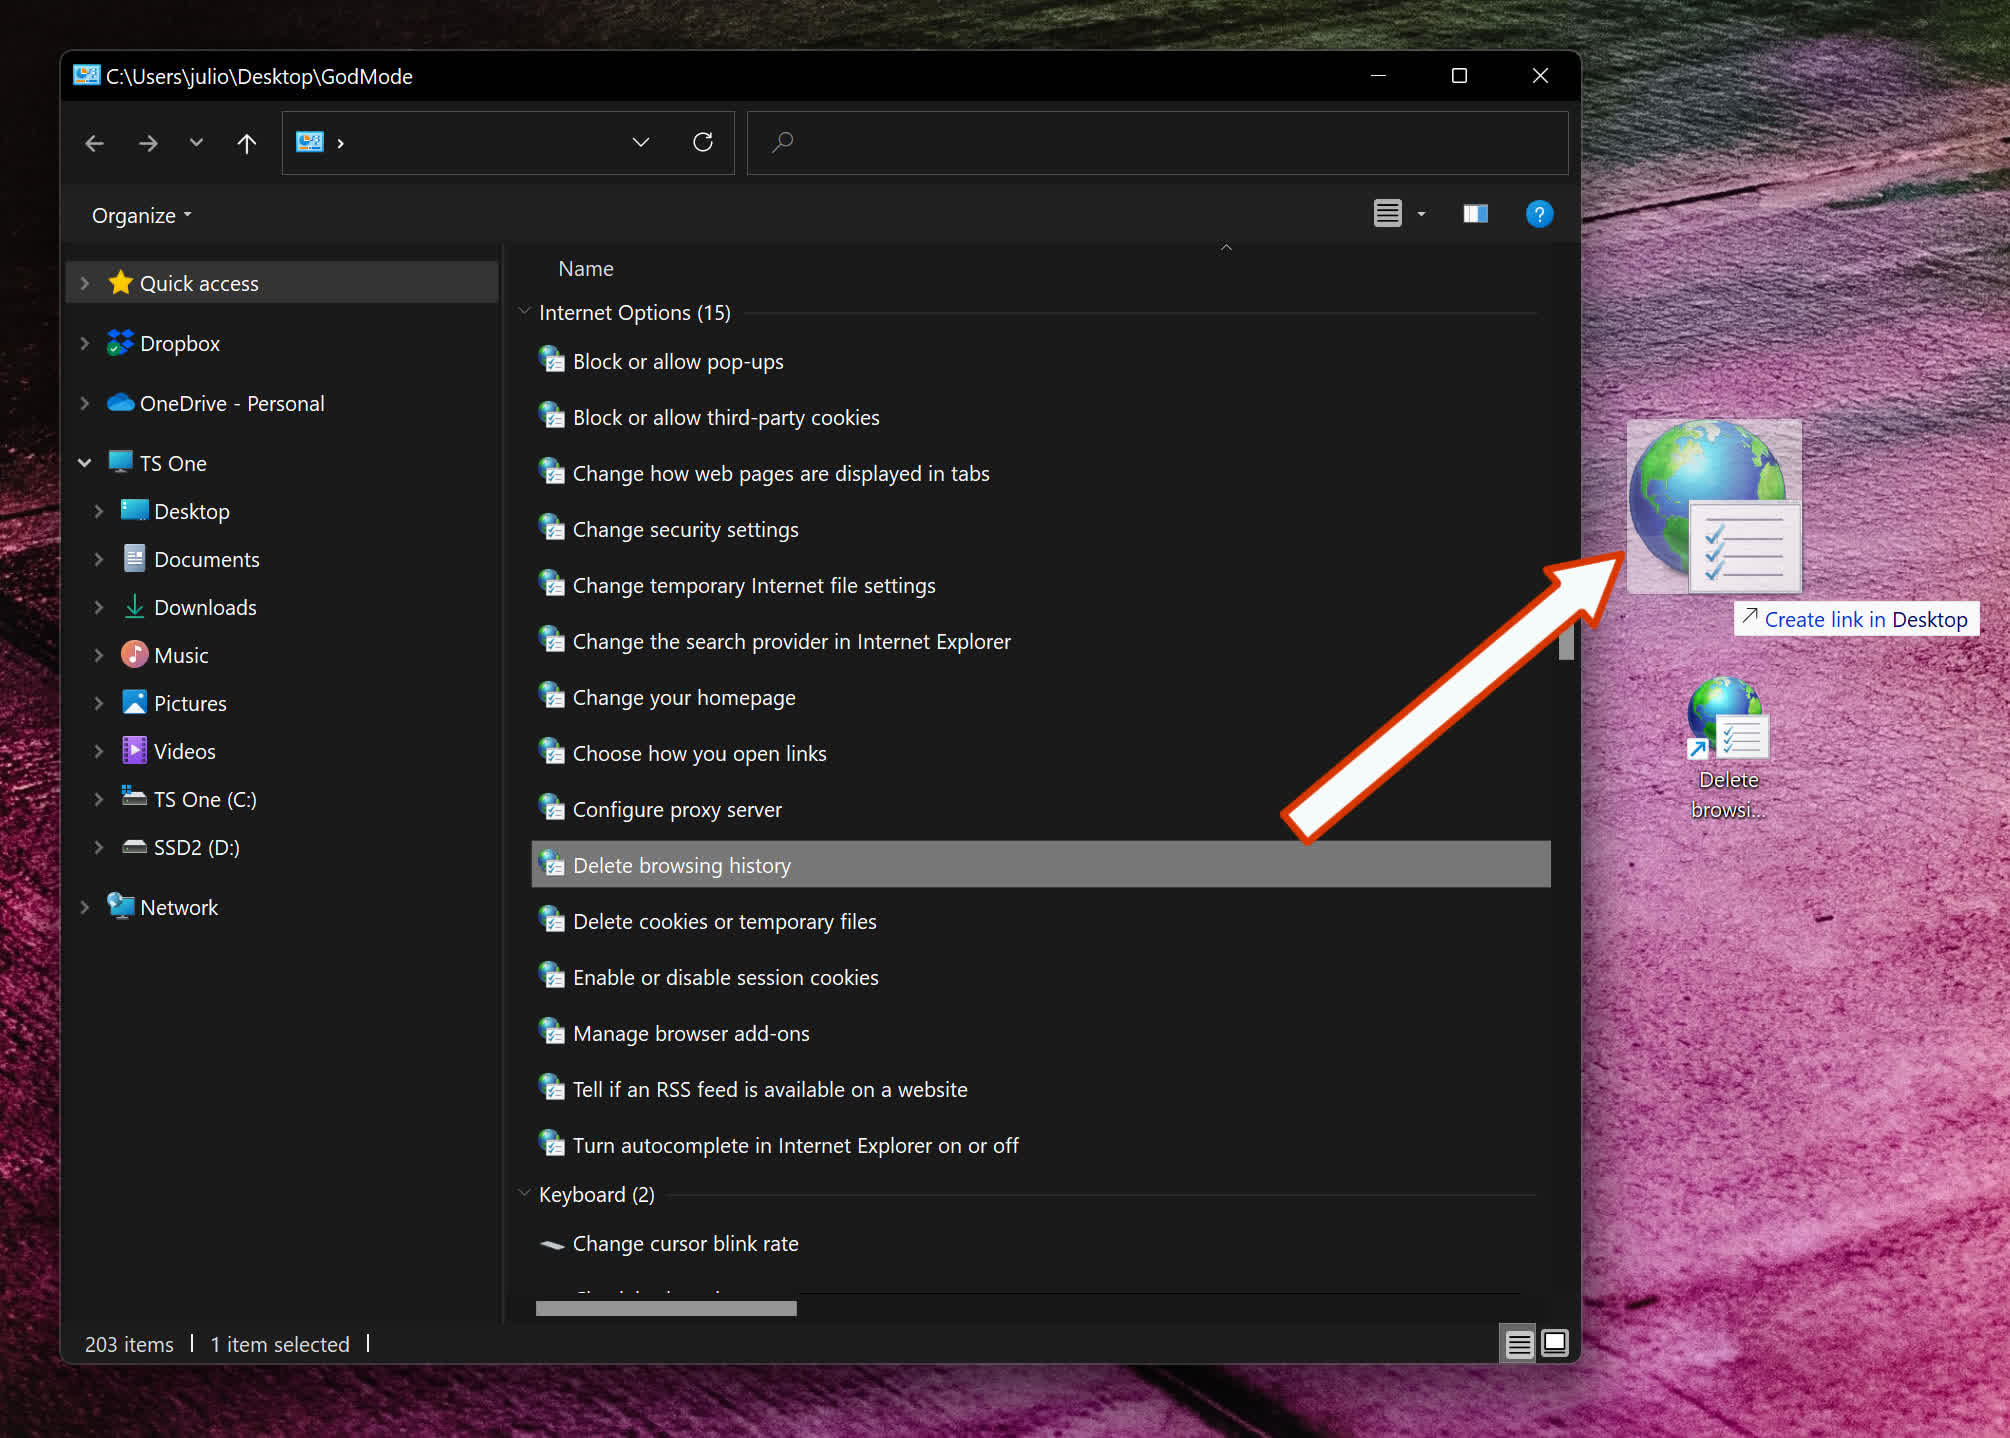
Another advantage of activating the Master Control Panel is that it allows you to easily create a shortcut to any setting.
For instance, if you use Bluetooth Settings frequently, drag and drop it from the Master Control Panel to the desktop, and you’re done. You will gain one-click access to that specific setting. The alternative way to achieve the same would be to navigate to the System32 folder (Local Disk > Windows > System32), find fsquirt.exe, and right-click it. In the context menu, select “Create shortcut.” Windows will then tell you that a shortcut cannot be created there and ask if you want it on the desktop instead. Select “Yes.”
Obviously, there are going to be tons of settings in the God Mode folder you will never use — probably most of them — but there are a few that frequently come in handy.
Backup and Restore options are nice to have at your fingertips. Most of the items listed under the Display section are also helpful. I’ve made use of “Show or hide file extension” and “Show hidden files and folders” on many occasions.
For novice users, or those new to Windows 11, everything under the Getting Started section is informative.
Even if it’s been a while since you last used God Mode, it might be fun to scroll through the list of options today. You might find something new in there that would be indispensable to have one click away.