

At a glance
Expert’s Rating
Pros
- Super svelte and attractive
- Surprisingly fast and expandable
- Runs Docker apps
- Affordable with affordable PCIe modules
Cons
- Can cause cable spaghetti
- Not dead-easy past the basics
- Needs more and better documentation
Our Verdict
If you’re looking for an affordable home media server with low power requirements, the Docker-based ZimaBoard–with its plethora of ports and add-on modules–will do the job. And if you’re tech-curious–it’s a lot of fun.
Price When Reviewed
$199.90 with Intel Celeron 832, 8GB of DRAM, and 32GB of NAND storage (other configurations also available)
Best Prices Today: Icewhale Technology ZimaBoard 832
Icewhale Technology
$199.90
The ZimaBoard family of micro-severs are wrapped in a super svelte, sexy, case/heat-sink. If that means nothing to you, think of it is as the guts of a NAS box sans the box and storage bays. If those descriptions don’t do the trick–it’s a tiny computer for use on your home network.
There are ports aplenty that you can hang stuff on, and apps for everything from media serving (our interest in this review) to network routing, to eventually controlling your household IoT tech.
Truth be told, while the ZimaBoard is perfectly usable, it and its CasaOS operating system are works in progress. They’re also a heck of a lot of fun–at least for enthusiastic DIYer.
Design and features
The first thing that struck me about the ZimaBoard is just how small it is. When Icewhale Technology pitched us on a review and described the available options, I had mini-ATX in mind. What showed up was a board measuring 5.46 x 3.2 x 1.36 inches (HxWxD). That’s much smaller than mini-ATX–you can easily grasp the ZimaBoard with one hand.
The ZimaBoard family leverages older, but still effective, Intel Apollo Lake-generation Celeron processors in three models: The $120 ZimaBoard 216A uses the dual-core, 1.1GHz/2.4GHz-burst Celeron N3350, while the $160 ZimaBoard 416 and $200 ZimaBoard 832 (the model reviewed here) have the quad-core, 1.1GHz/2.2GHz-burst Celeron N3450 onboard.
All three boards use integrated Intel 500 graphics, and as you might have guessed, the first digit in the model numbers is the memory on board, and the latter two digits indicate the amount of storage. Specifically, the ZimaBoard 216 has 2GB of DRAM and 16GB of eMMC storage, the 416 increases the memory to 4GB of DRAM, and the 832 has 8GB of DRAM and 32GB of NAND.
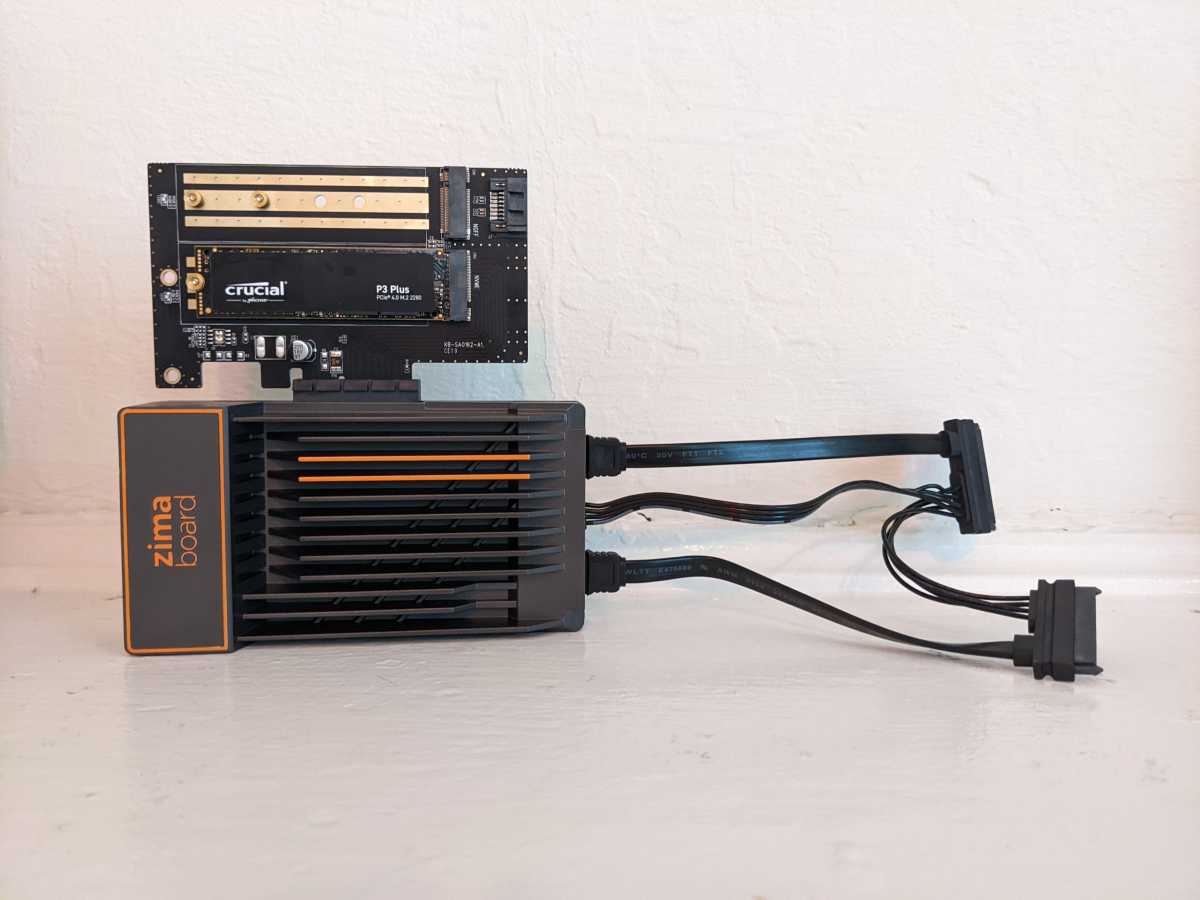
The ZimaBoard 832 with the PCIe, M.2 NVMe/SATA adapter card attached.
Jon L. Jacobi/Foundry
The ZimaBoard is more than capable of running on its own without peripherals; however, the smallish eMMC storage means you just can’t keep a lot of stuff on it as is. Icewhale knows these minimal configurations won’t cover all usage scenarios, so there are ports: There are two USB 3.0 ports (5Gbps), two gigabit ethernet ports, and a mini-DisplayPort 1.2 (4k@60Hz) occupy the back of the unit. Yup. DisplayPort. Don’t groan: Use and adapter and you can drive any type of display: HDMI, DVI–even analog.
There are also three exposed motherboard-type ports: two SATA ports on the bottom, with a mini 4-pin power connector in between, and a x4 PCIe slot on the side. Icewhale provides an adapter cable for the SATA ports which is shown in the next section. It also sells a host of modules for the PCIe slot.
If those specs sound underwhelming; well, they are by modern PC standards. But for the typical server or NAS box, they’re more than adequate–you won’t be using this board to play games or crunch 4K video. That said, it probably wouldn’t be muscular enough to run a Roon media server. But it is a power-efficient solution; the company says the entire deal has a 6-watt TDP (thermal design profile) before you add peripherals.
The ZimaBoard as raw art
If, like me, you’re a fan of exposed technology, you’ll like the ZimaBoard. It looks sleek enough on its own or with a USB drive attached, but once you start hanging stuff off its SATA ports and PCIe slot, it gets commando in a hurry: cables, chips, heatsinks, bare drives…. The whole nine yards.
 The ZimaBoard 832 with the SATA adapter cable in place.
Icewhale sells the aforementioned hanging stuff at surprisingly low prices. The company included several PCIe card modules for testing, including a $9.90 dual-M.2 (m-key NVMe/b-key SATA) adapter, a $14.90 4-port USB adapter, a $39.90 5-port SATA adapter, and a $29.90 2.5Gbe adapter. Okay, the latter two aren’t that cheap, but you’ll get the most mileage out of the first two.
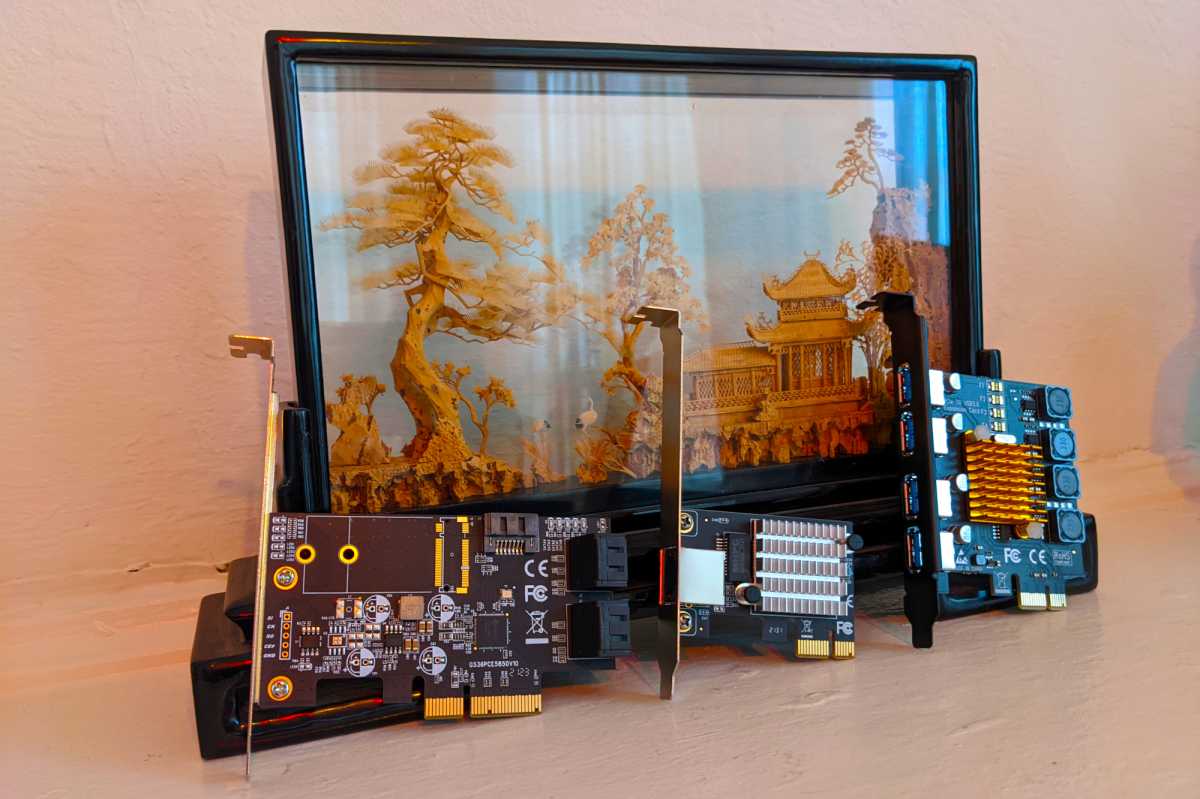 The ZimaBoard SATA, 2.5Gbs, and USB expansion cards.
You might be able to use other x4 PCIe boards, but that will depend on driver support. If Linux drivers are available (CasaOS is a Debian variant), they should be installed automatically. If you need to go looking, you should be able to install them if you know how. By “know how,” I’m talking terminal/command line. Whichever card you decide on, choose wisely as there’s only the one PCIe slot.
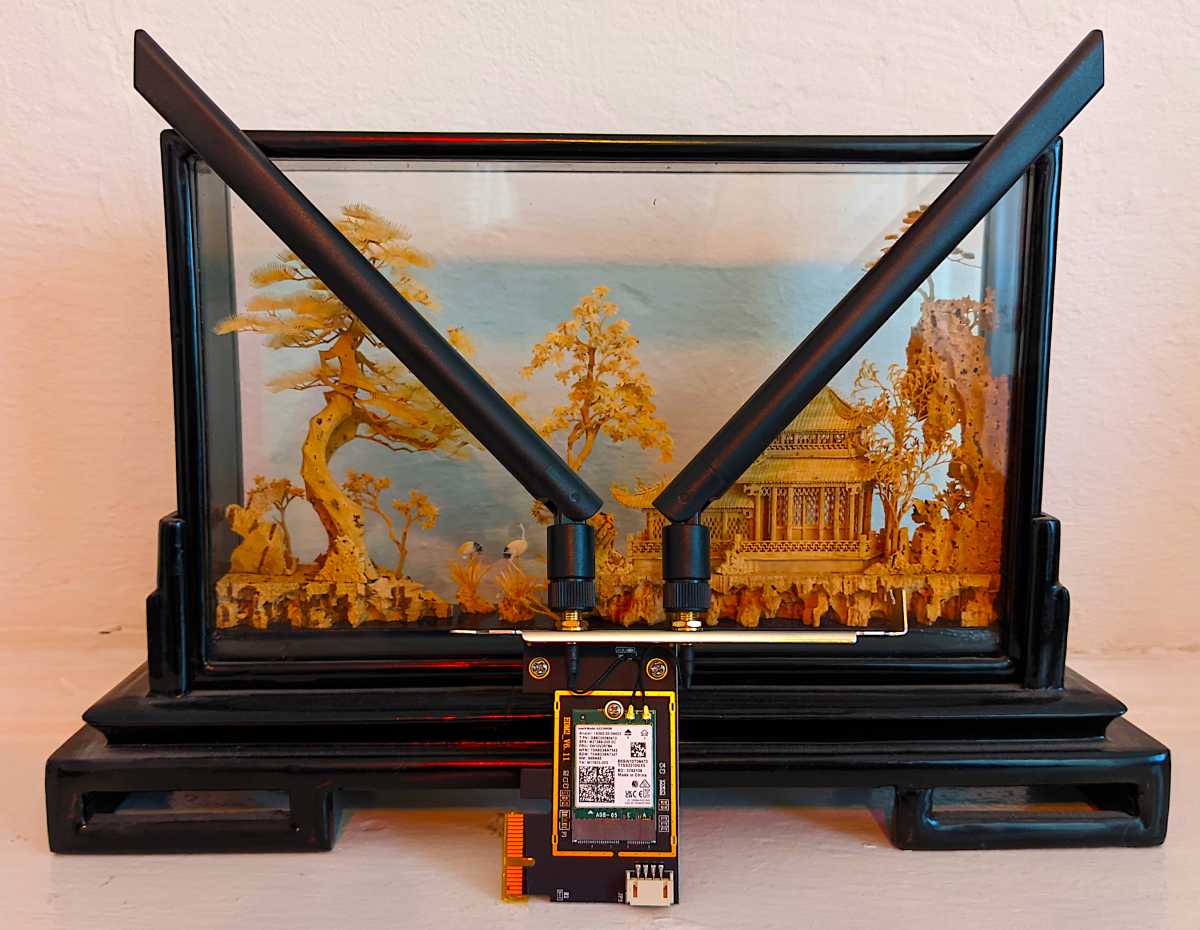 Icewhale also offers a Wi-Fi module for the PCIe port.
If you’re not a fan of exposed technology, think of this peripheral madness as a miniature art installation that you don’t have to pay a museum entrance fee to enjoy. Still not into it? Buy a traditional NAS box.
Setting up and using the ZimaBoard
Physically setting up the ZimaBoard is a simple matter of choosing the appropriate prongs for your outlet type from the included international adapters for the 12-volt/3-amp wall wart, plugging said power supply into the wall and the ZimaBoard, and then running an ethernet cable from your switch/router to the ZimaBoard.
You can of course also attach a display, keyboard, and mouse for console use. In this case, it’s more like using a standard Linux distribution and you have access to normal apps such as Firefox, Libre Office, and so on. So yes, the ZimaBoard is also a tiny Linux PC.
There’s no on/off switch; the unit is on from the time it senses power. If you’re going for NAS-like use, open up your browser, find the ZimaBoard’s IP address (look in your router’s client table or use a probe utility) and log on. The extremely attractive, Docker-hosting, CasaOS web interface prompts you to create a user name and password, then you’re good to go.
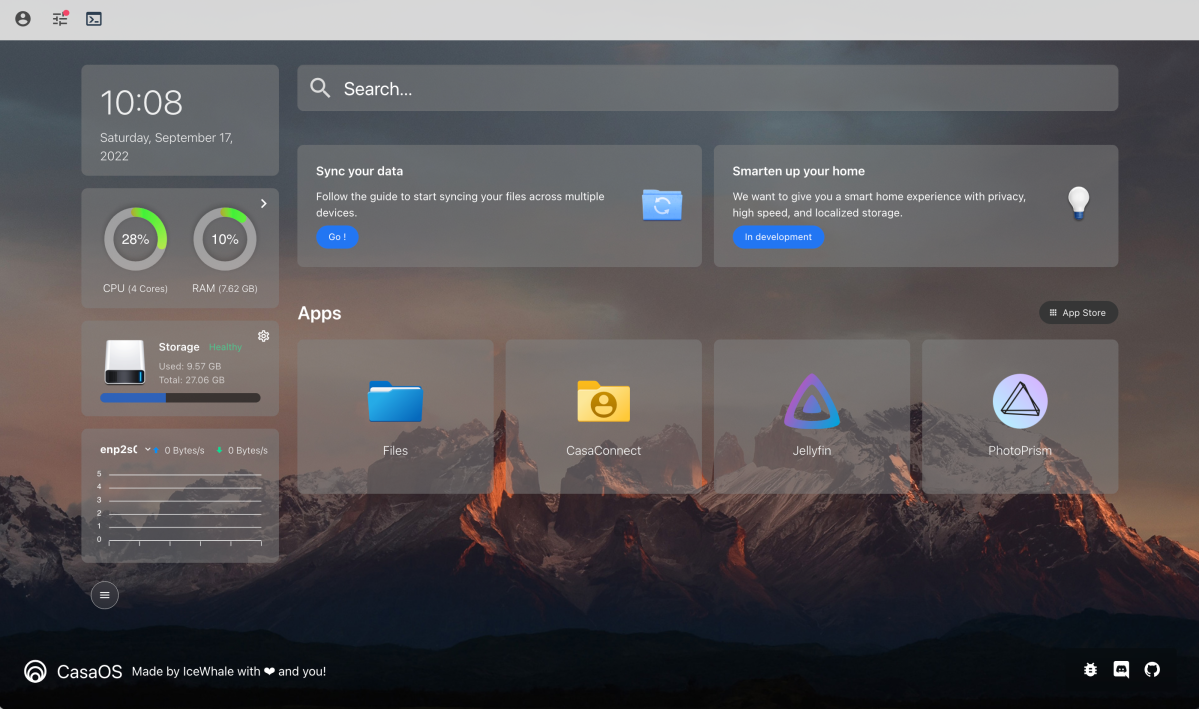 The main browser page of CasaOS as it appears when you first power on the ZimaBoard.
When I added drives, both NVMe and SATA units required me to power-cycle the ZimaBoard before they’d show up. It’s probably a good idea to power down before inserting a PCIe module anyway, since you could damage the unit by crossing contacts. USB storage was recognized and available upon insertion.
Installing the OS and apps on the ZimaBoard
As shipped, the CasaOS Web interface sports a file manager, media and photo servers, and file-sharing programs, but there’s a lot more stuff available in the app store. Note that most apps will use the entire tab, or open a new one.
While it’s not quite as slick as the genuine child windows that QNAP and Synology NAS boxers offer, CasaOS is perfectly usable. Also, most apps require their own user name and password. Personally, rather than keep a list, I changed them all to match those I entered at first run whenever possible.
By the way, the terminal uses the base username and password: casaos/casaos. It won’t respond to the one you create at first run. If you’re exposing the ZimaBoard to the outside world (i.e., the internet), you should change the defaults as soon as possible, as they are well known.
The pre-installed Files app was a nice surprise as you can drag files directly to said app from your local desktop to upload them. That said, I like FileBrowser even better, as it features drag-and-drop within the browser, where Files supports only cut and paste. Alas, like some other Docker modules, FileBrowser didn’t seem to pick up entirely on anything but the fixed eMMC storage.
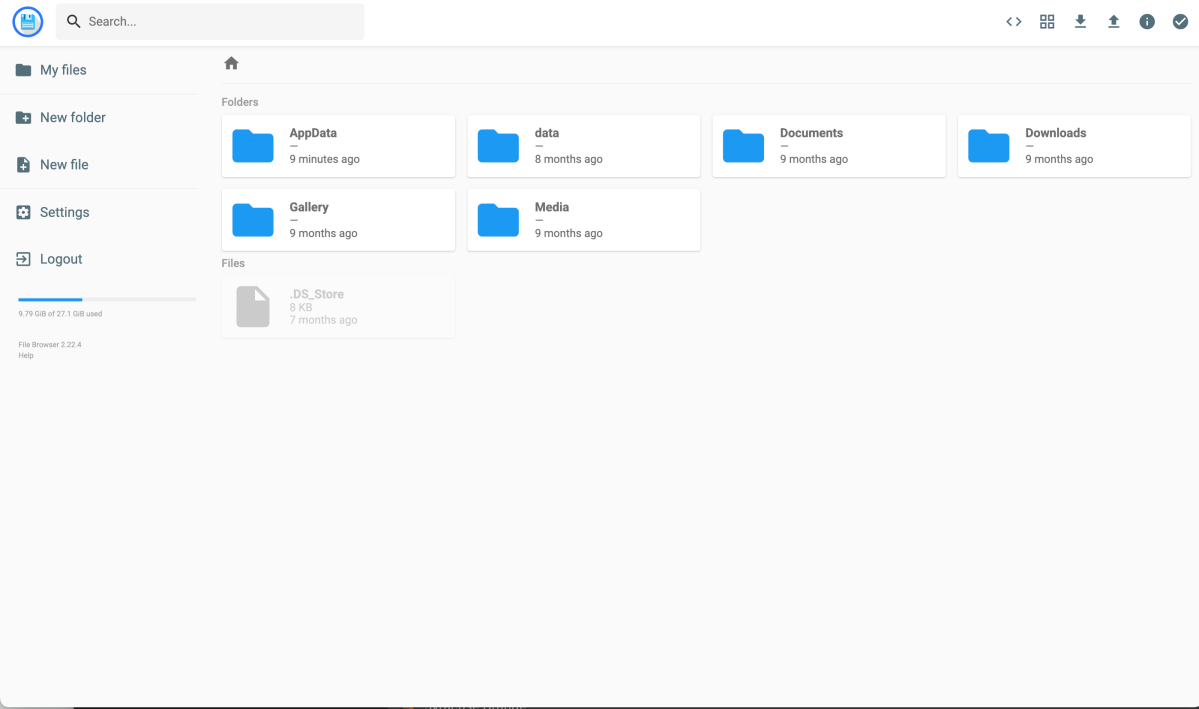 The Docker FileBrowser app worked great, but didn’t recognize add-on storage. The pre-installed “Files” apps does, but doesn’t offer drag-and-drop inside its window, only from your desktop.
As TechHive’s interest in the ZimaBoard (and other NAS) is strictly home media serving (or IoT, which is still a work in progress with CasaOS), I also installed the Plex (which requires an account and shills various streaming services and movies), Emby, and Jellyfin (an offshoot of Emby) media servers.
Personally, I would’ve liked a simple, no-frills DLNA server such as MiniDLNA, but all three of the available media servers claim to stream via DLNA if you enable that option. I say “claim” as only Plex showed up as a DLNA server on my network–my research indicating that this is currently a known issue with the Docker versions of Emby and Jellyfin.
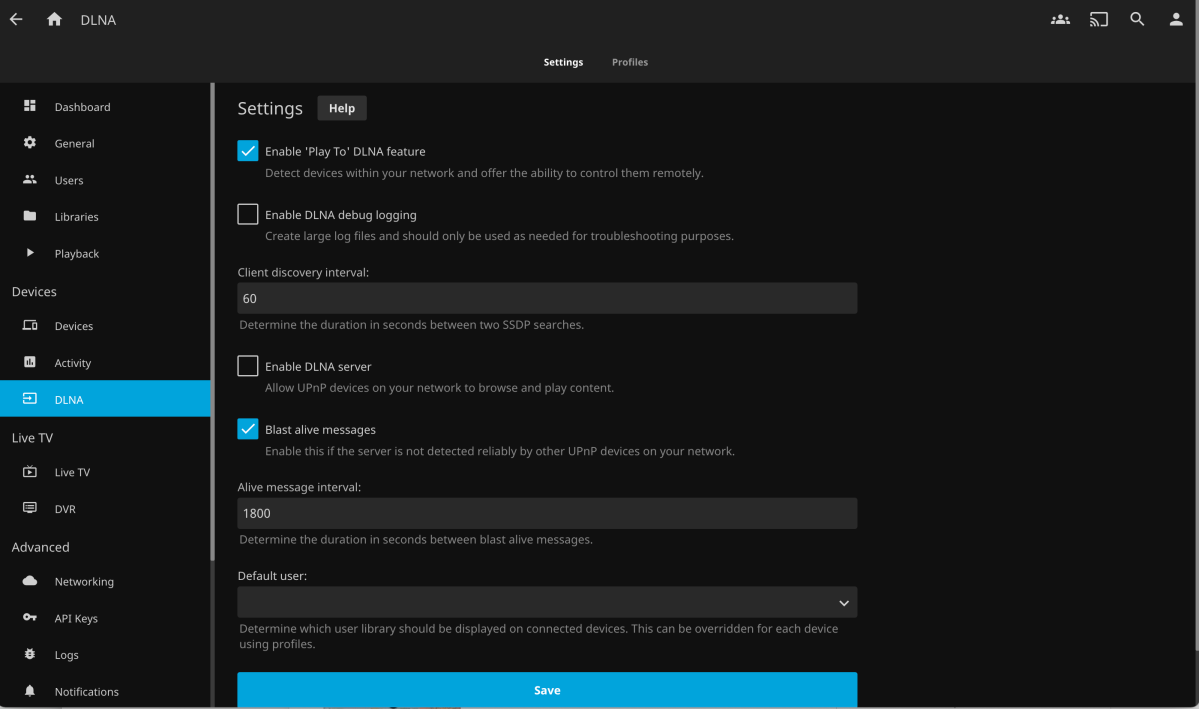 I really wanted to use the pre-installed Jellyfin media server, and it works well with its associated client apps. I use DLNA, though, and the Docker version of Jellyfin’s DLNA server doesn’t show up on my TVs and other media clients.
Other worthy media-related apps available are QBittorent, Transmission (Bittorrent), Deluge (Bittorrent), Jackett (proxy server), and AllTubeDownloader. There are more that you can find listed at the live online demo. Icewhale may have added more by the time you read this.
One thing I noticed about the app store (and didn’t particularly like) is that it doesn’t track what you already have installed. The ZimaBoard had the Jellyfin media server already installed, but the “Install” option was still available in the store. This is hardly a deal-breaking issue, but it is a sign of the version 0.3x status of CasaOS.
I also had some issues with newly installed docker modules (Jellyfin and Plex) taking me straight to logins on first run, when they should have taken me to first-time-setup pages. Exiting and reopening seemed to cure this.
I wasn’t in love with the selection of backup programs, but I’m strange in wanting the server to do all the work. There is the effective Syncthing, but that requires local clients. Duplicati is also on hand for online and local backup, but it’s from the server to other destinations only; you can’t grab files from a remote source to back them up to the ZimaBoard.
If you don’t find what you want listed in the app store, you can perform a custom install of one of the more than 100,000 available Docker apps. Alas, this is where the lack of documentation for CasaOS comes into play.
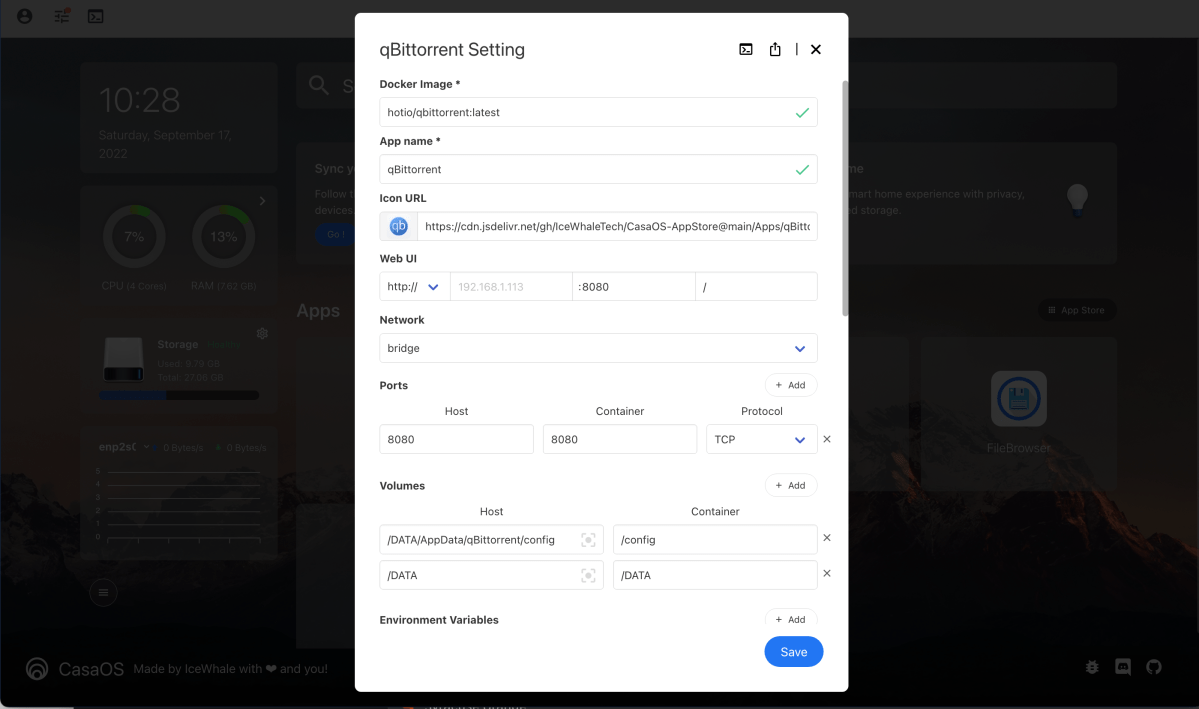 Though this is a preinstalled app, the same dialog is used for installing apps from places such as hub.docker.com. Some apps fill in some of the settings, others don’t. It gets tricky.
A Docker veteran will likely have fewer problems, but it took several emails and quite a bit of time on Icewhale’s Discord server and YouTube (look up DB TEch) for me to discover how to accomplish this task. (There’s a lot of configurations options–shown above) Even then, my success rate was hardly spectacular.
The CasaOS Web interface (shown above), while not having a true window system (there are dialogs), nonetheless impressed me. It’s lean, mean, and easy on the eyes. It takes care of the essentials, and in my experience handled Docker well–once I’d been shown how to custom-install apps, that is.
The local mouse/keyboard/display interface below is typical modern Linux: minimalist and easy to use. If you’re familiar with Linus Torvald’s baby, you’ll feel right at home. if you’re not, it’s come a long way toward being user friendly.
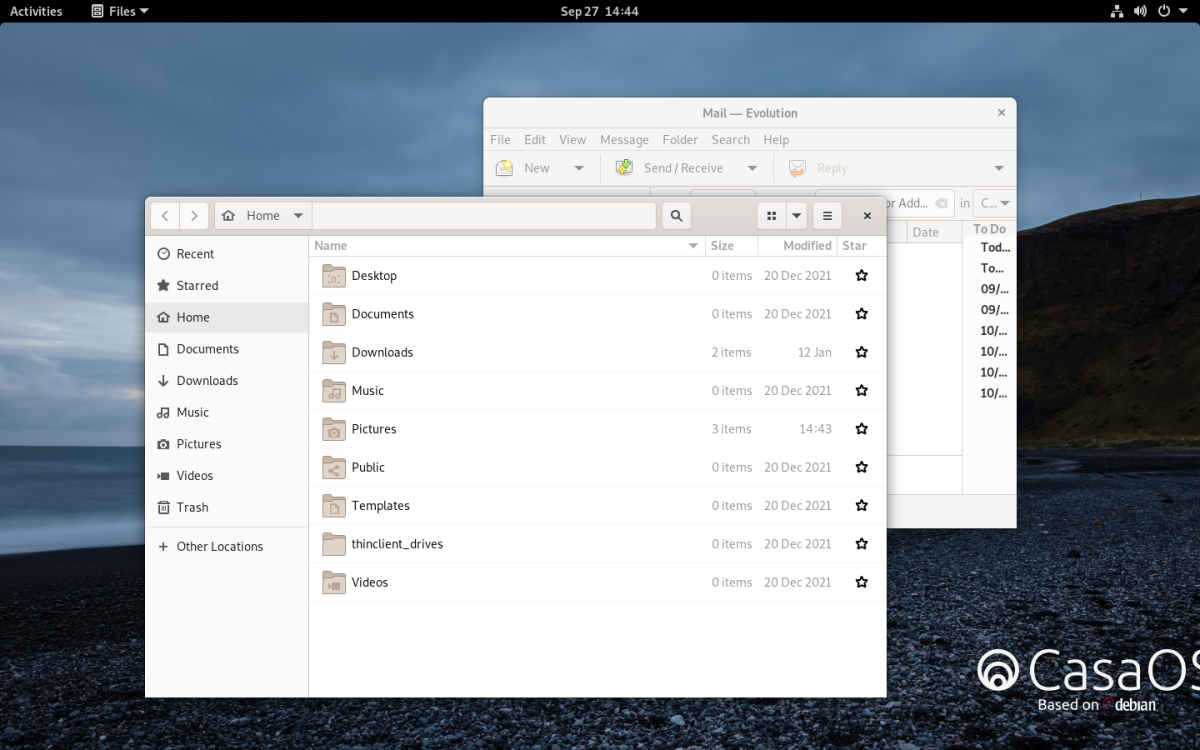 The local CasaOS interface that you’ll see when you attach a display directly to the ZimaBoard. Activities opens the menu.
And that brings me to my major complaint: the absence of a decent user’s guide. Docker and Linux users will likely take to the ZimbaBoard and CasaOS fairly easily, but the uninitiated will need to spend some time learning Docker and perusing Icewhale’s Discord server–not to mention YouTube (search “DB Tech CasaOS”).
Also, SATA hot-swapping would be nice, and the ability to pool storage into fewer logical units would be welcome. The company’s news feed hints at MergerFS being implemented to address the latter concern. As I said up top, it’s a work in progress.
ZimaBoard performance and recommendations
Considering that its Intel components are a bit long in the tooth, the ZimaBoard’s web interface performance is very snappy. That’s largely because of the eMMC solid state storage, but at no time did I feel as though the system was underpowered. Bear in mind that this review is of the top-of-the-line 832 model, opening and using apps was quick and facile, and streaming (using both the h.264 codec and the more processor-hungry h.265) was smooth as a baby’s behind.
Icewhale sent me the entire passel of add-on cards, and they all worked well. While I appreciate the versatility those cards deliver–and each card could fit a certain scenario–you might be best served by the USB card. With it, you can most easily add storage (USB is plenty fast enough for home server use) and other functionality. The more specialized boards obviously offer fewer options.
Used locally with display/keyboard/mouse as a tiny PC, the ZimaBoard’s performance is doable, though hardly up to that of most modern PCs. It’s fine for admin and occasional light work, but I wouldn’t buy it for that role.
Is the ZimbaBoard a good product?
The ZimaBoard is not for everyone, but if you have even the slightest bit of geek in you and want something inexpensive yet versatile to stream media, or perform other network chores around the home, it’s a hoot and a fantastic value. Think of it as an already useable and affordable computer-science research project with educational benefits.
That said, there are a few too many foibles for the ZimaBoard to garner 4.5 stars. But it’s on its way and not awarding that other half star wasn’t easy–I had a ton of fun with the ZimaBoard, and I’m now a fan of both the hardware and the Docker concept. If they leave it in my hands, it will stay on my network.