With the new Cyberpunk 2077 2.0 update and Phantom Liberty expansion, we’re bringing you a fresh optimization guide that goes through every setting in the game to tell you which settings are worth turning to Ultra, and which are worth turning down to improve performance.
Cyberpunk 2.0 is similar to the original release in terms of the quality settings it offers, although CD Projekt Red have added more features over time, including XeSS and FSR upscaling, as well as a path tracing technology preview.
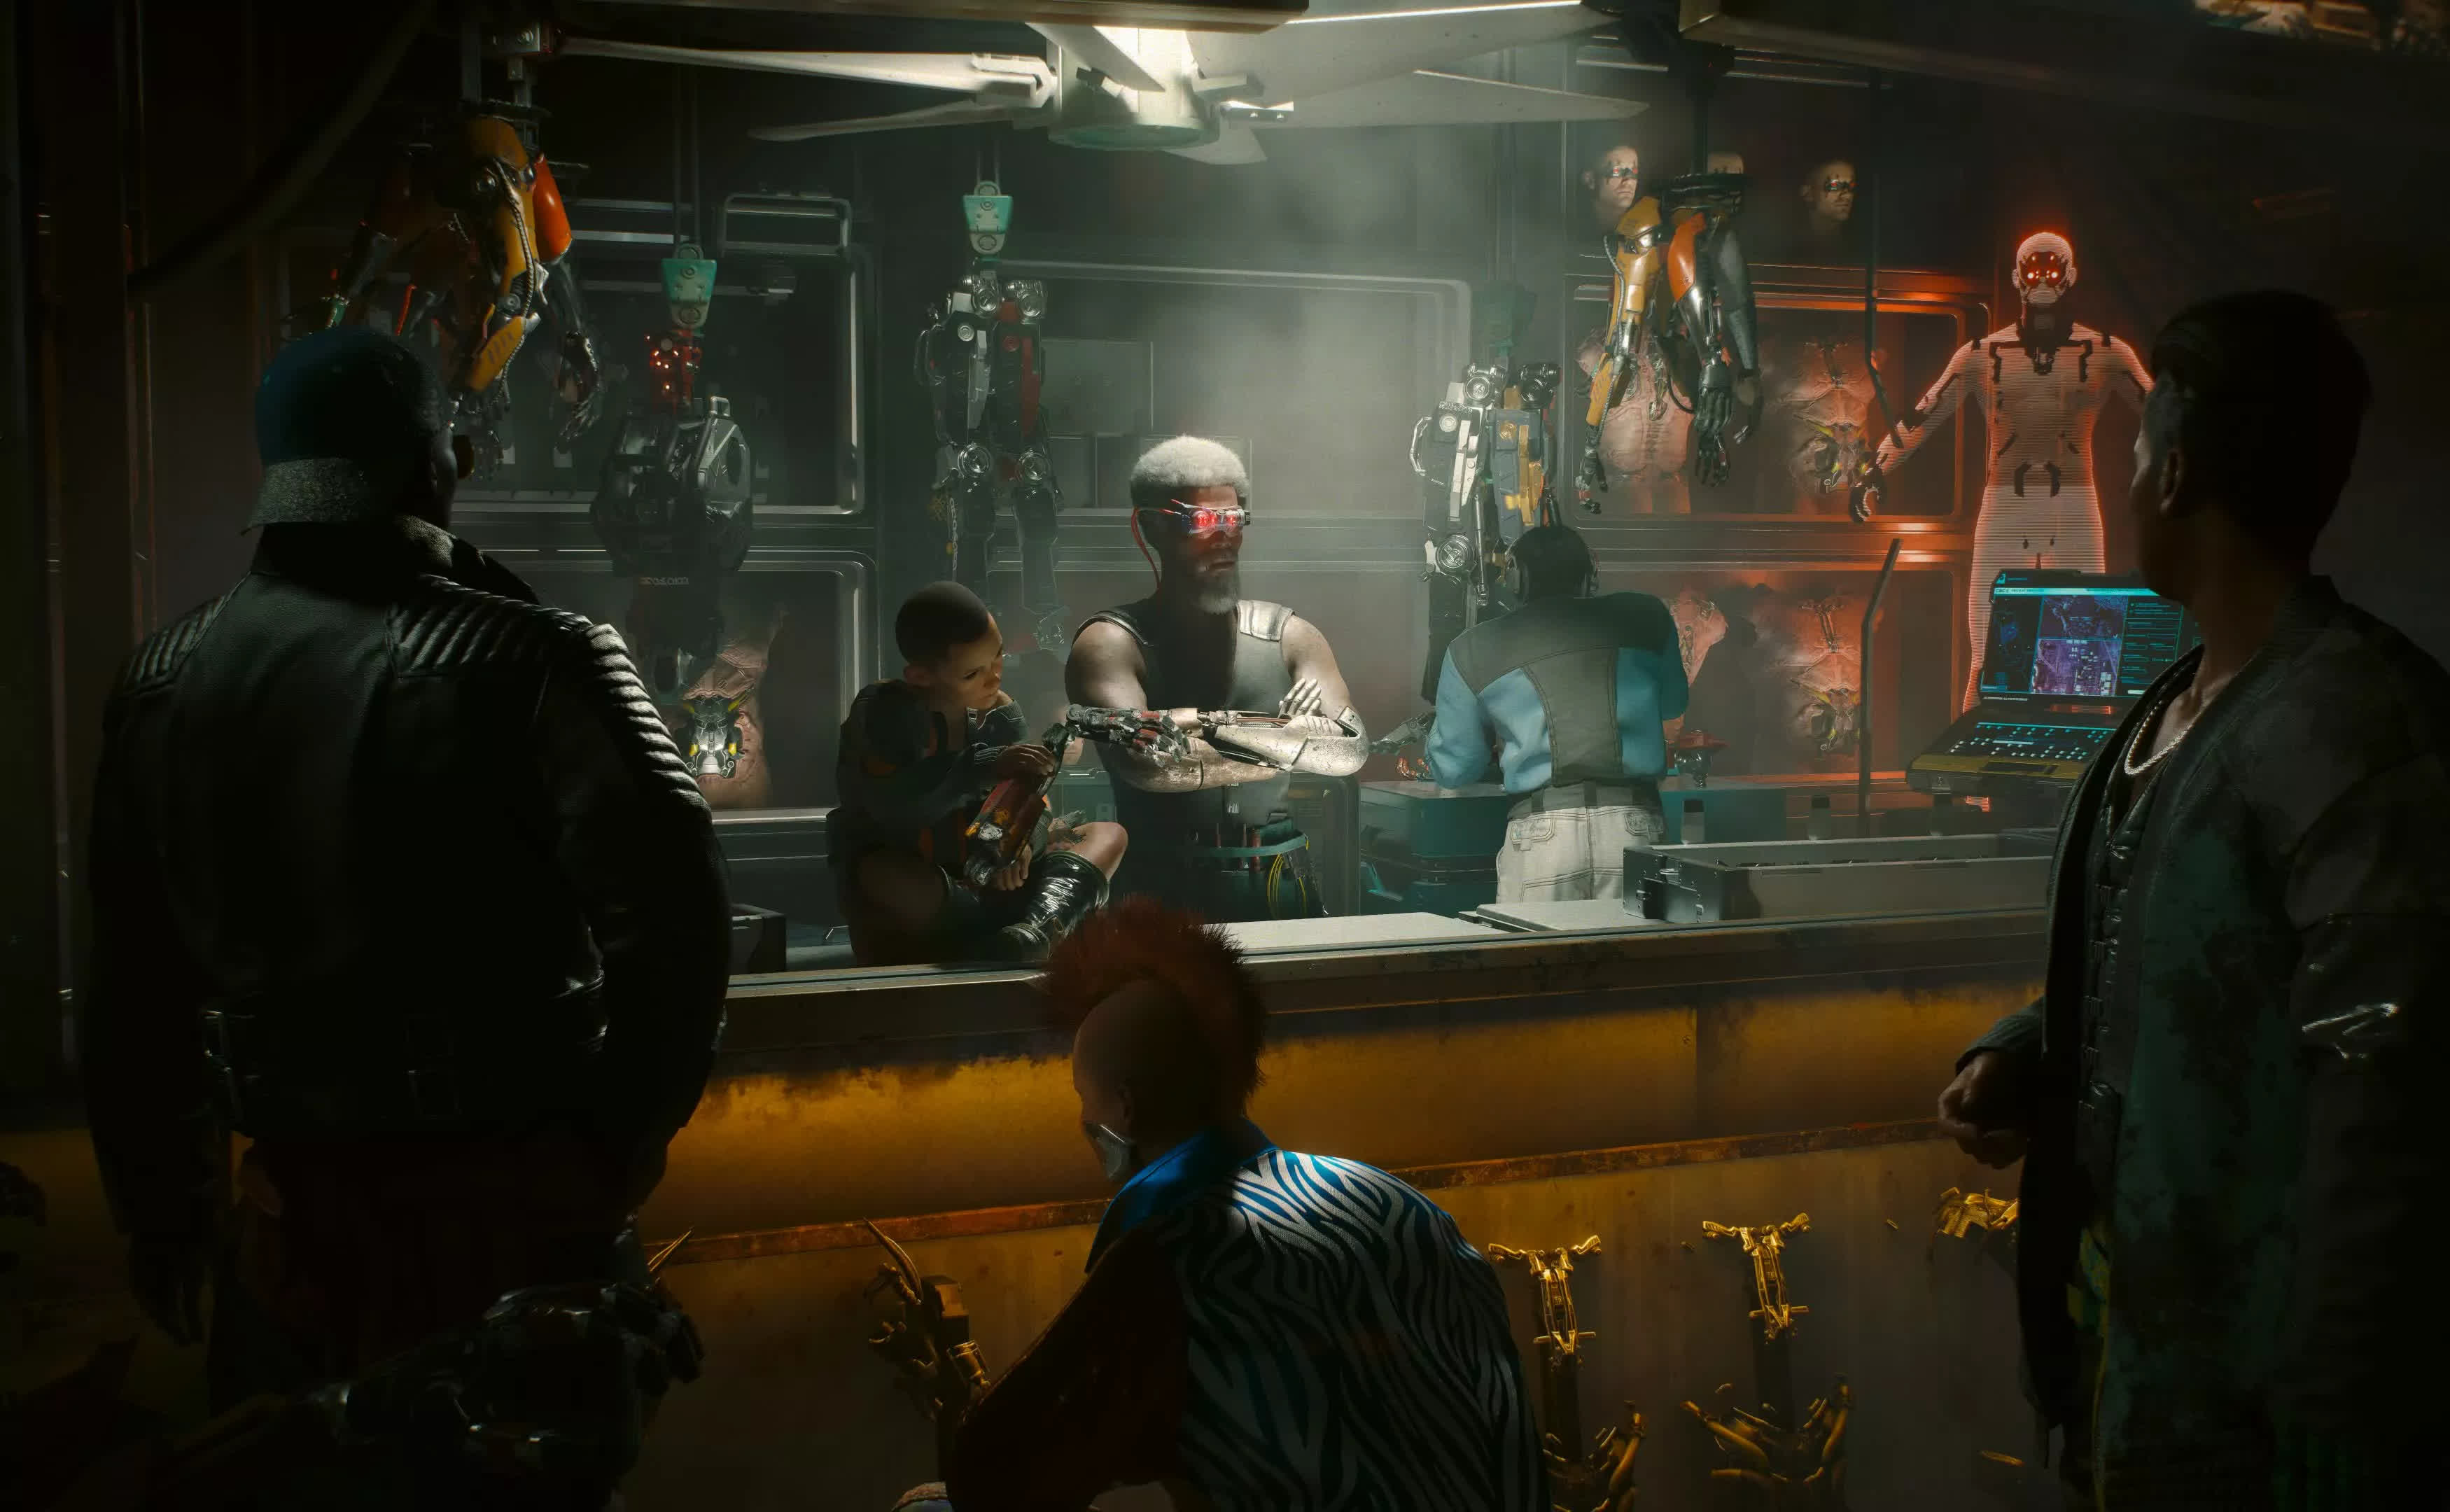
The new Dogtown area that’s introduced with Phantom Liberty is quite demanding – while also being visually stunning – so it’s this area of the game that we’re focusing on for both the visual comparisons and performance data. But, it can also be similar to other parts of the game, so this guide will be useful if you’re starting a Cyberpunk playthrough from scratch as well.
We’ll focus on GPU optimization which is usually the biggest bottleneck for the game, though we’ll discuss a little about CPU settings as we go. We’re benchmarking with a GeForce RTX 4070 as performance with ray tracing on is right on the edge with an 8GB GPU, so we’ve bumped it up to 12GB while trying to keep to the (now quite expensive) mid-range of graphics cards. The CPU used for testing is the AMD Ryzen 7 7800X3D with 32GB of DDR5-6000 CL30 memory, on MSI’s MPG X670E Carbon WiFi motherboard.
All game visual captures that you’ll see below were taken on a GeForce RTX 4090, so we can provide high frame rate 4K quality comparisons. We recommend watching the YouTube embeds at 4K quality if possible. And before we get into things, each quality setting is split into a visual and performance section.
The performance data is captured in a benchmark pass at 1440p that’s designed to give you a look at the impact of a setting on typical game performance, rather than spot checking FPS numbers which isn’t as accurate or representative of typical gaming. The area we’ve used for benchmarking is in Dogtown walking between an intensive indoor and outdoor section that you’ll quickly discover at the beginning of the expansion. We didn’t use the built-in benchmark.
We’ll go through each individual setting and look at presets at the end of this guide. There are lots of settings that have very little impact, so expect us to breeze through those. We’re also not going to assess upscaling quality in this title, we’ve already covered these extensively before and most people are familiar with what they bring. You should tune these options to your liking and resolution, though for most gamers we’d recommend using at least some form of upscaling for an easy performance improvement (DLSS Quality or FSR Quality modes, for example).
Texture Quality
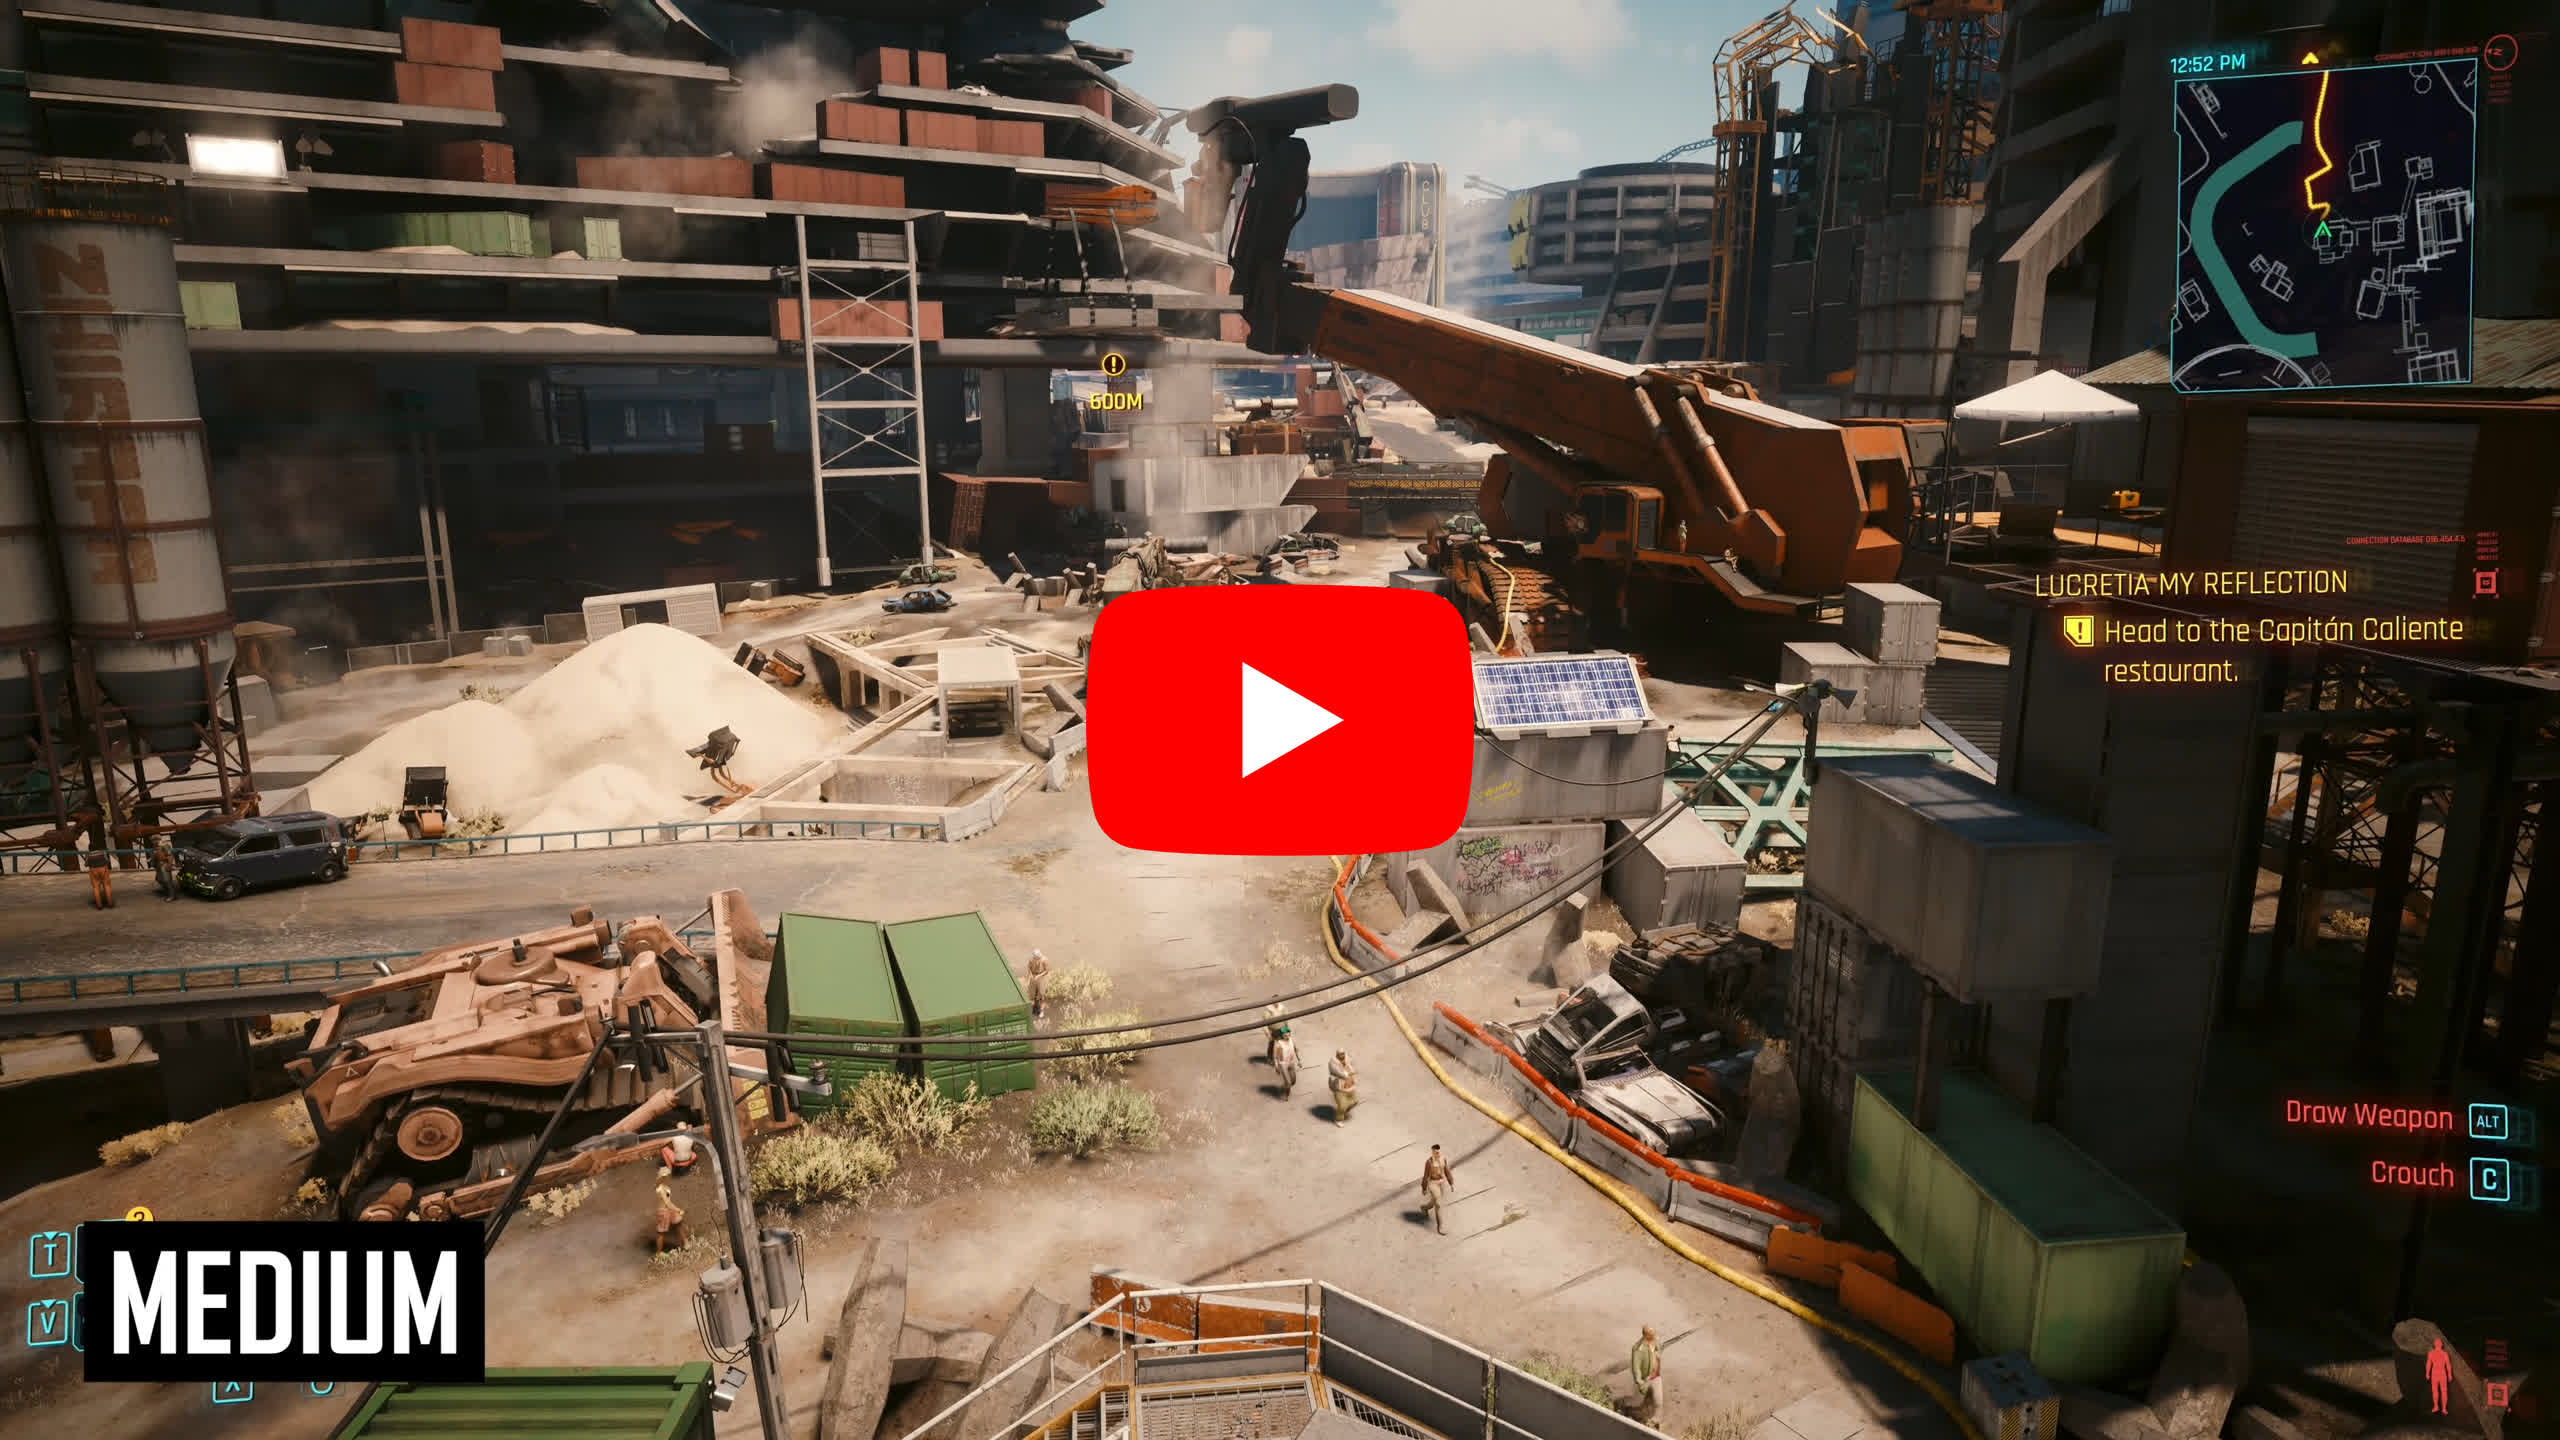
For a better representation of image quality comparisons, check out the HUB video below:
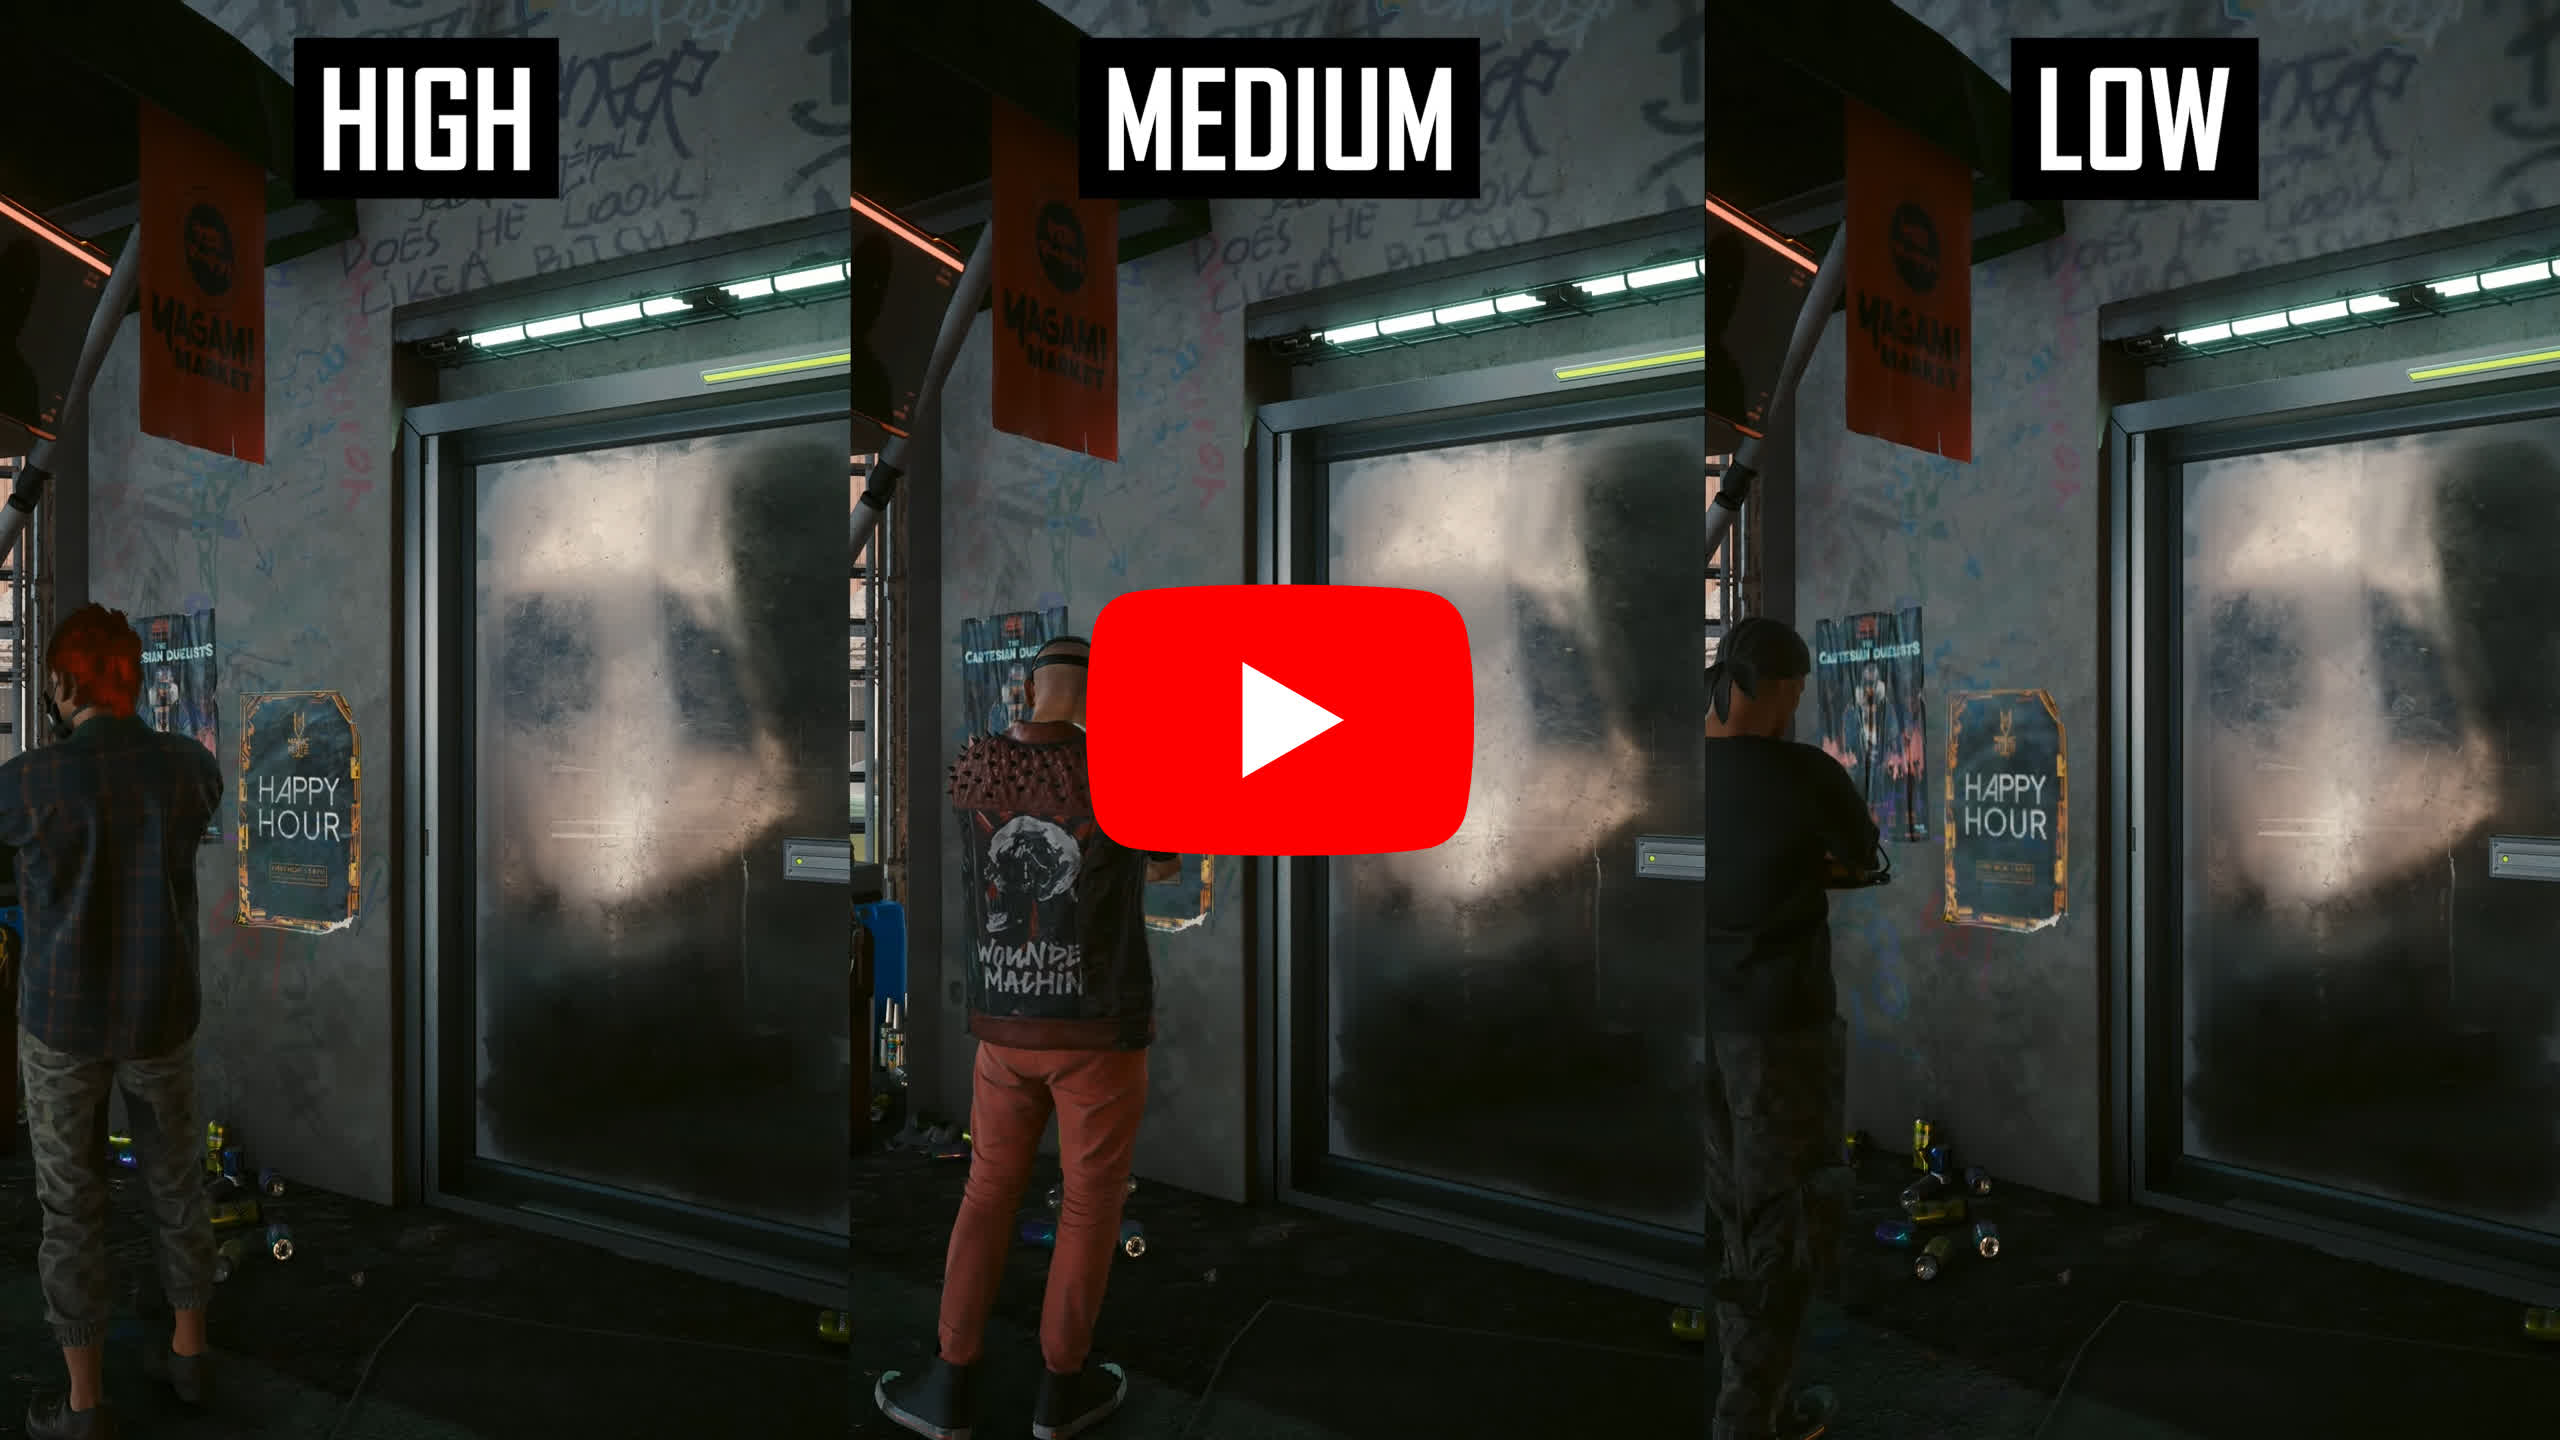
The texture quality setting impacts the sharpness and clarity of some in game textures, with lower settings making textures more blurry. Even on the medium setting you’ll notice quite a large reduction in texture clarity relative to the high setting, and on low the game is very blurry.
Not all textures are impacted, there are some surface level details and dynamic displays that don’t seem to be affected, but everything else becomes much worse on lower quality textures. We also don’t think the texture quality in Cyberpunk is especially amazing given the quality of effects in other areas, draw distance for textures is pretty weak so ideally the game would come with an ultra setting that really pumps up those textures for those with high end GPUs, but for now the High setting will have to do.

When we look at performance it’s no surprise to see that the texture setting has little impact when you have enough VRAM, as we do on the RTX 4070 we used for testing. I’d strongly recommend keeping this setting on High for most graphics cards, and only turn down the setting if you run out of VRAM, such as when playing on a 6GB GPU.
8GB GPUs will largely be fine playing Cyberpunk with High textures, although with ray tracing enabled at high resolutions like 4K, performance can reduce somewhat so the game is very much on the edge with 8GB GPUs – 10 or 12GB appears quite comfortable.
Motion Blur
For a better representation of image quality comparisons, check out the HUB video below:
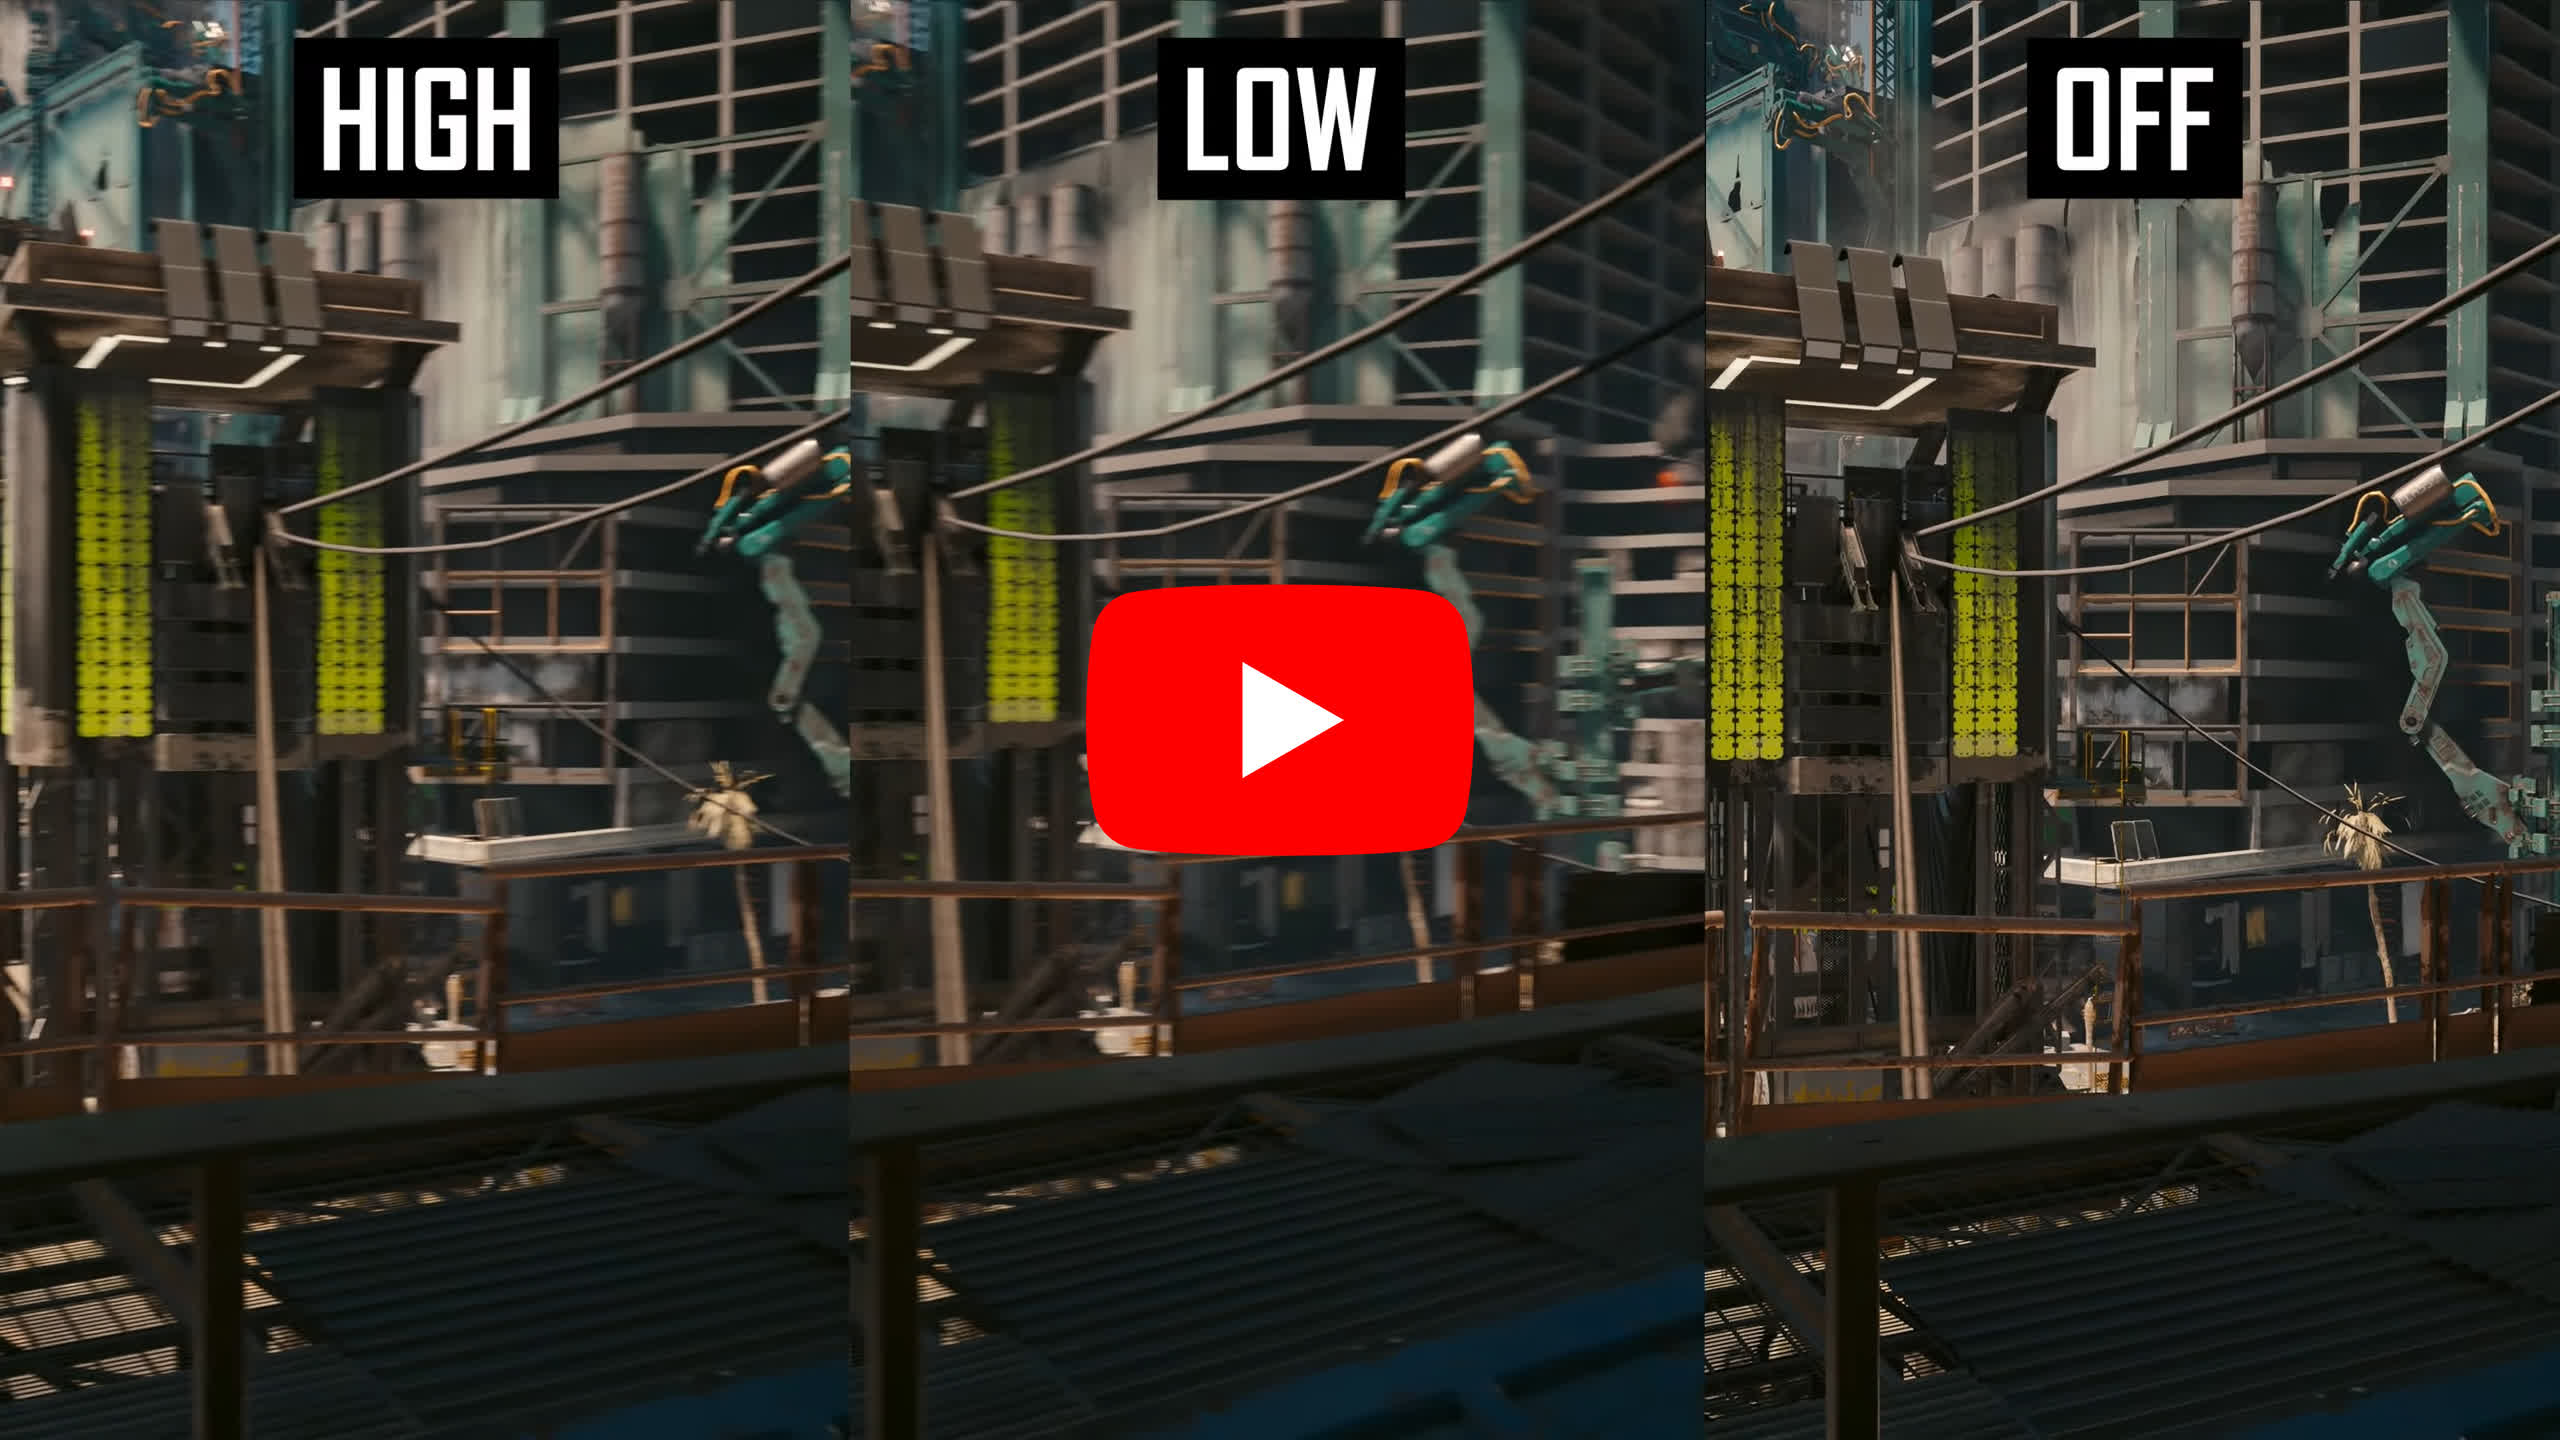
Motion Blur is a single toggle that impacts both camera and per object motion blur, so unfortunately those settings are not uncoupled and you cannot disable camera blur while retaining object blur. The high and low settings here simply adjust the strength of the blur effect, high being more blurry. Off disables motion blur as expected.

The implementation of motion blur in Cyberpunk is great in that enabling the feature has little to no impact on performance. So whether it’s worth using will mostly come down to personal preference. We always prefer disabling motion blur when playing at a high frame rate, although if you are targeting 30 FPS then motion blur will hide the fact the game is running as a slideshow.
Contact Shadows
Contact Shadows is a straightforward setting. With it enabled, some objects are able to cast shadows onto itself or other nearby objects. In the video example, the sandbags are casting sun shadows onto itself which increases the realism and depth to the presentation. Not all objects are impacted but a surprising number are.
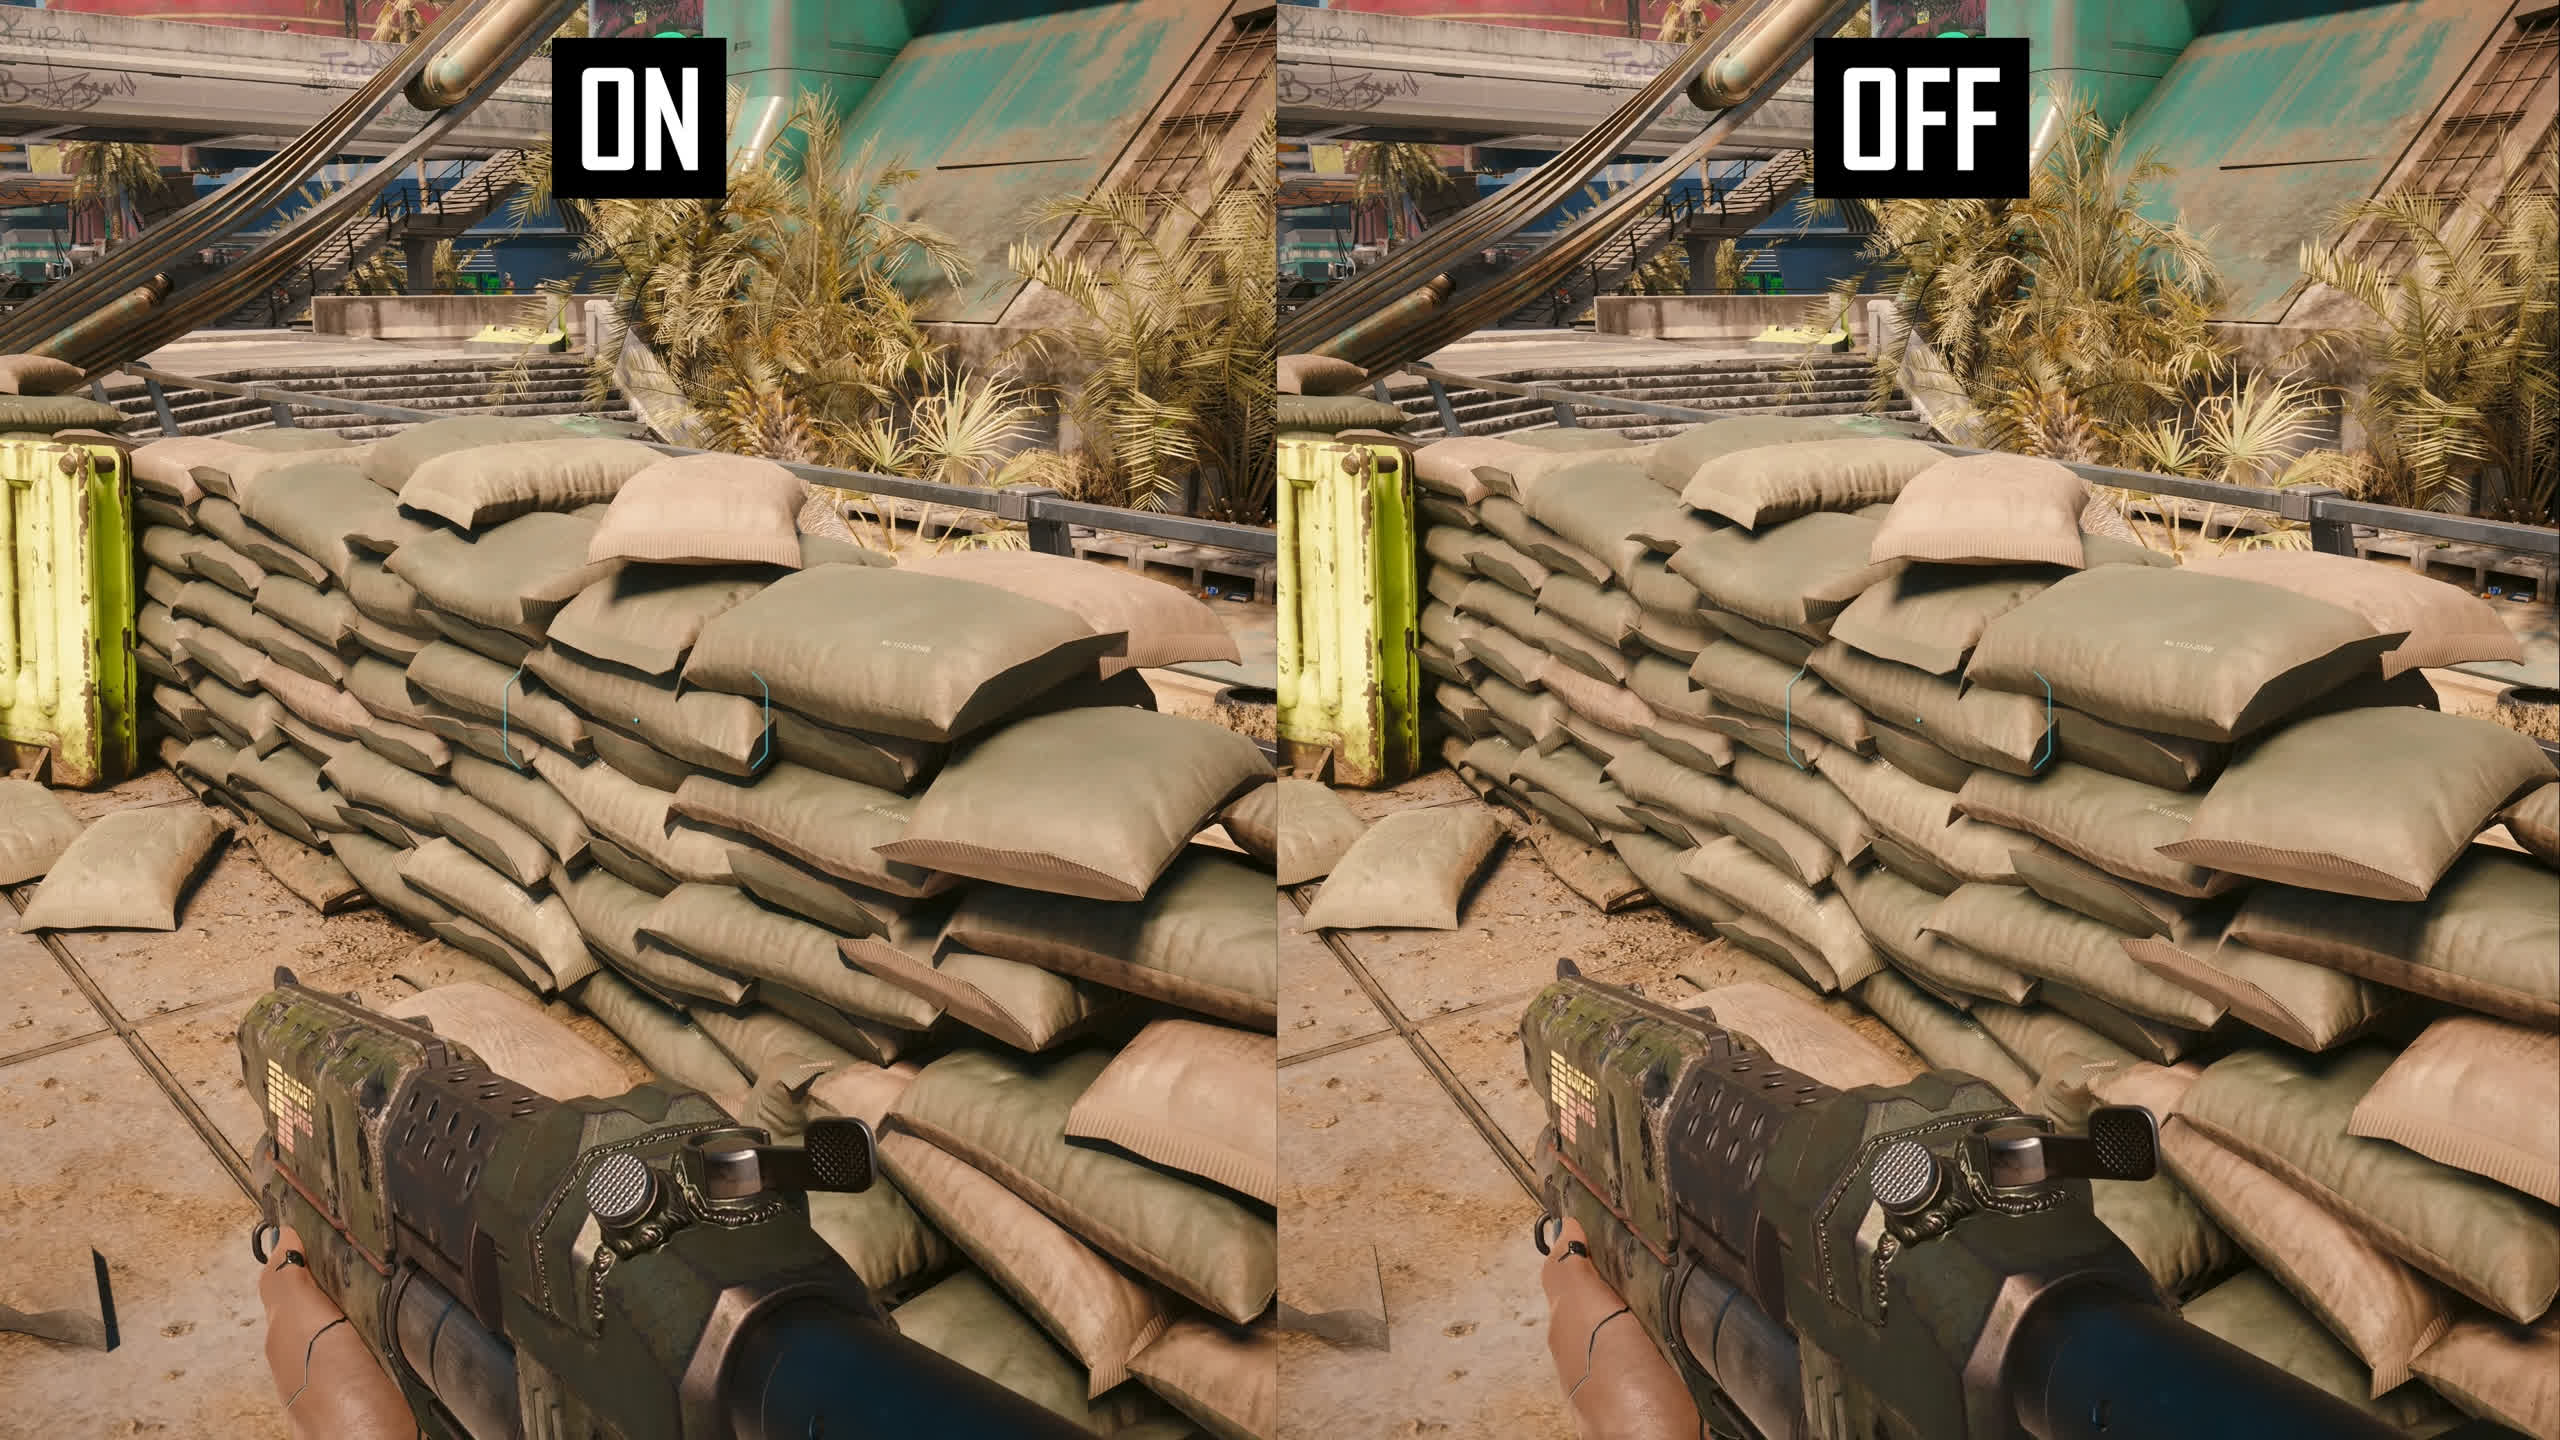
Even though disabling contact shadows can provide a 3 to 4 percent performance improvement, I think for most people you’ll want to play the game with this setting enabled. However if you are interested in a large performance improvement, then turning contact shadows off is a viable choice as it doesn’t disable all shadows.
Improved Facial Lighting Geometry

Improved Facial Lighting Geometry is a setting that I couldn’t really tell if it was turned on or off, both from a visuals and performance perspective. I assessed a number of faces in different lighting conditions and it didn’t seem to make much difference. I’d leave this setting on.
Anisotropy
Anisotropy affects the clarity of textures when viewed at off angles. I didn’t spot a huge difference between the setting on 16 or 8, but dropping down to 4 does reduce the crispness of textures in some circumstances – it’s minor but certainly noticeable. Using the setting on 1 makes the game look awful, so clearly this is not the best way to play the game and shouldn’t be used unless you are also turning down texture quality as why bother running high textures if you’re not going to filter them properly.
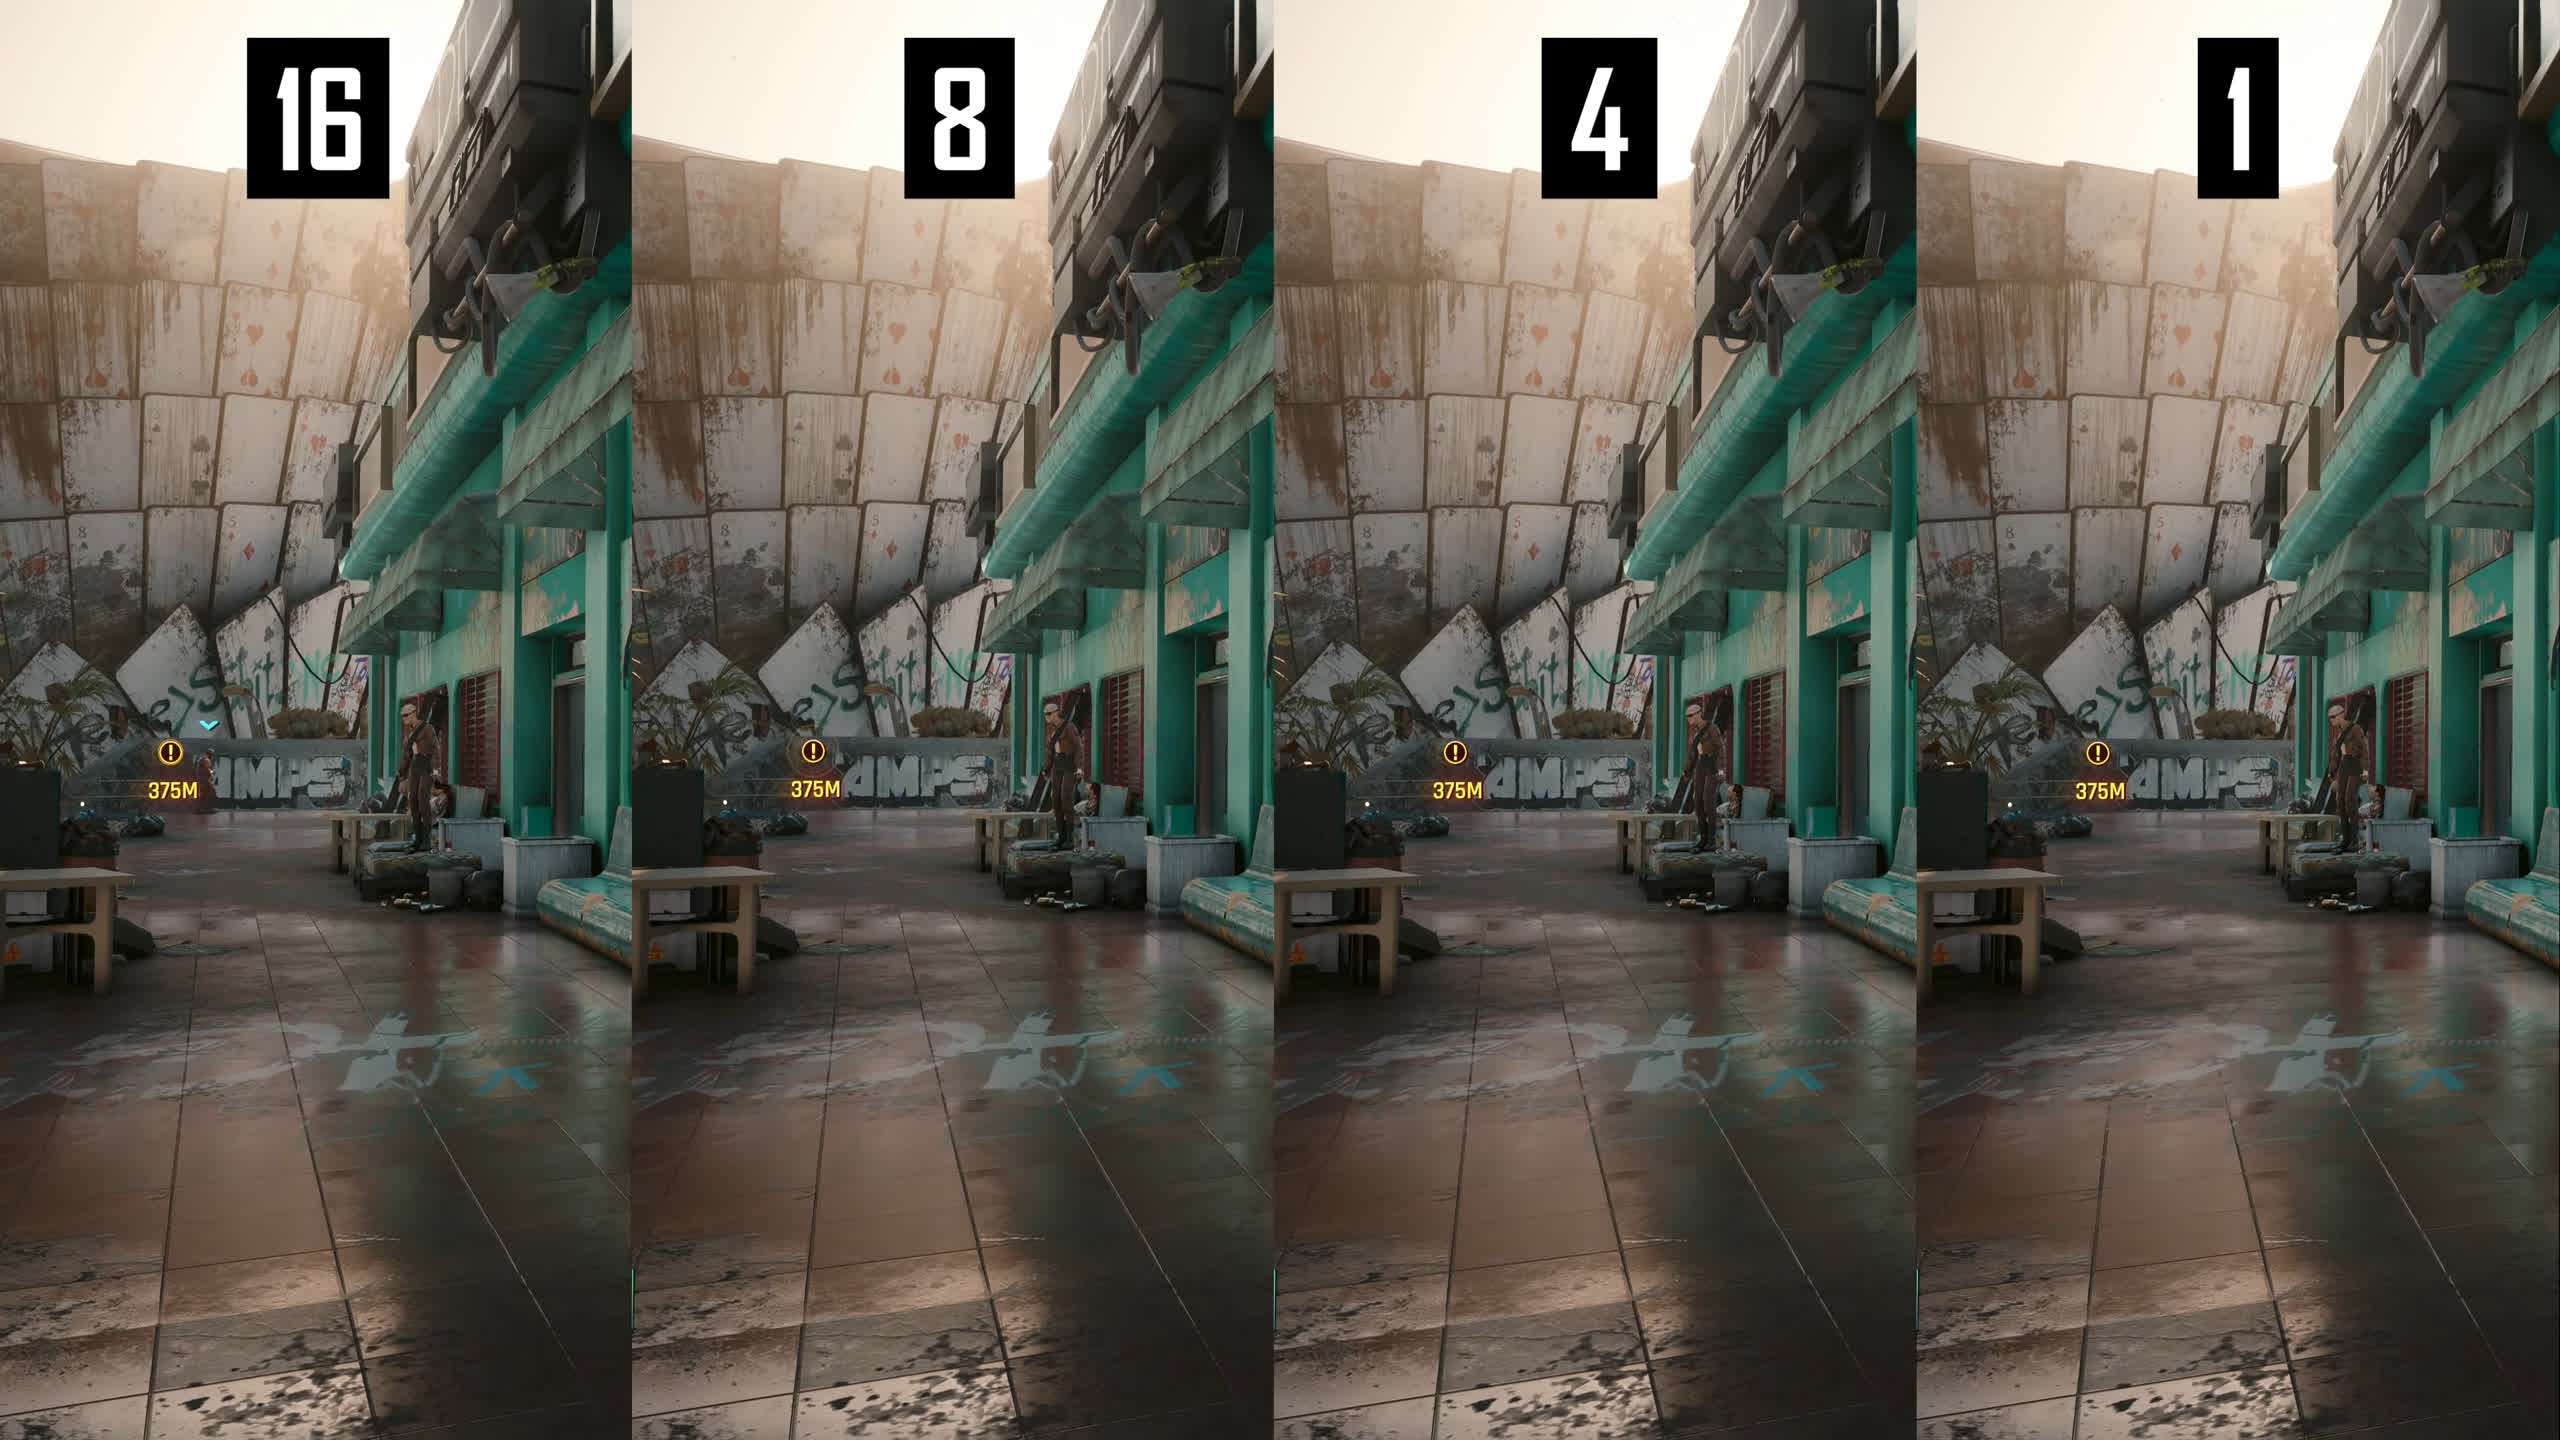
Luckily like in most games anisotropy has little to no performance impact unless you turn it to 1, which delivers up to a 3% performance improvement. Unless you have low end hardware I would recommend keeping this setting on the maximum available level.

Local Shadow Mesh Quality

Local Shadow Mesh Quality affects the quality of geometric detail used to cast shadows from artificial light sources, which is quite the niche feature. I found it quite difficult to tell the difference between the three quality options, although in this scene I did notice that switching from high/medium to low did reduce the shadow accuracy for this barrier, it seems that indeed the low setting reduces the geometry quality used for the shadow. Most of the time you’ll see no difference and you probably wouldn’t have noticed this either unless I pointed it out.

Given that there is a small performance improvement moving from High to Medium with little to no perceptible quality change, I would recommend the medium setting. Low does produce a quality difference but didn’t seem to come with much of a performance gain so I wouldn’t use that mode.
Local Shadow Quality
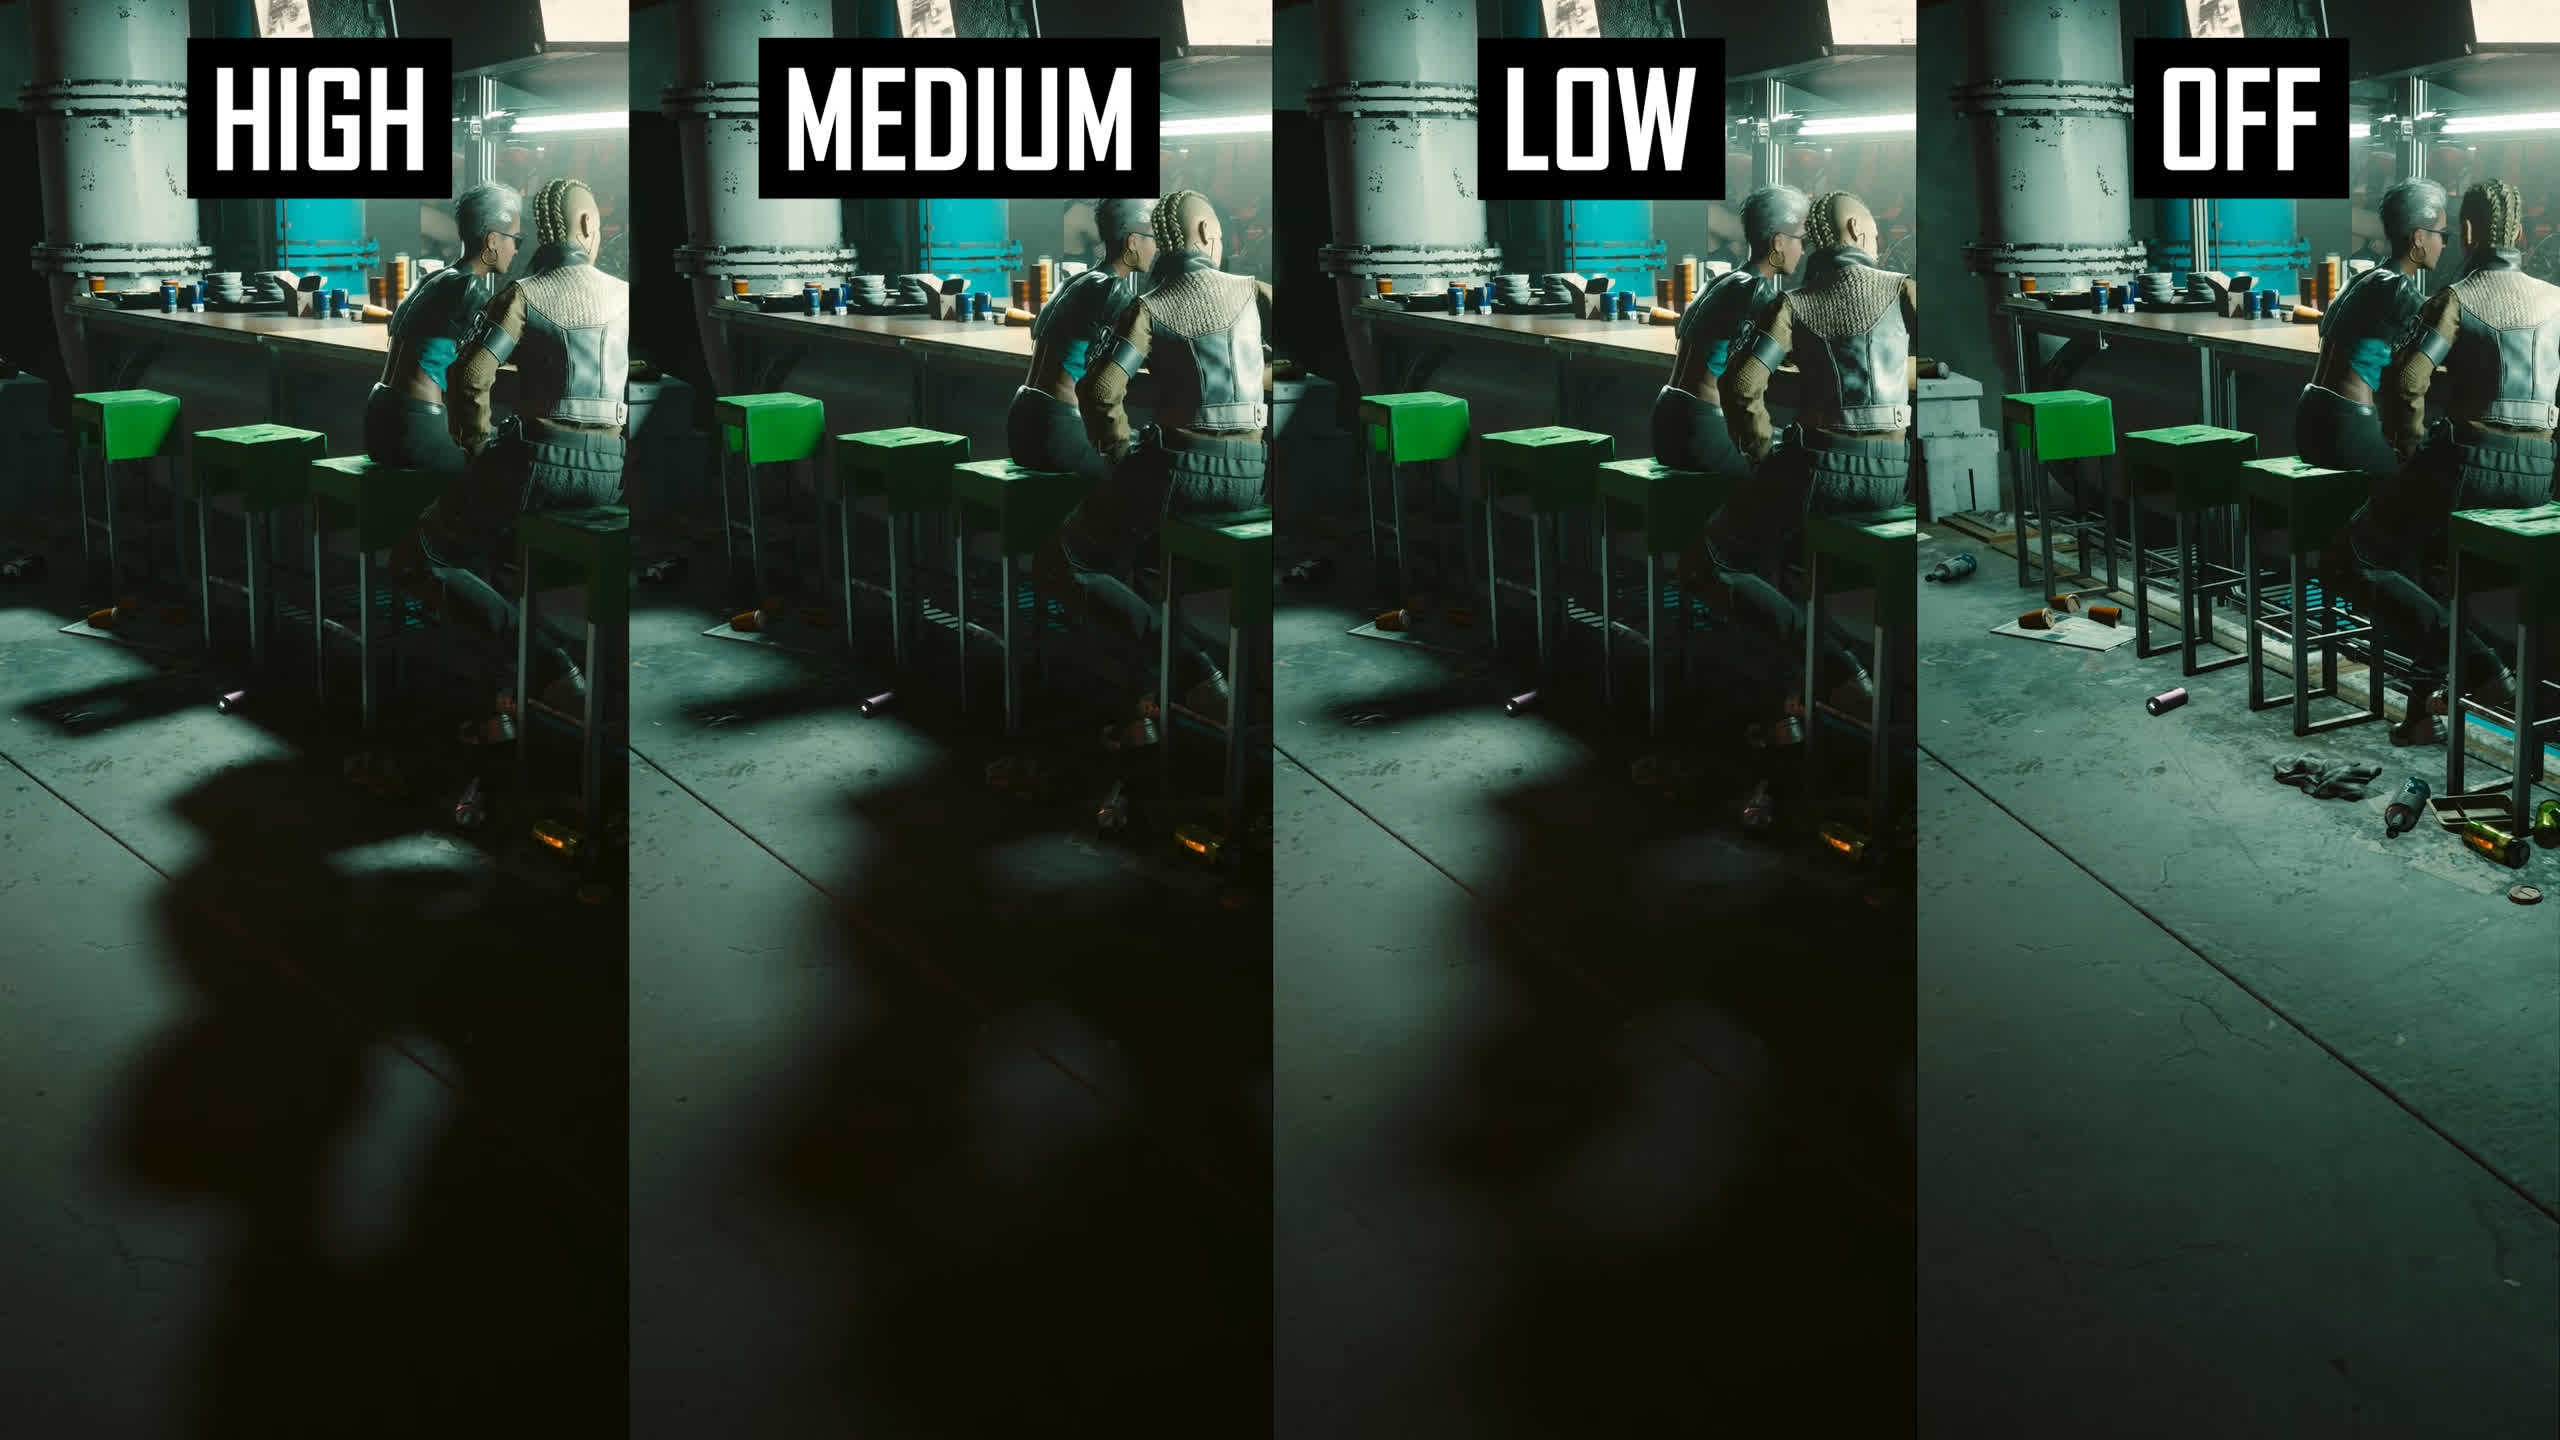
Local Shadow Quality does exactly what it says: for shadows casted by artificial light sources (such as indoors), reducing this setting reduces the quality and resolution of these shadows. The High setting preserves the sharpest local shadows, medium is a clear reduction compared to high with a blurrier shadow presentation, low is basically identical to medium, then off completely turns off local shadows which hurts the image quality.

The only major performance difference I spotted from this setting was turning it down from High to Medium. As there was not much of a difference between medium and off outside of a small improvement to 1% lows in our test area, I would strongly suggest not turning off local shadows.
For those after the best visual quality I feel that the High setting is a clear enough upgrade to justify a 2% hit to performance. For those after more performance, medium is a good choice as it still preserves local shadows, just at reduced quality.
Cascaded Shadows Range
For a better representation of image quality comparisons, check out the HUB video below:
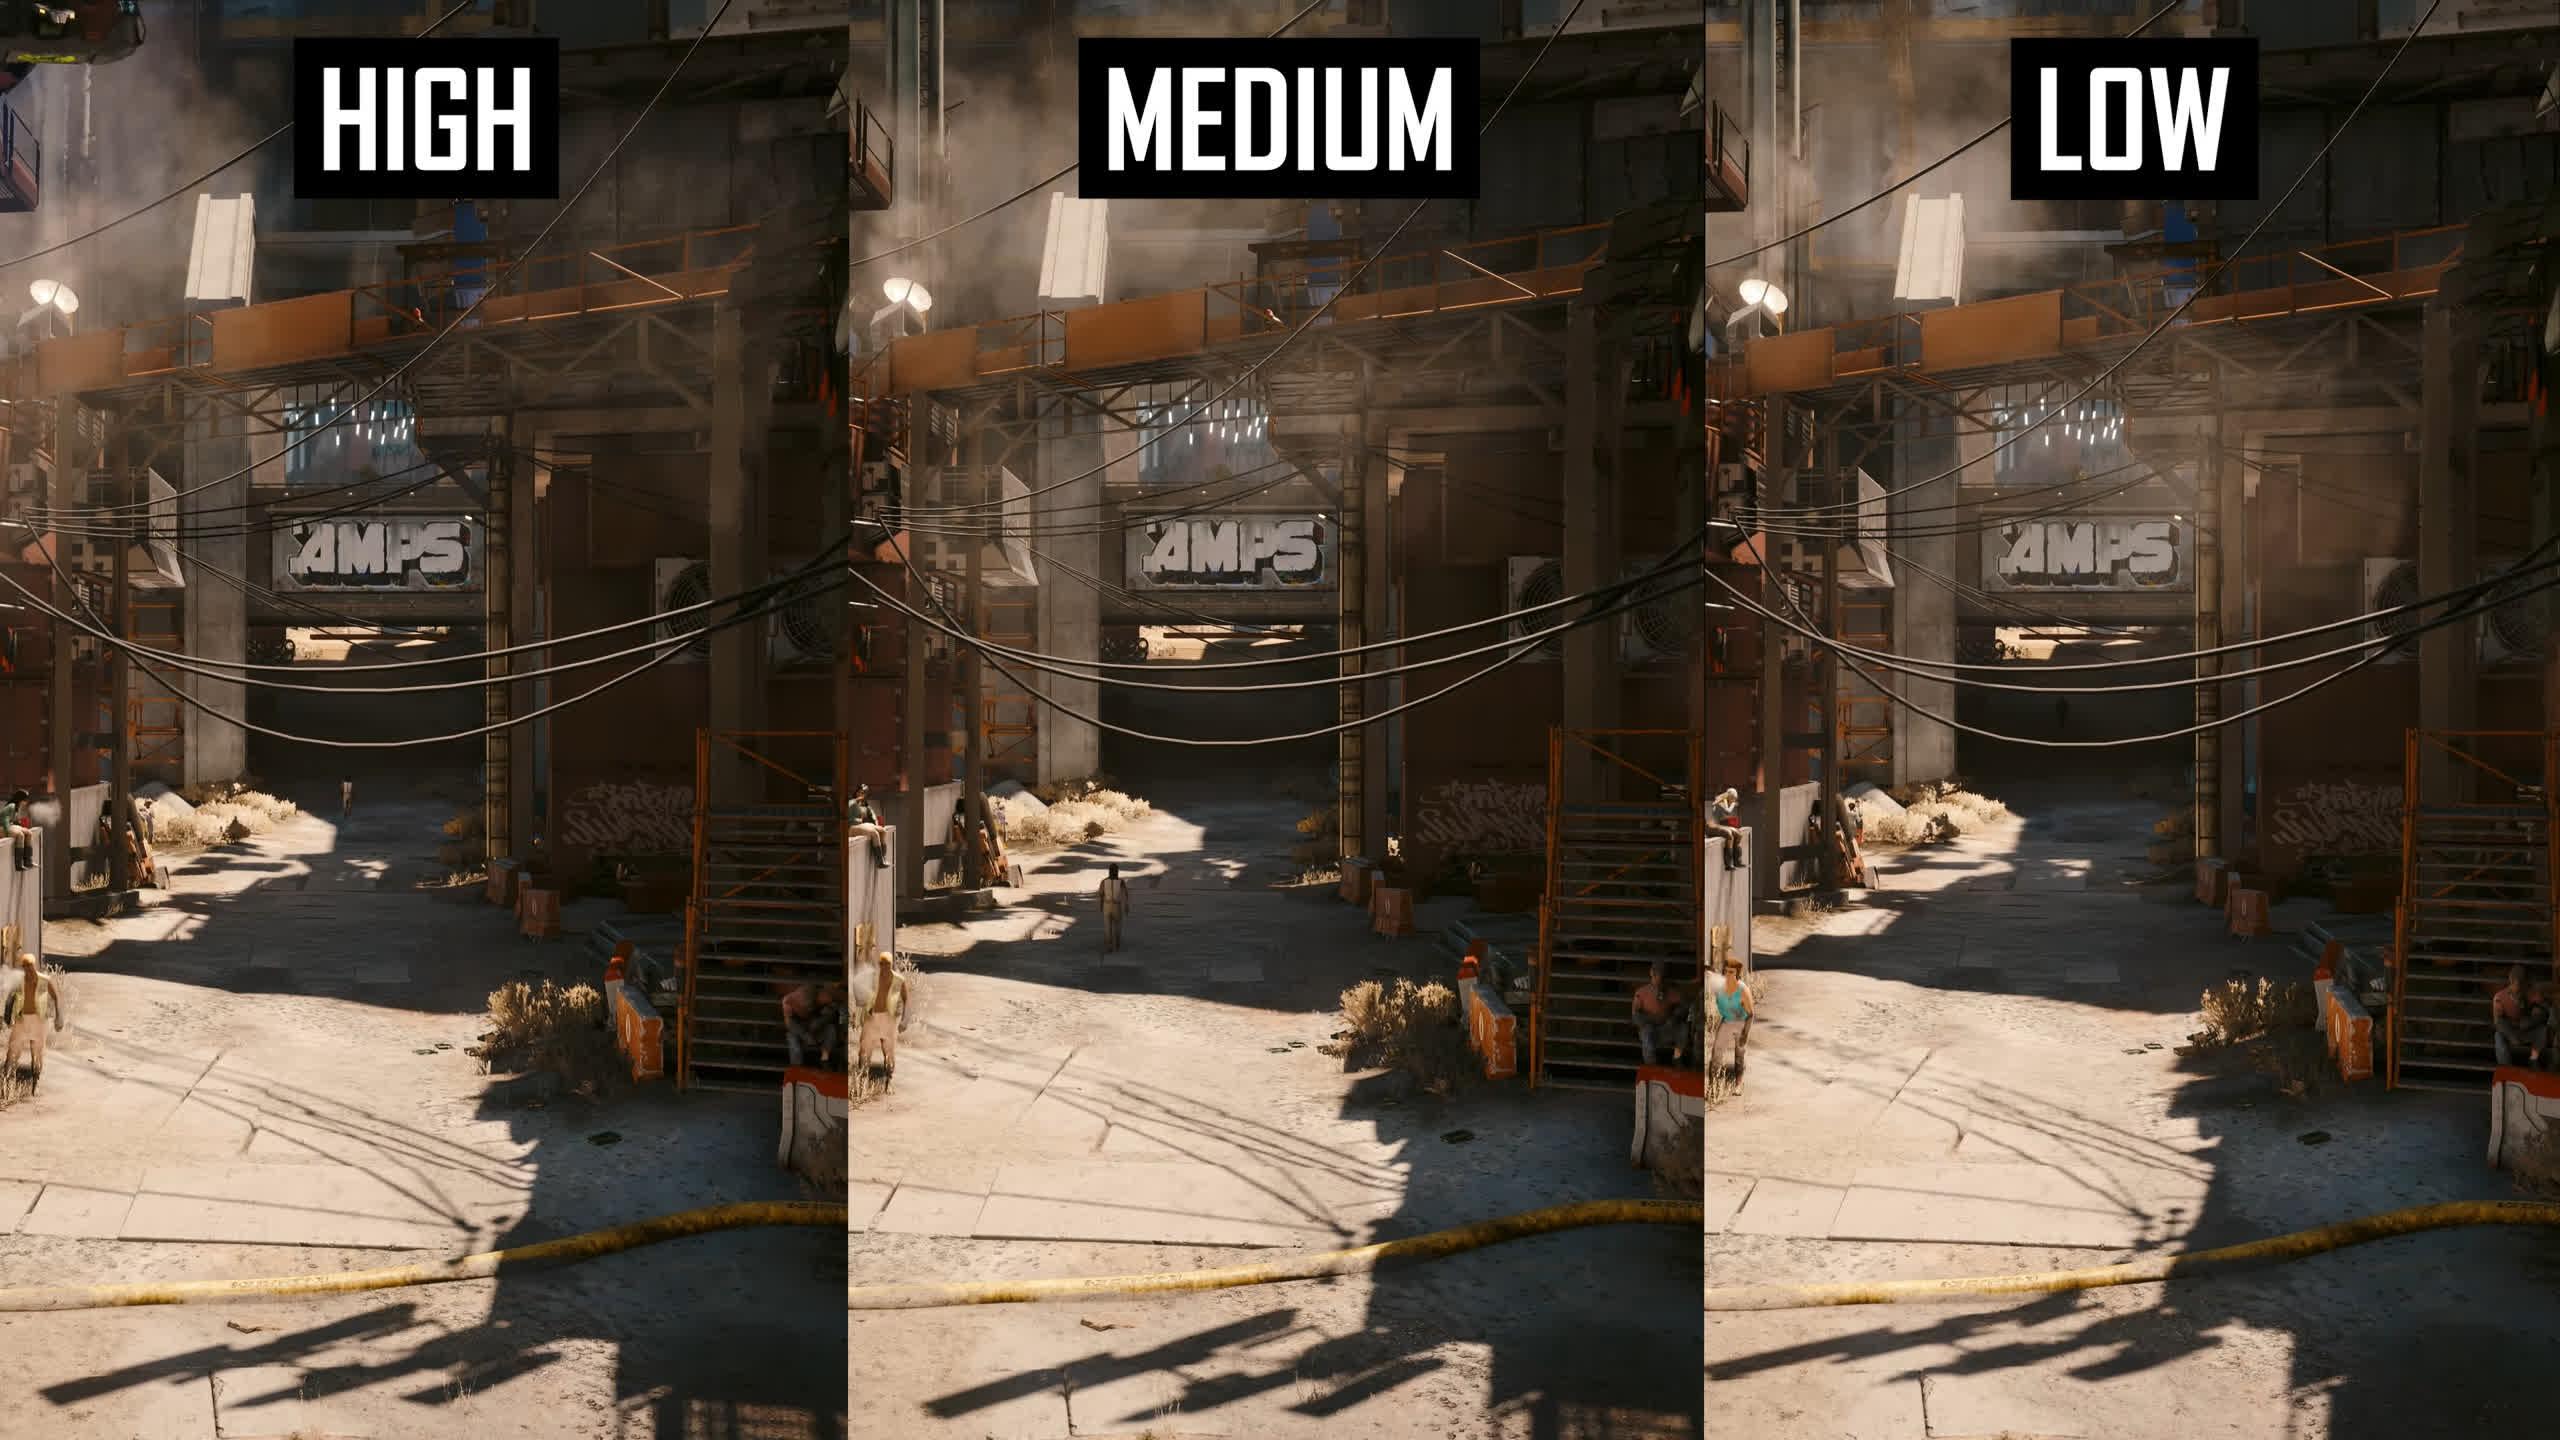
Cascaded Shadows Range impacts how far into the distance you’ll see dynamic shadows casted from the sun. In this scene for example you’ll notice that with the setting on high, pretty much all of the NPCs and grass even far into the distance have sun shadows.
Turning this down to medium removes sun shadows for distant NPCs, but preserves it for closer NPCs. Turning it to off removes shadows for distant and near NPCs, even affecting some of the closer grass elements so the game does look flatter with this setting on low.

Not a huge performance gain to be had here even though parts of our benchmark run are outside where this setting would make a difference. At best turning the setting to low would see a 1 to 2 percent gain, which just isn’t worth it. I would recommend keeping this on high.
Cascaded Shadows Resolution
Cascaded Shadows Resolution affects the sharpness and clarity of sun shadows. The high and medium settings are pretty similar, but High does produce less shadow aliasing in some scenes so is the least artifact way to play. The low setting though has clearly reduced shadow resolution with lots of shimmering and aliasing across the presentation so I’d avoid that mode if possible.

For performance you’ll only see a 1-2 percent gain moving from high to medium so for the best visual quality I’d stick with high shadow resolution, only using medium if you need more performance. Low performs pretty similarly to medium for a much larger reduction to image quality, so I wouldn’t recommend it.
Distant Shadows Resolution
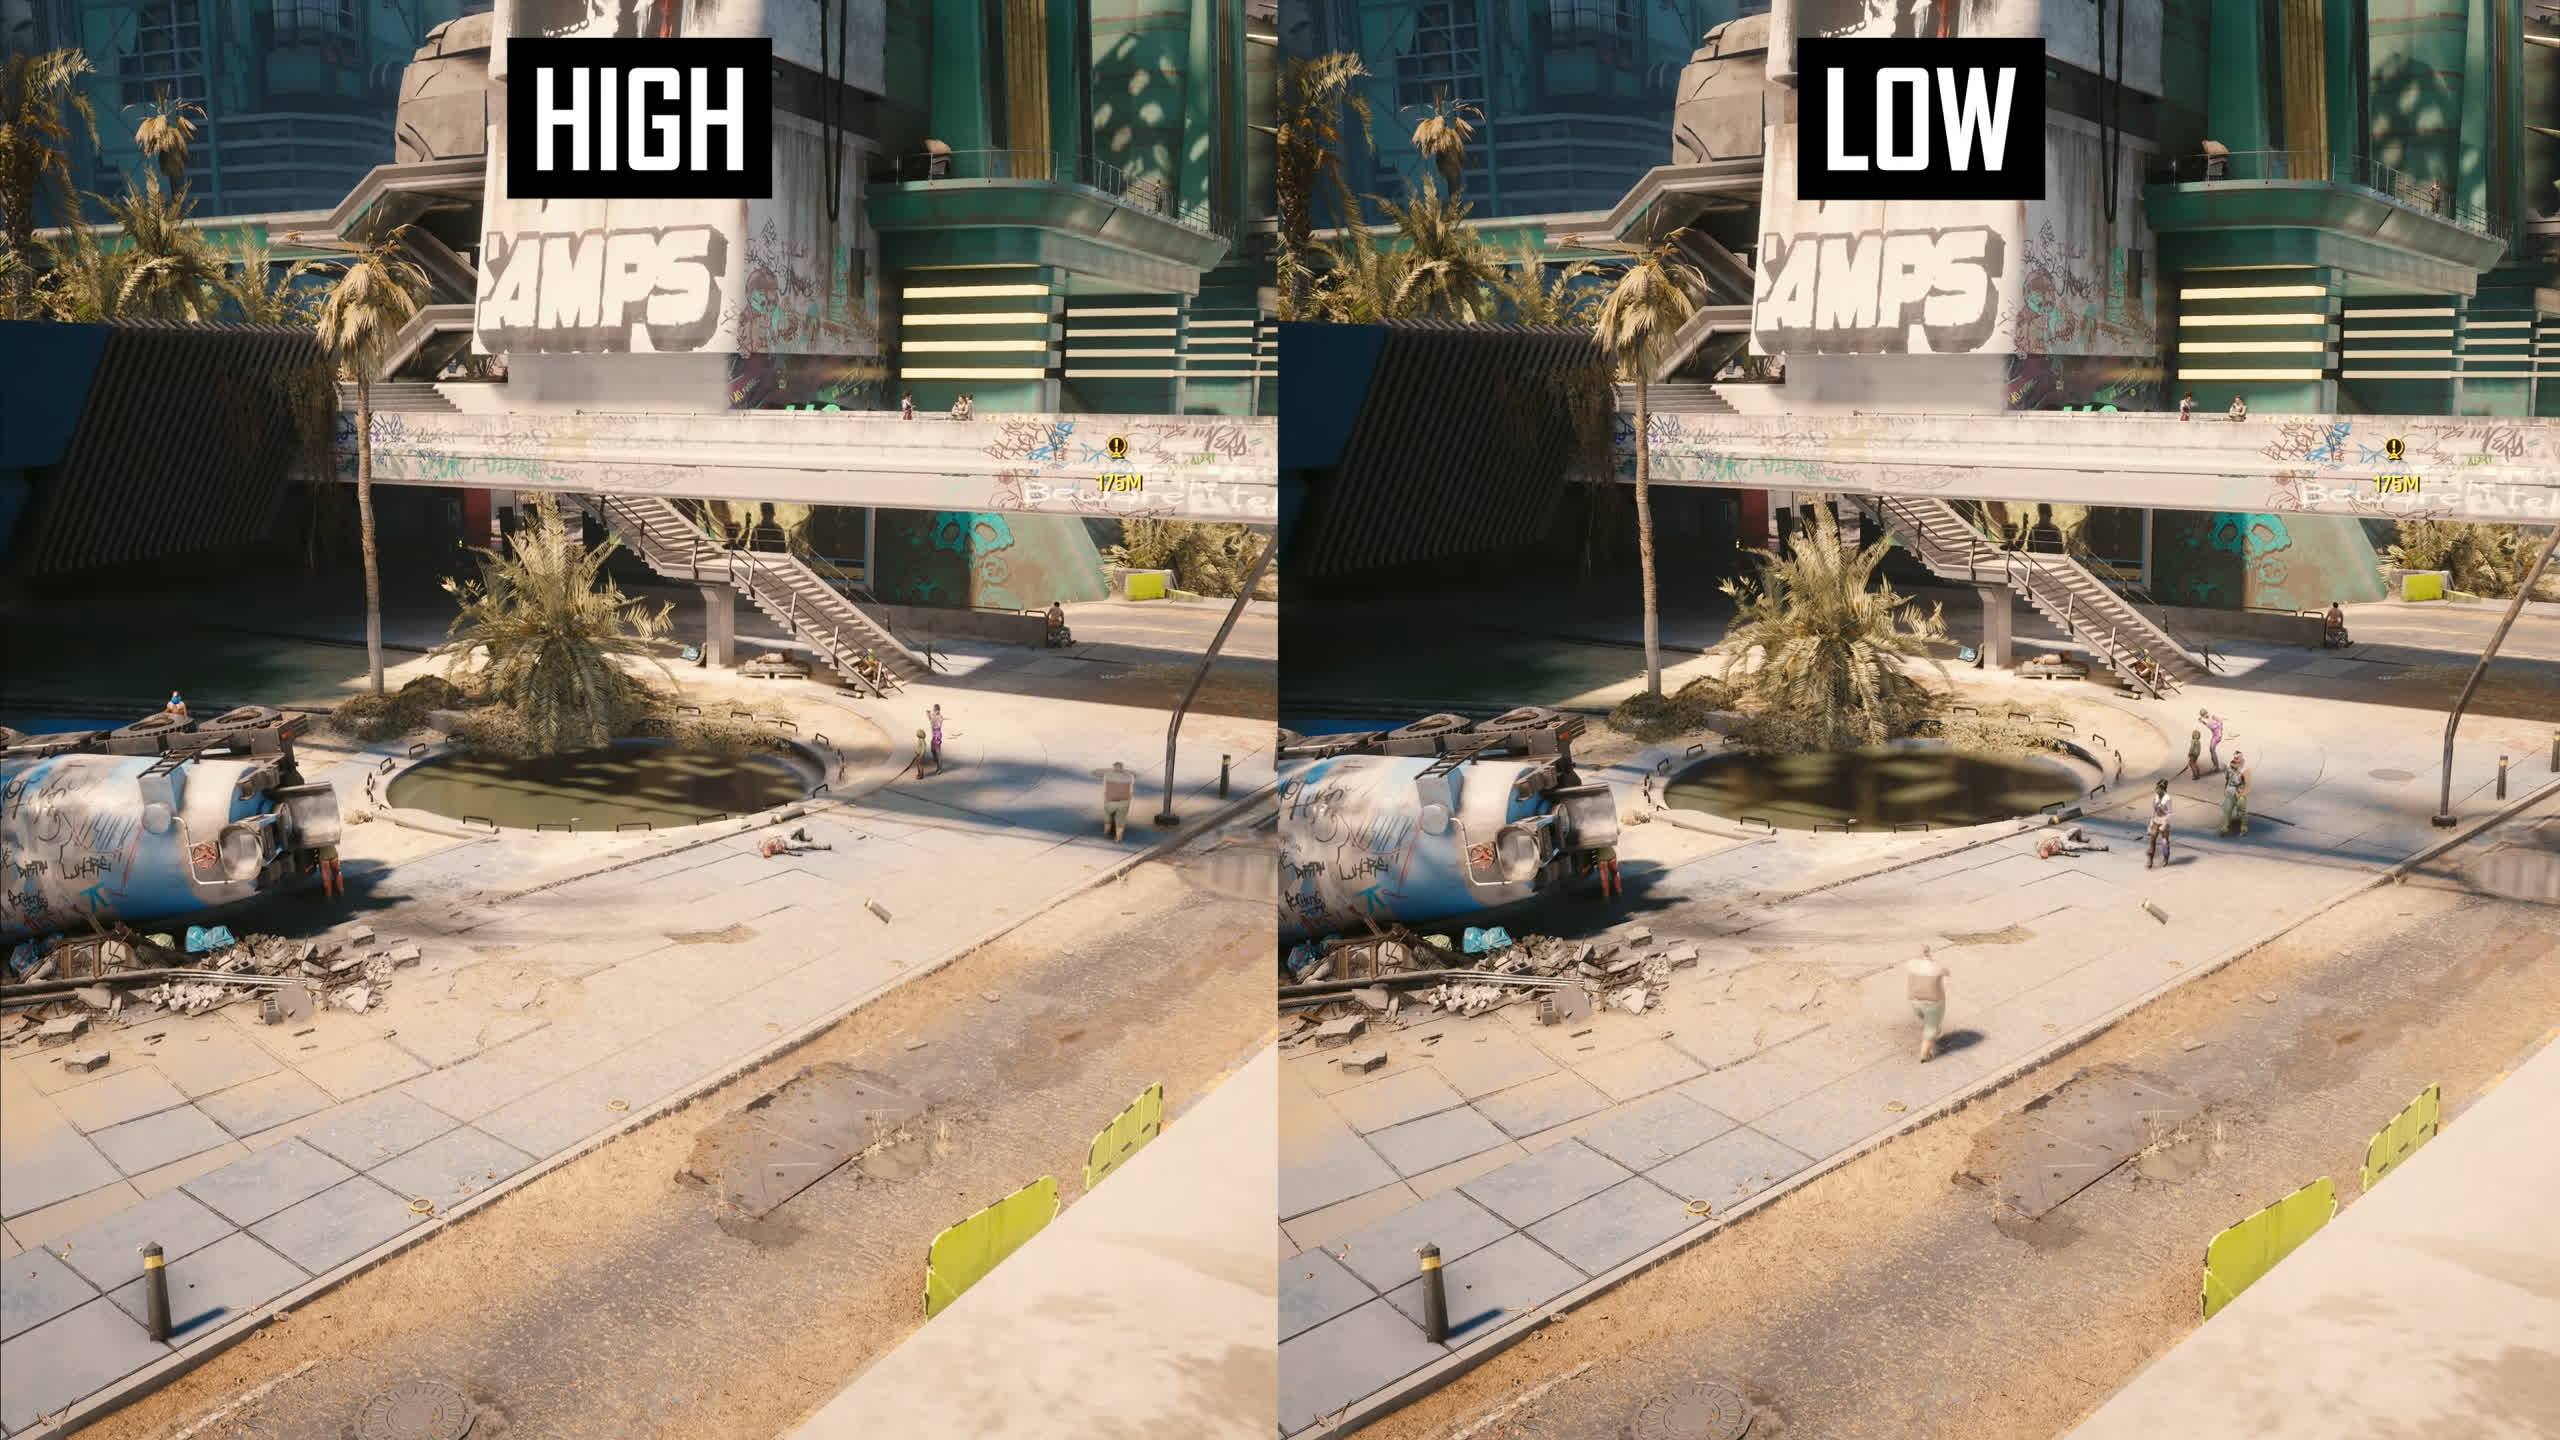
Distant shadows resolution is similar to cascaded shadows resolution but only affects shadows further from the camera. The impact of this setting can be hard to spot but we did find one area where the difference is visible. Considering it has little to no performance impact in intensive areas of the game I would use the High setting.
Volumetric Fog Resolution
For a better representation of image quality comparisons, check out the HUB video below:
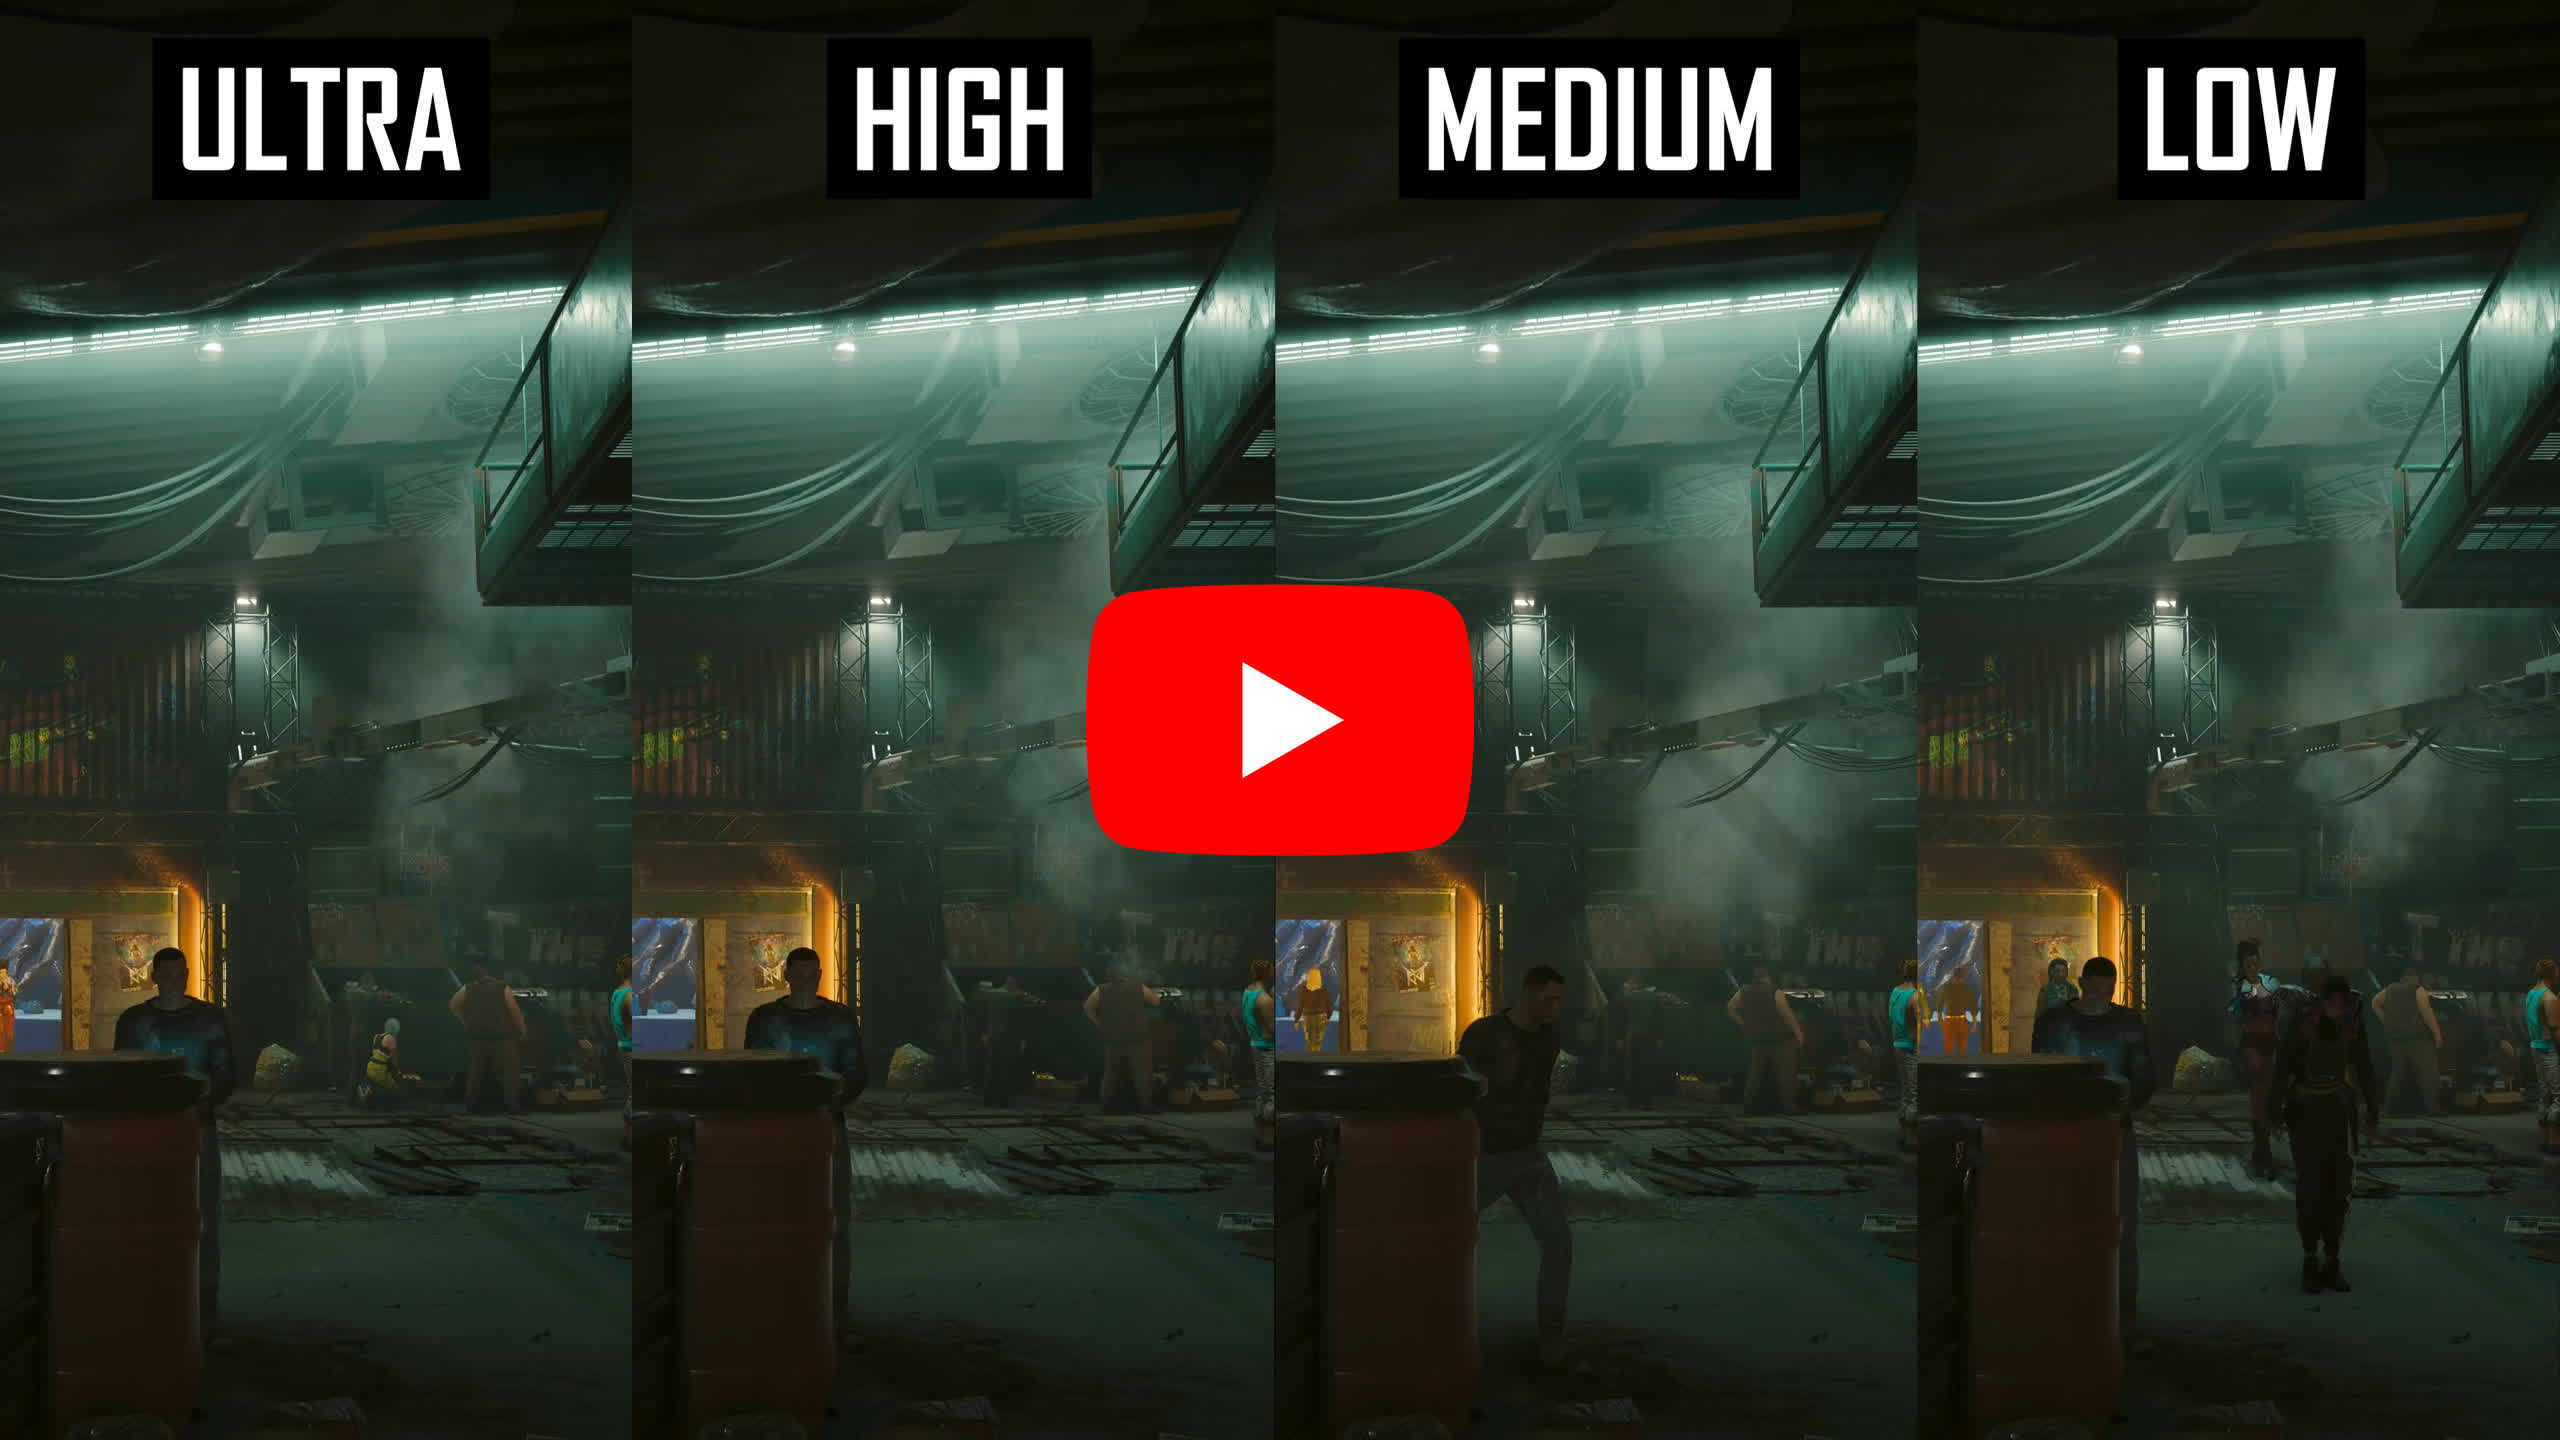
Volumetric Fog Resolution is similar to this setting on other games in that it has a big impact on performance. Visually though, the differences can be quite subtle. When stationary, there’s not a huge difference between Ultra, High and Medium, with higher settings being slightly more accurate. However when dropping to Low you’ll notice a reduction to fog quality even when standing still, with artifacts I think are noticeable.

In motion the differences are a little more pronounced, with Ultra providing the ultimate clean experience, High looking very slightly worse than Ultra, Medium being a step down, and Low producing many artifacts. Given these are fairly standard temporal artifacts from using lower volumetric fog quality, it’s possible you won’t even notice this during normal gameplay as the amount of fog and its density is pretty much the same even on lower quality settings.
When we look at the performance impact, dropping volumetric fog from Ultra to High provides just a 1% performance improvement, but Ultra to Medium is a significant 7% impact to average frame rates. Low is slightly more performant than Medium. The level of artifacting from medium fog is definitely more noticeable than using Ultra, but I feel it doesn’t ruin the experience to that significant of a degree and I would take the 7% performance gain it provides. Ultra is definitely the best way to play for gamers with high end GPUs, but for everyone else I would optimize this down to medium; and I’d avoid low even on lower end graphics cards.
Volumetric Cloud Quality
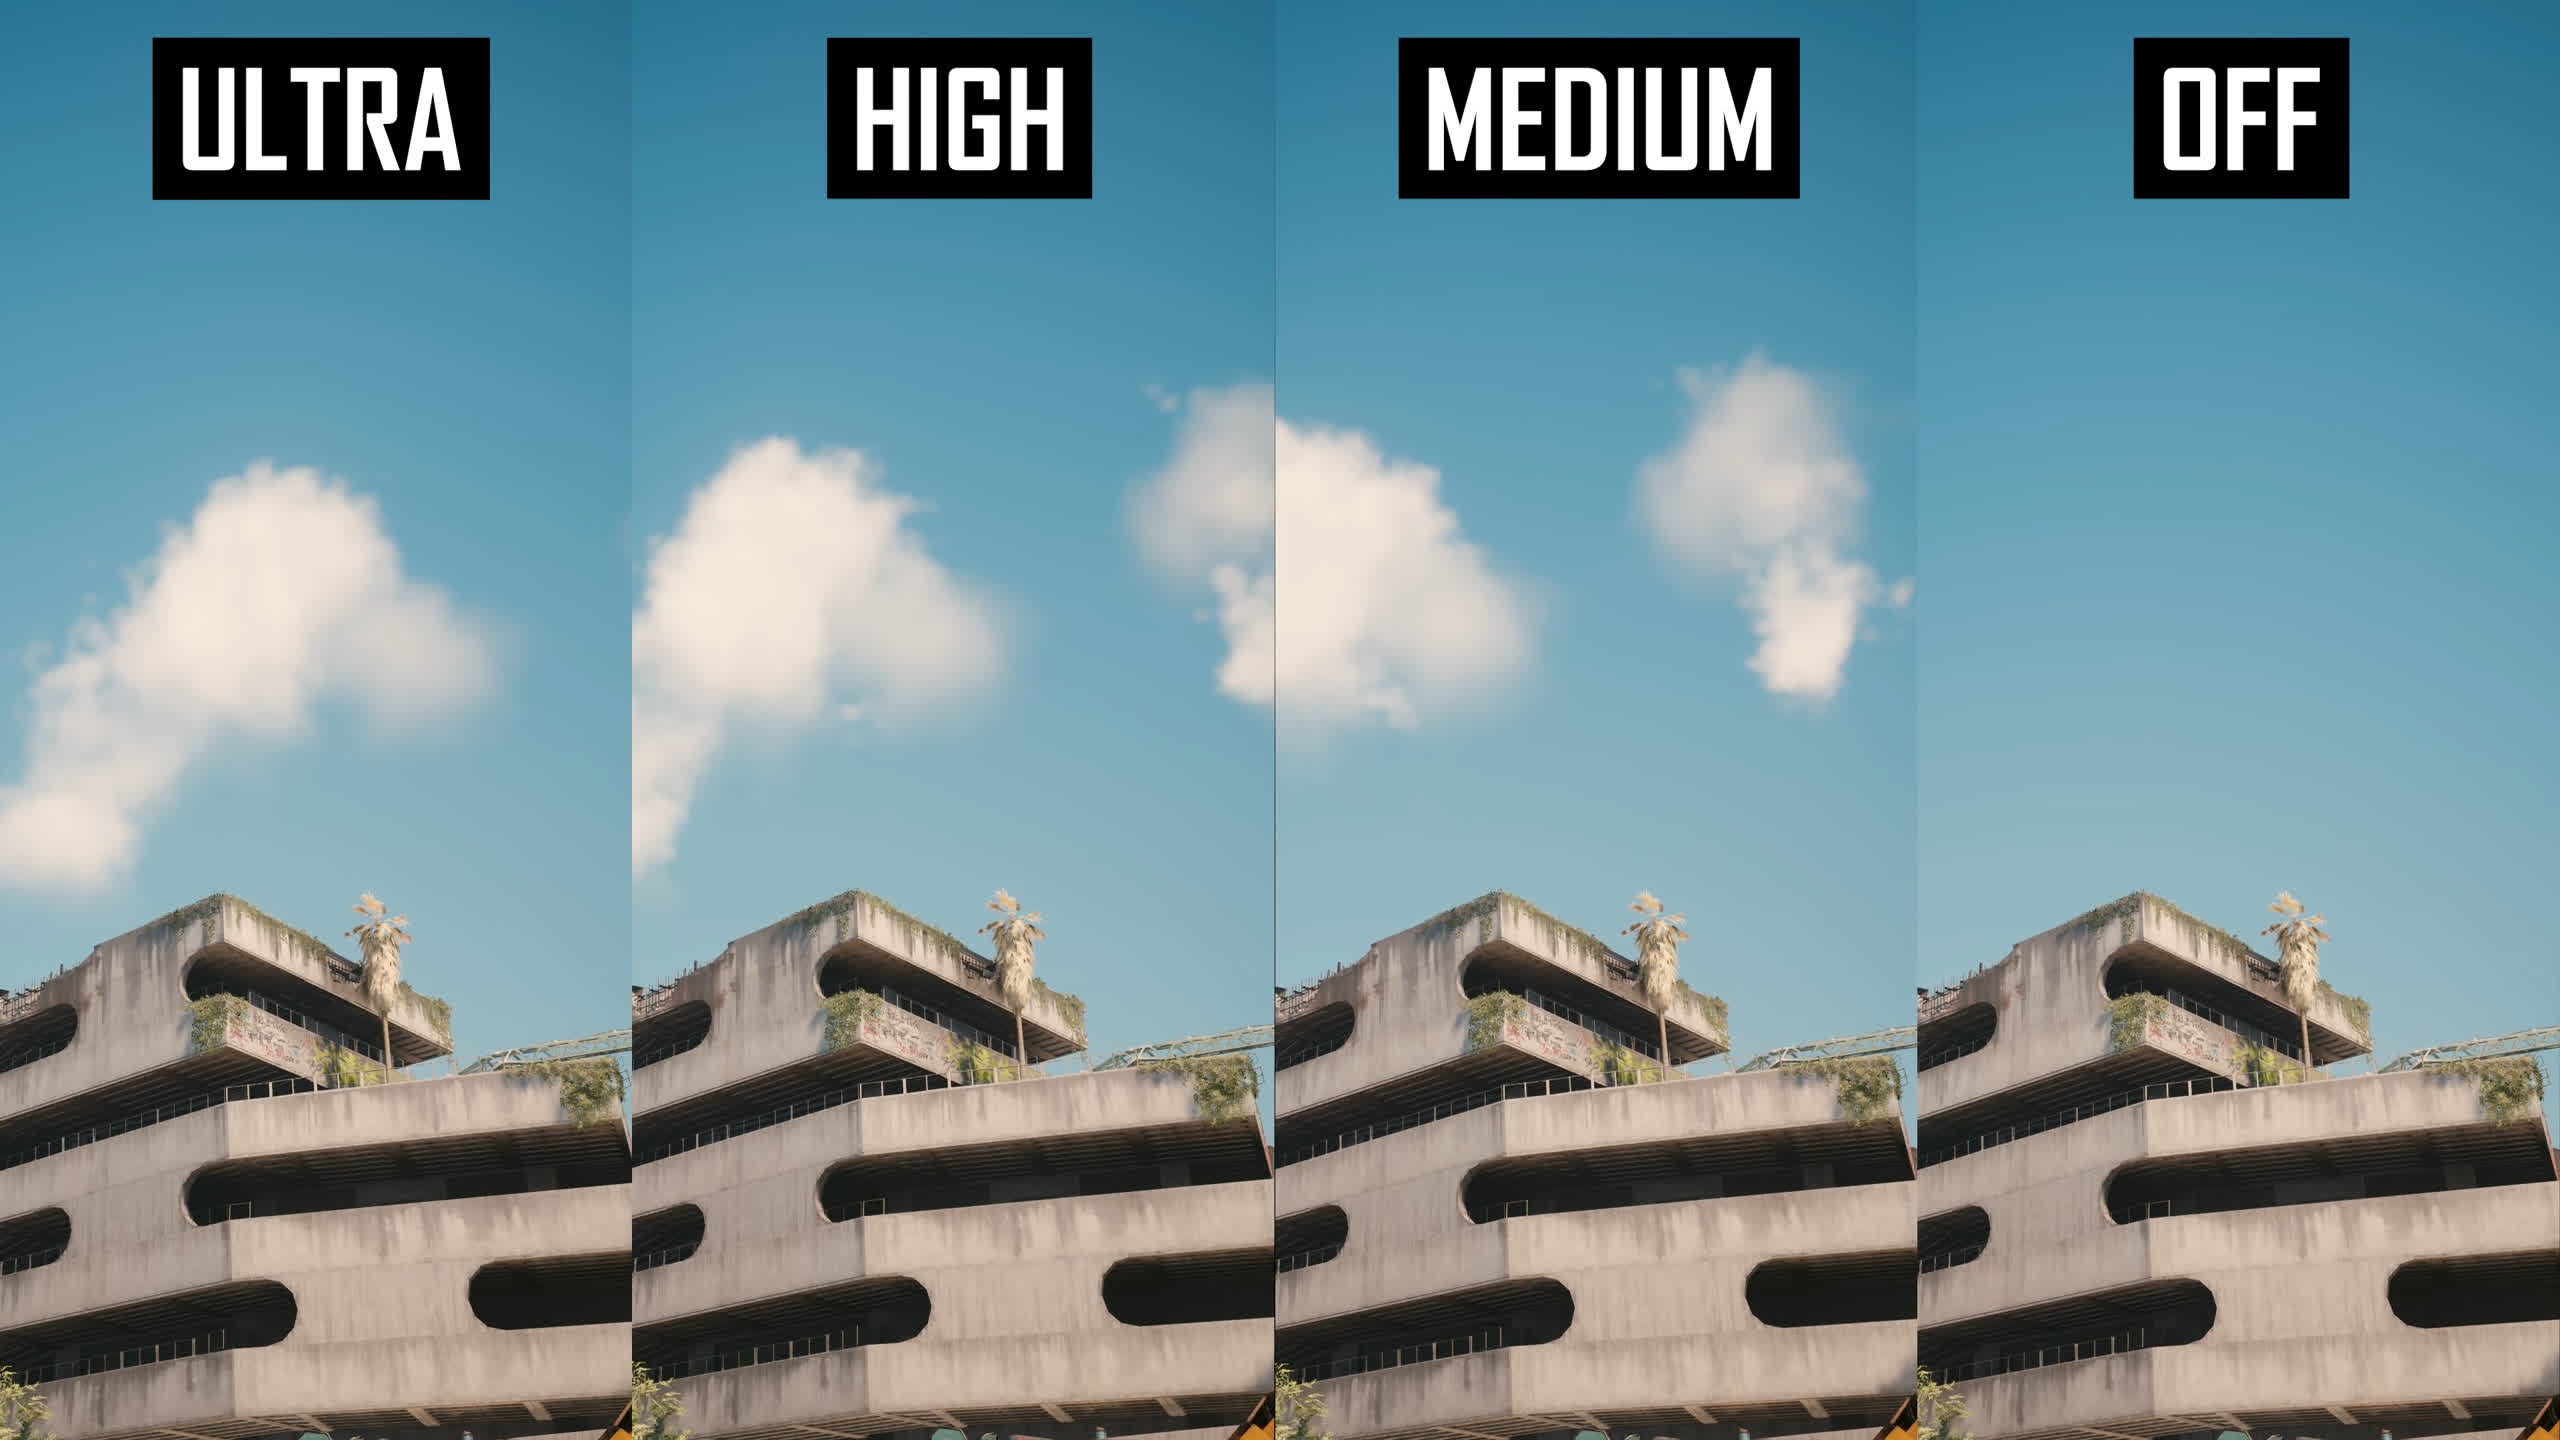
Volumetric Cloud Quality affects the resolution of clouds. It’s pretty hard to tell the difference between Ultra, High and Medium, although I wouldn’t recommend Off as it just turns off clouds completely. Medium produces slightly lower resolution clouds than Ultra.
What’s interesting about the performance of this setting is that during intensive areas of the game you just won’t notice much of a performance impact. That’s because clouds are high up in the sky where you aren’t often looking, and the heaviest areas of the game also tend to have big tall skyscrapers that obscure the visibility of clouds. Yes you will notice a performance difference if you tilt up and look at the sky, or go out to the more sparse areas of the game, but these areas also perform much better than the city areas of Cyberpunk in general.
Given all of this, I would recommend using the medium quality setting. It doesn’t look that different from Ultra and does give a performance boost in less intensive areas where clouds are more visible, I saw up to an 8% improvement. Just don’t expect this setting to alleviate performance issues in Cyberpunk’s more intensive areas because it’s unlikely clouds high up in the sky that you aren’t looking at are the reason for lower performance.
Max Dynamic Decals
I didn’t see much impact to performance from the max dynamic decals setting even when unloading tons of bullets into various areas. I’d leave this on ultra.
Screen Space Reflections

Screen space reflections quality is by far the most intensive non ray traced setting in the game. Simply put it affects the resolution and therefore clarity of reflections, the higher you go, the clearer the reflections. Moving from Ultra to High isn’t a massive difference though it is noticeable in some areas. Medium is a step down with blurrier and less defined reflections, while Low really cuts down on the resolution to essentially just provide the essence of a reflection.
Off disables the feature entirely, which given the amount of reflective surfaces in the game delivers a huge blow to image quality. There’s also the psycho setting, one step above Ultra, which provides an even higher reflection resolution but the gap between these modes is similar to the difference between high and ultra, so it’s not a massive improvement.

For gamers that want to enjoy optimized but still high quality visuals, we think the medium setting here is the way to go as it provides a 20 percent performance improvement for only a small hit to visuals, that’s certainly substantial. I could also justify high as it looks close to ultra but with an 11% gain, but I feel that most gamers will prefer the extra performance on offer from medium.
Low is a great choice if you need even more performance, as the 26% performance gain over ultra is massive given reflections are still enabled, though at a lower quality than medium. Turning off SSR gives a 10% gain over medium but drastically transforms the game’s visuals. The psycho setting is completely pointless as it destroys performance for only a minor quality gain, definitely wouldn’t recommend using it.
Subsurface Scattering Quality
Subsurface scattering quality is supposed to affect skin quality but honestly I couldn’t find any visual difference. It could be there, it’s just not very noticeable. And performance is largely unchanged whether you use high or low so may as well keep this setting on high.
Ambient Occlusion Quality
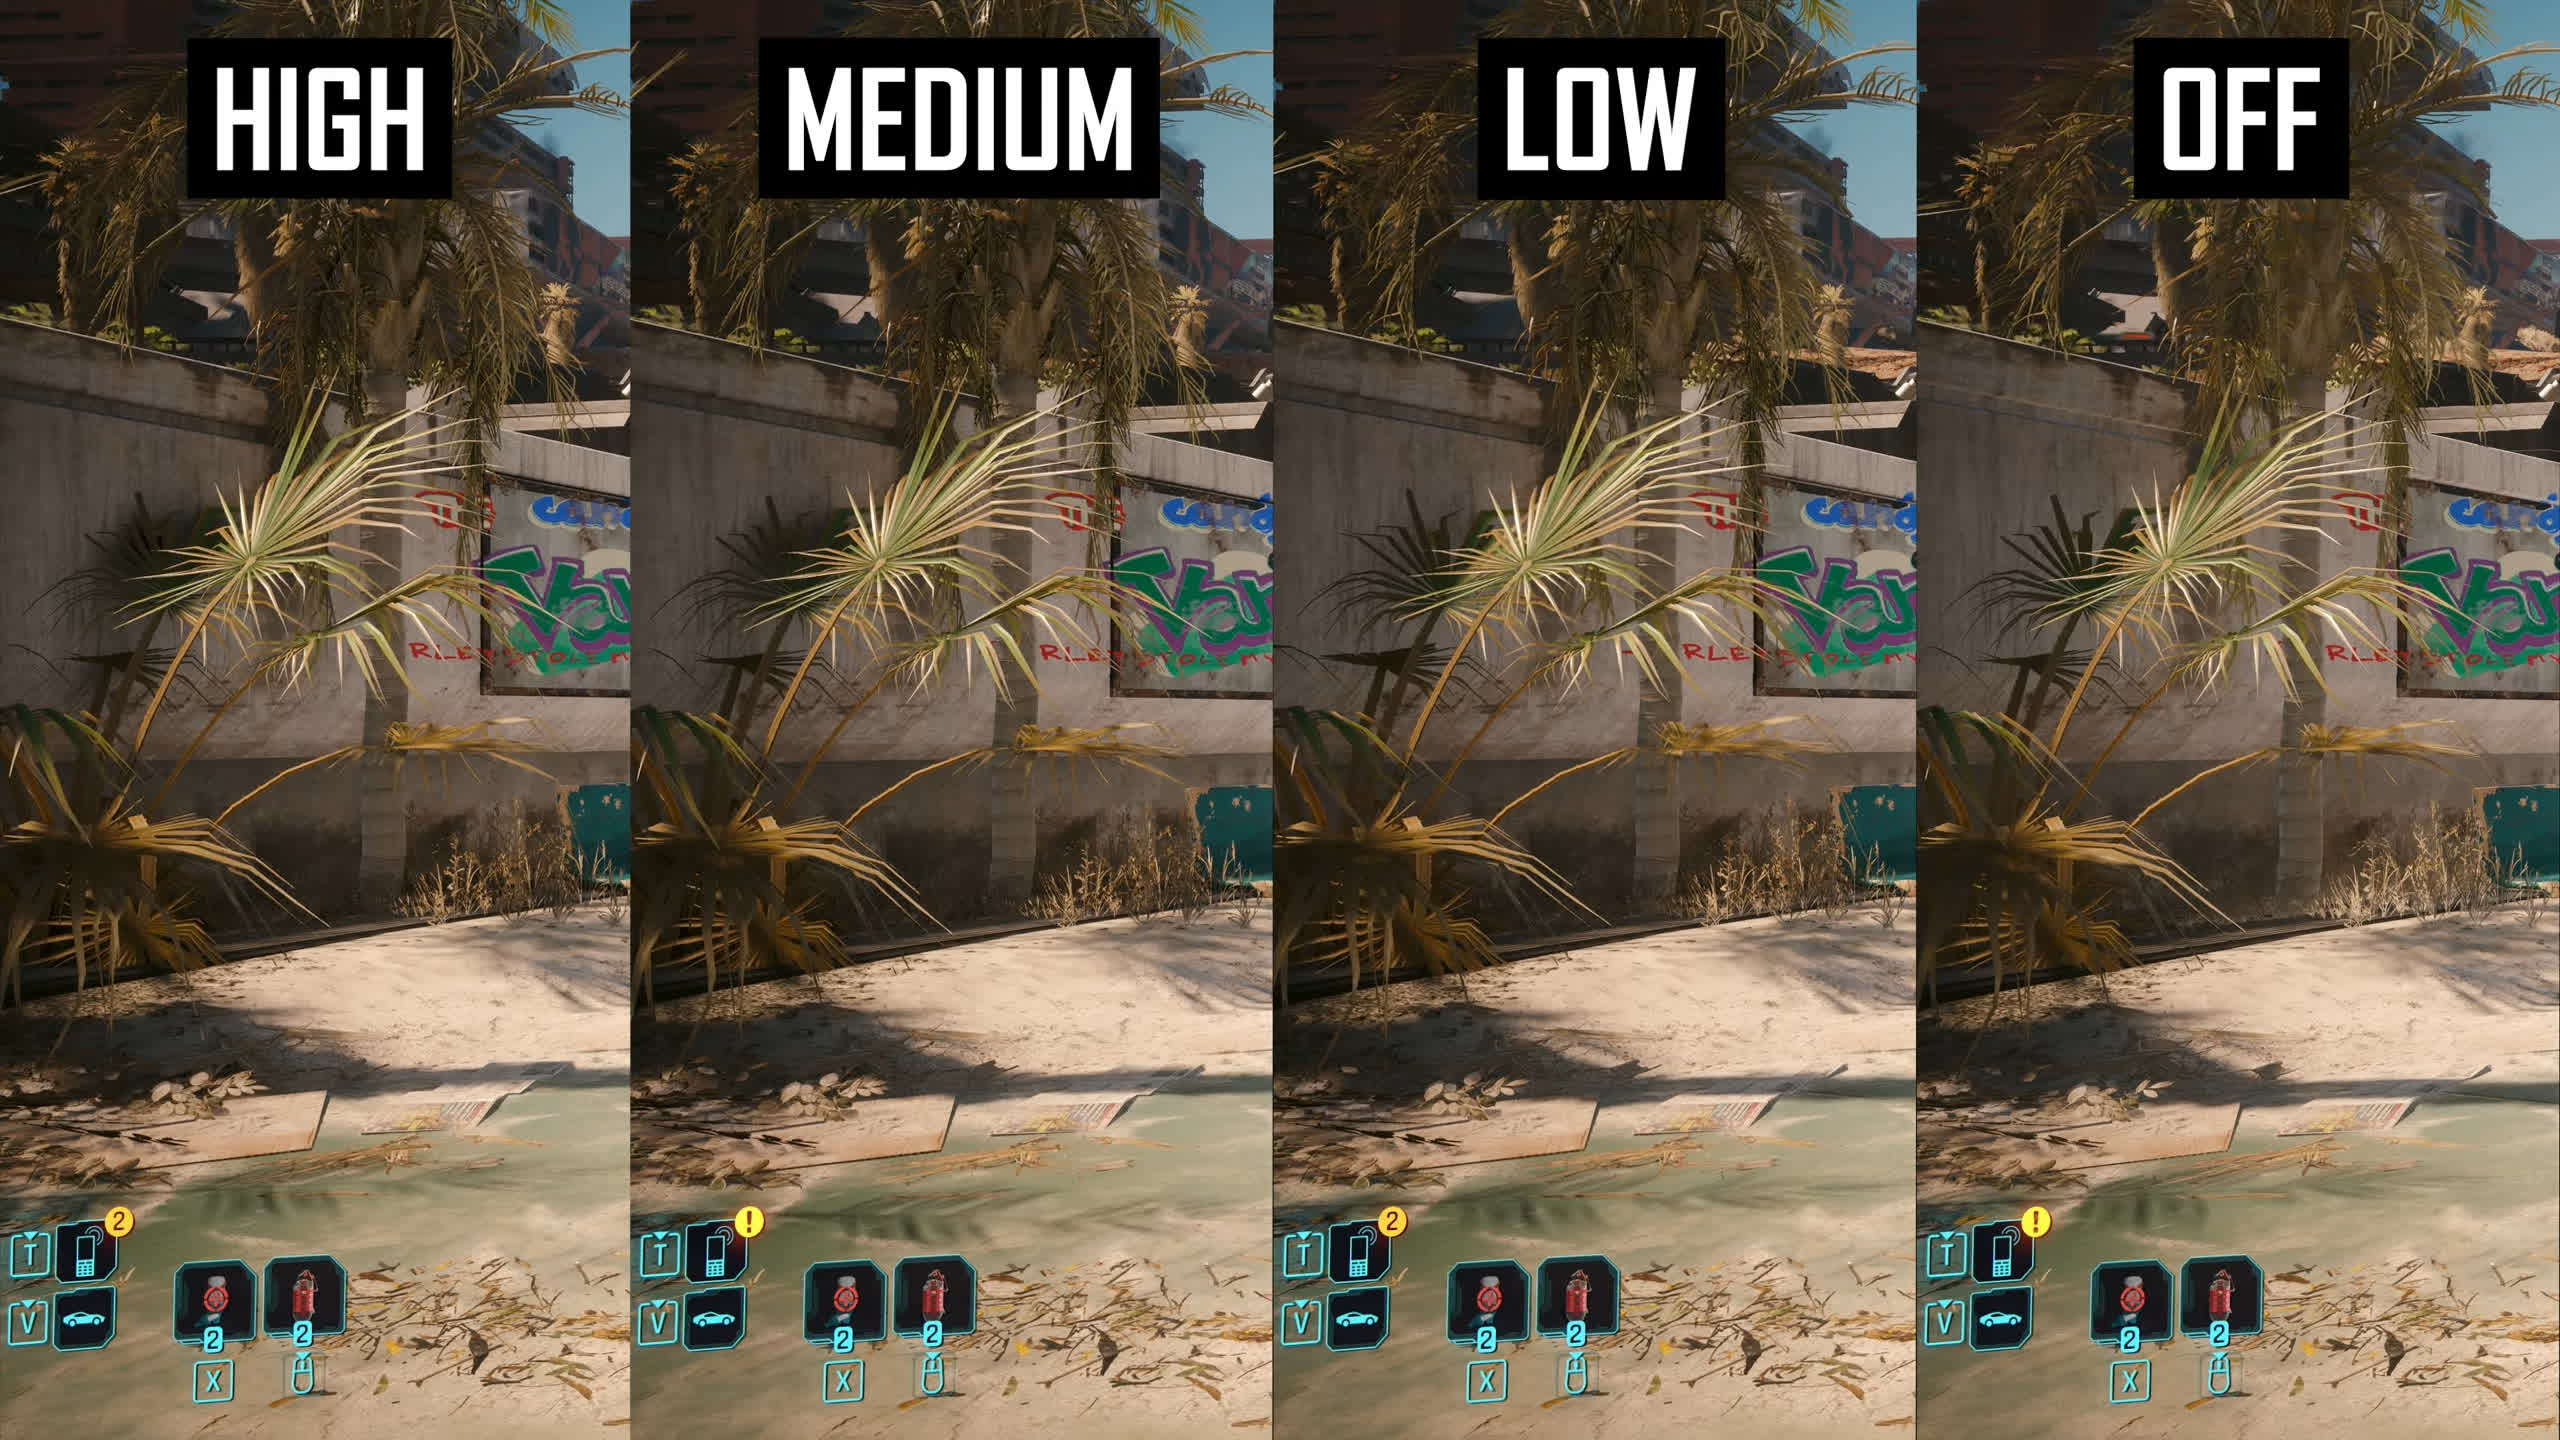
Ambient occlusion works in the same way as other games, providing self shadowing for close together objects. The difference between high, medium and low is the strength of ambient occlusion, with higher settings providing greater shadowing and more depth.
The impact to this varies depending on the area, but I do feel that low makes the game world look flatter than using high. Off disables the effect entirely, which makes the game look very flat and underwhelming, definitely would not recommend that setting.

As for performance, ambient occlusion doesn’t have a huge impact. Switching from high to low improved my frame rate in the most intensive area of Dogtown by just 2 percent, it’s only disabling the effect entirely that gives a large performance boost. Given that I feel the game looks noticeably flatter using low AO, I’d keep this setting on high, only reducing to low if you need extra performance.
Color Precision

Color precision is supposed to reduce banding when set to high but I didn’t really spot any noticeable difference to medium. Given that medium is 1% faster on average you may as well use the medium setting.
Mirror Quality

Mirror quality is not an important setting in Cyberpunk because the most intensive areas will typically run worse than areas that have mirrors enabled. For that reason you may as well just leave this on high as it has no impact during regular gameplay. However if mirrors really destroy performance on your system, each setting produces a step down in mirror resolution. I saw up to an 21% performance gain in mirrors switching from High to Medium, and 31% from ultra to low. Medium is a good midpoint here.
Level of Detail
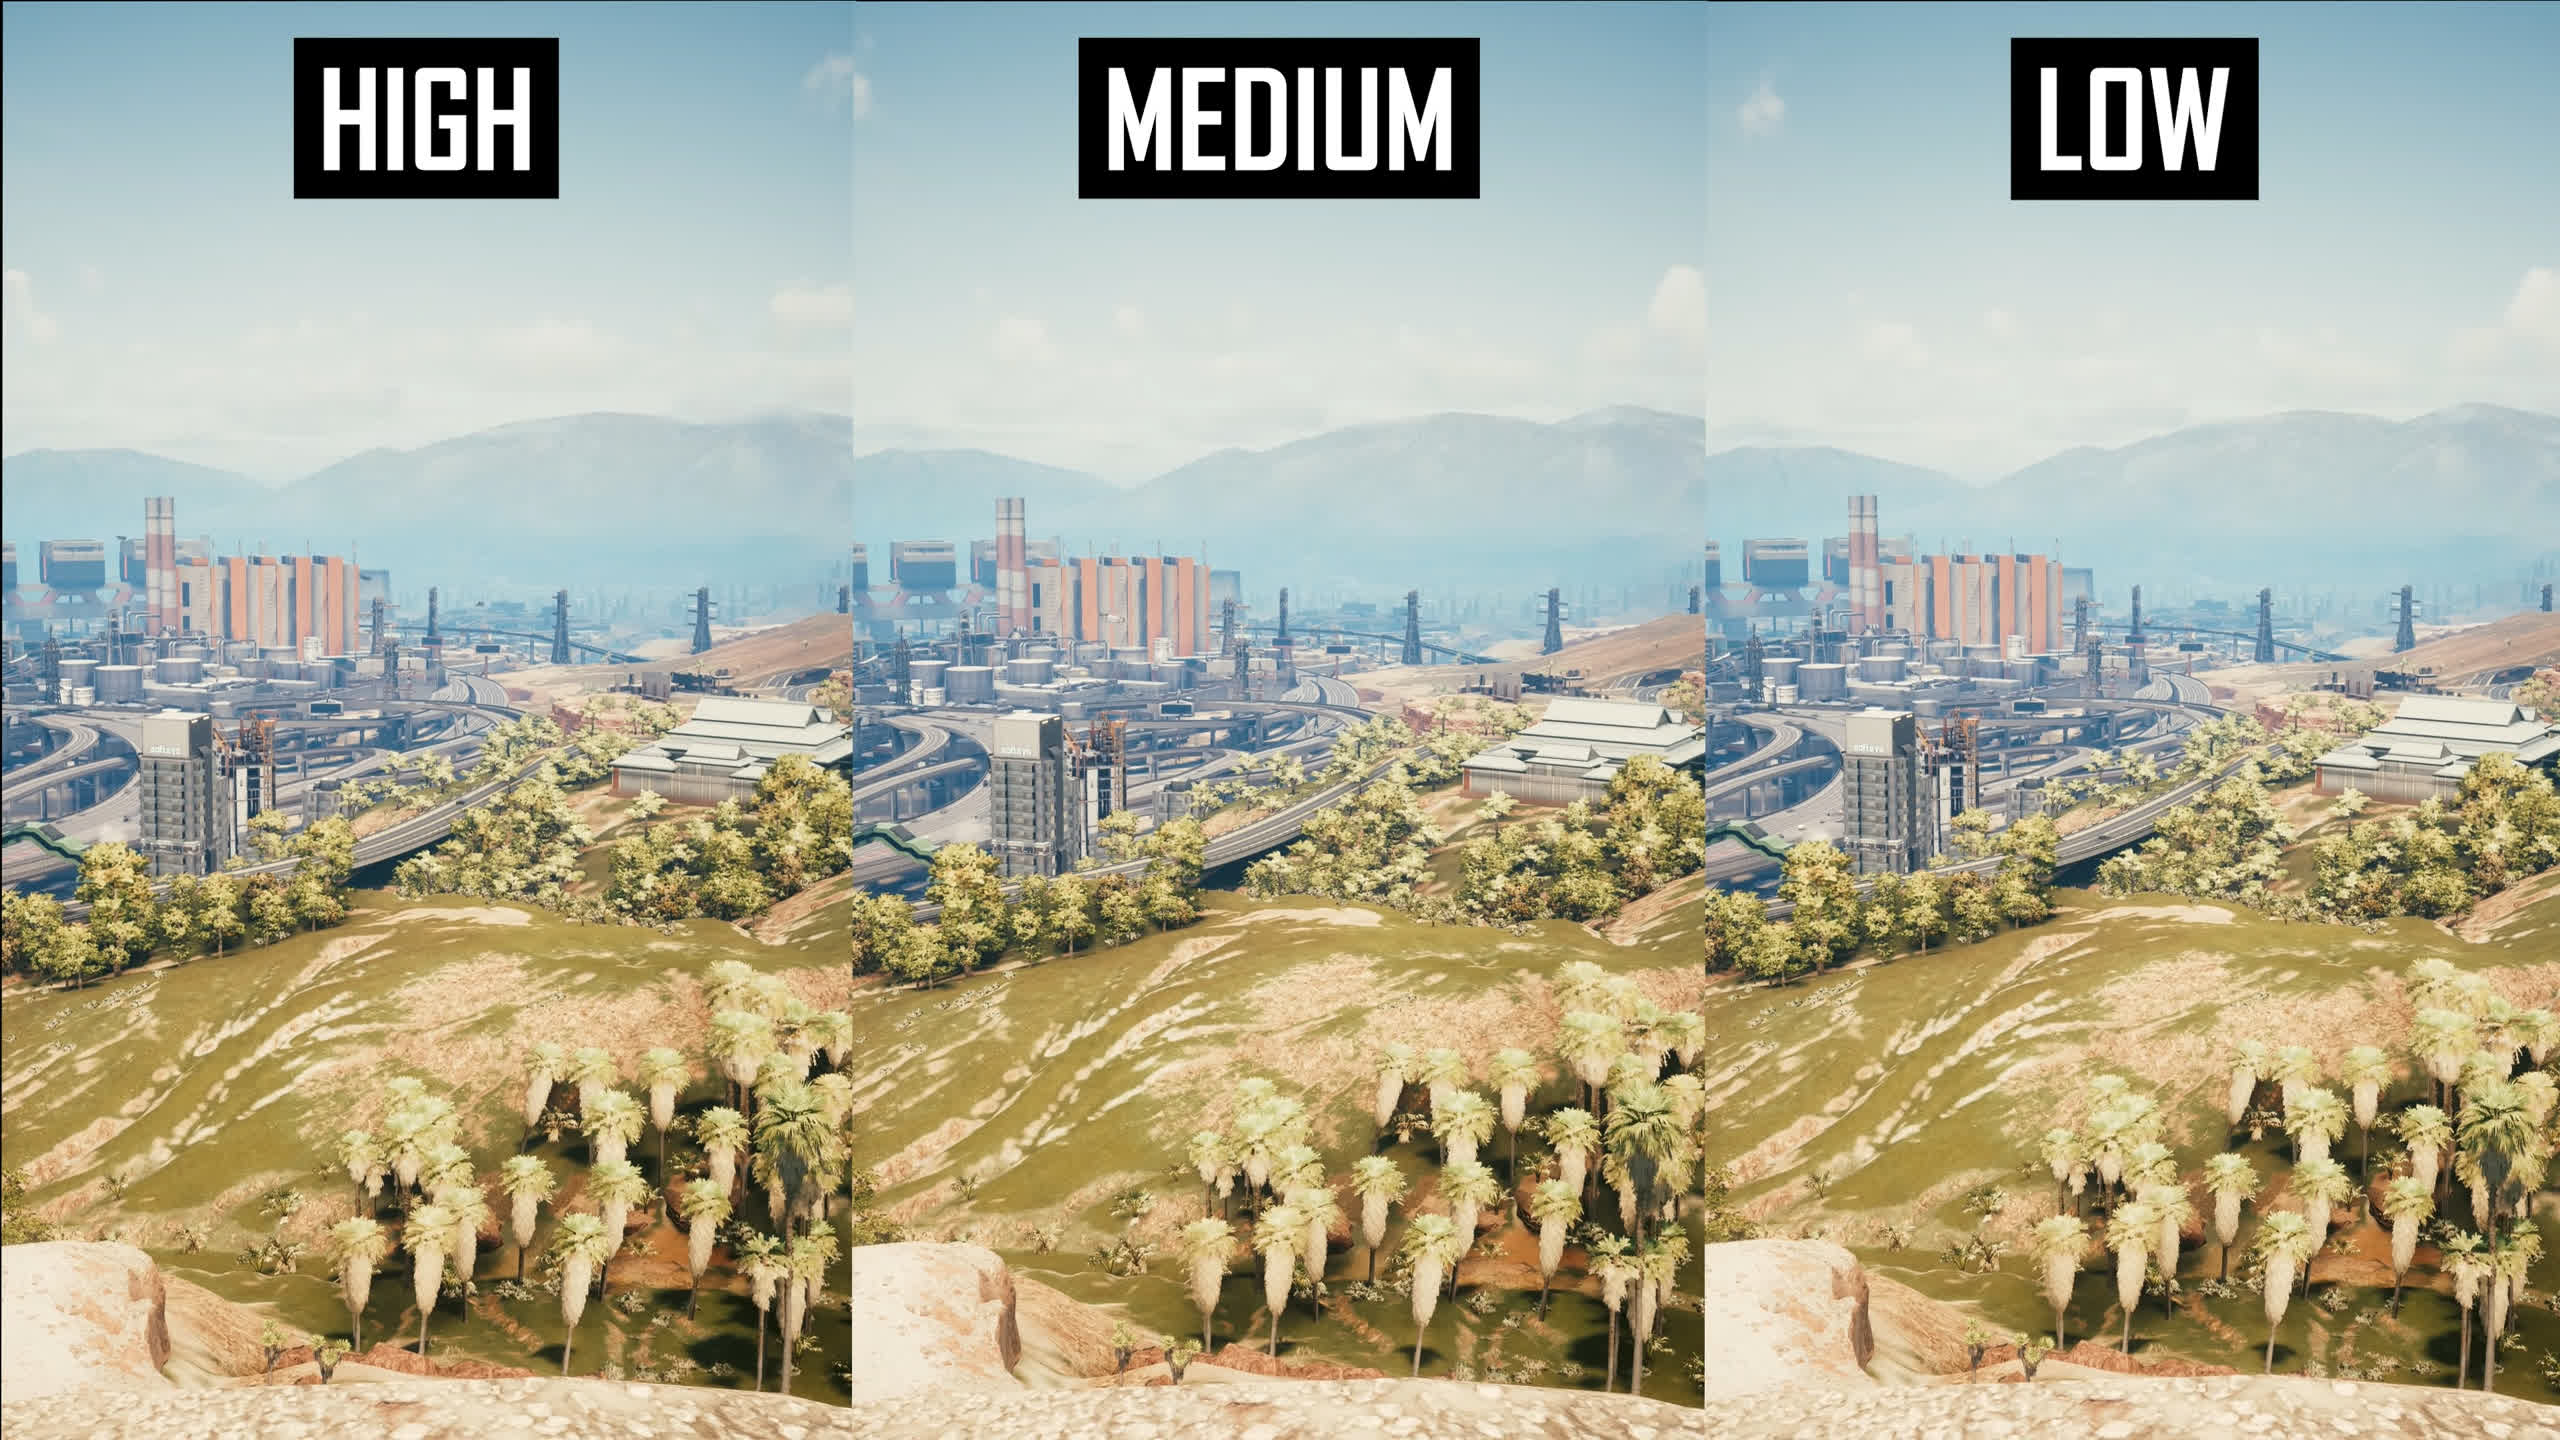
Level of Detail is supposed to affect geometry detail and draw distances but in Cyberpunk I found the setting has no impact to visuals or performance. Bit weird but I am quite confident that even in areas with vast view distances, this setting doesn’t change anything, so keep it on high.
Crowd Density
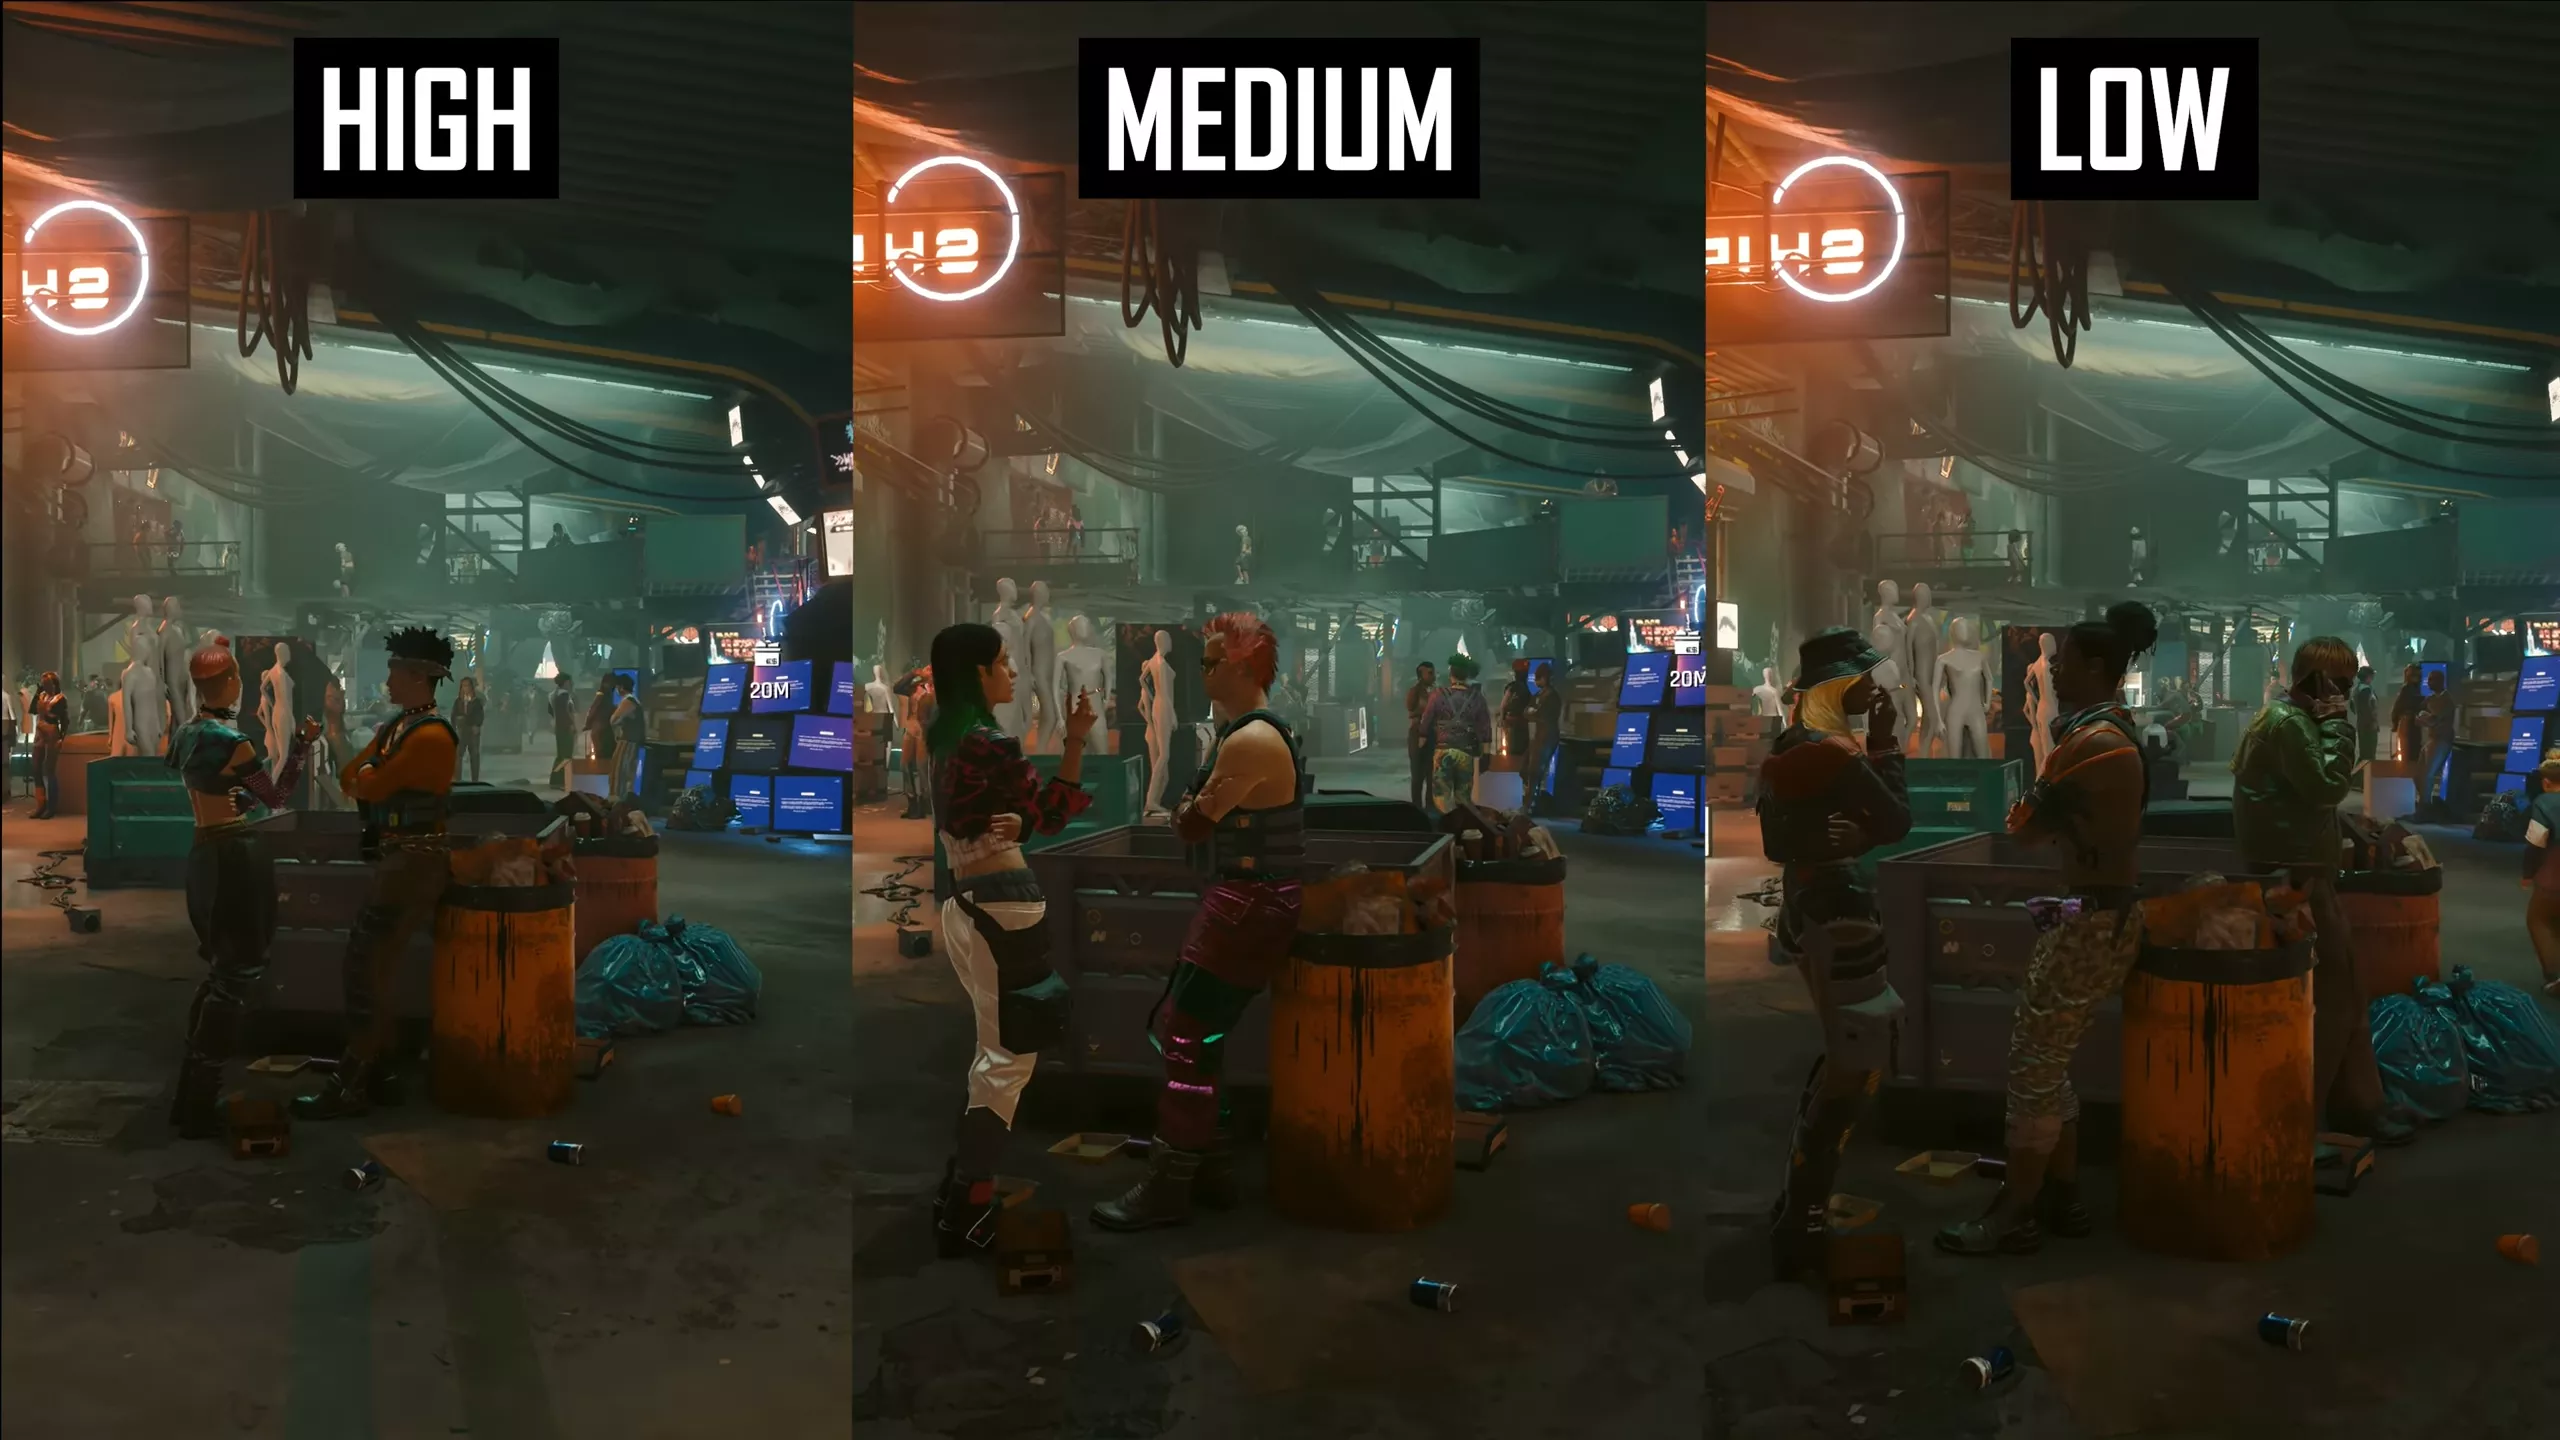
Crowd density affects the number of NPCs in busy areas and typically while GPU limited this setting has little to no impact on performance. Therefore if you have a high end CPU and aren’t finding yourself CPU constrained, the best course of action is setting this to high so you enjoy a more densely packed game world.
However crowd density is still reasonable on low, so if you have a slower CPU and are struggling in these difficult to run areas of Dogtown, turning the setting down to low is definitely viable and will improve performance somewhat.
Ray Traced Reflections
For a better representation of image quality comparisons, check out the HUB video below:
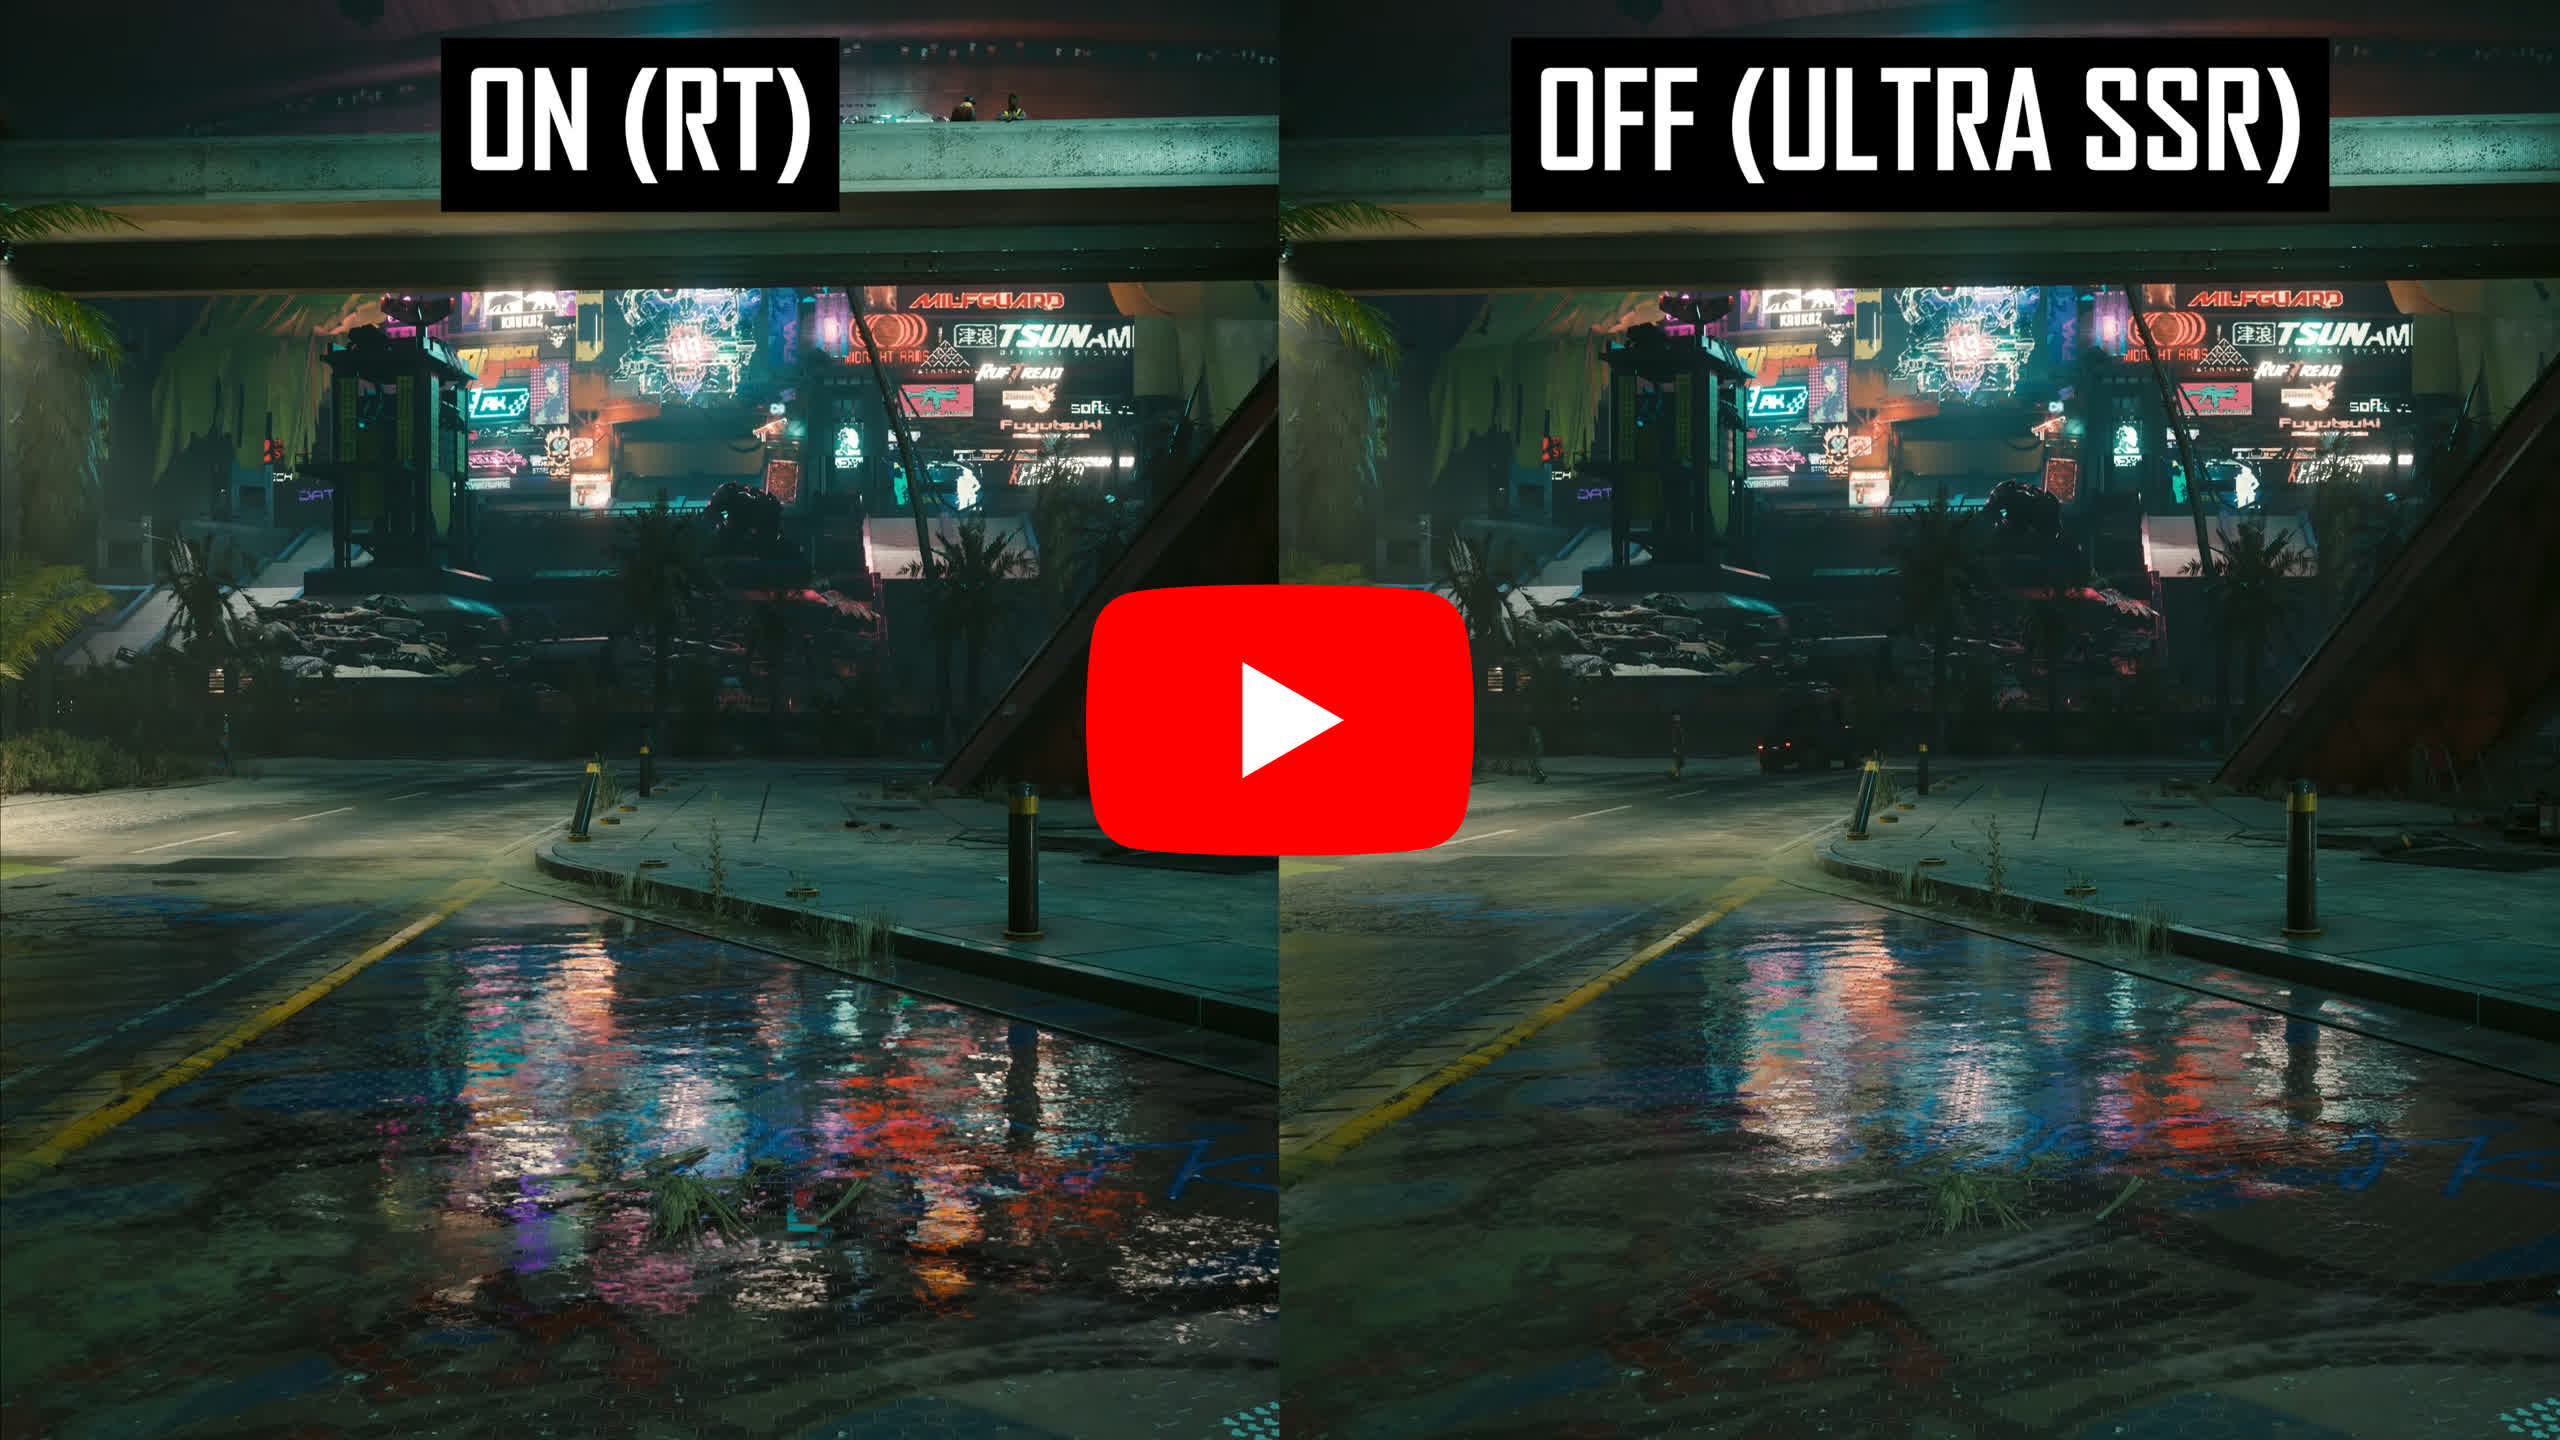
Next up we get to the ray traced effects. Ray traced reflections in our opinion has the biggest impact on visual quality. These reflections replace screen space reflections and work in many more circumstances, like when the object in the reflection is not on screen, or when the reflective surface is glass and needs to reflect what is behind you.
This significantly transforms the visuals of the game to make it look better and more accurate. On top of this, other reflections where SSR would normally be applied are now enhanced with increased resolution and higher accuracy. In many areas reflections go from blurry to much clearer when RT reflections are enabled.

The performance hit is quite large from using this setting, so the optimized choice would be to not use ray tracing. RT reflections, relative to ultra screen space reflections, caused a 24% performance hit on the RTX 4070, a gap that’s even larger on AMD GPUs.
Relative to medium SSR that we recommend for optimized gaming, ray traced reflections runs 37 percent slower, so this is very much a premium visual feature. However it runs much better than psycho screen space reflections, again making that psycho setting pointless.
Ray Traced Sun Shadows
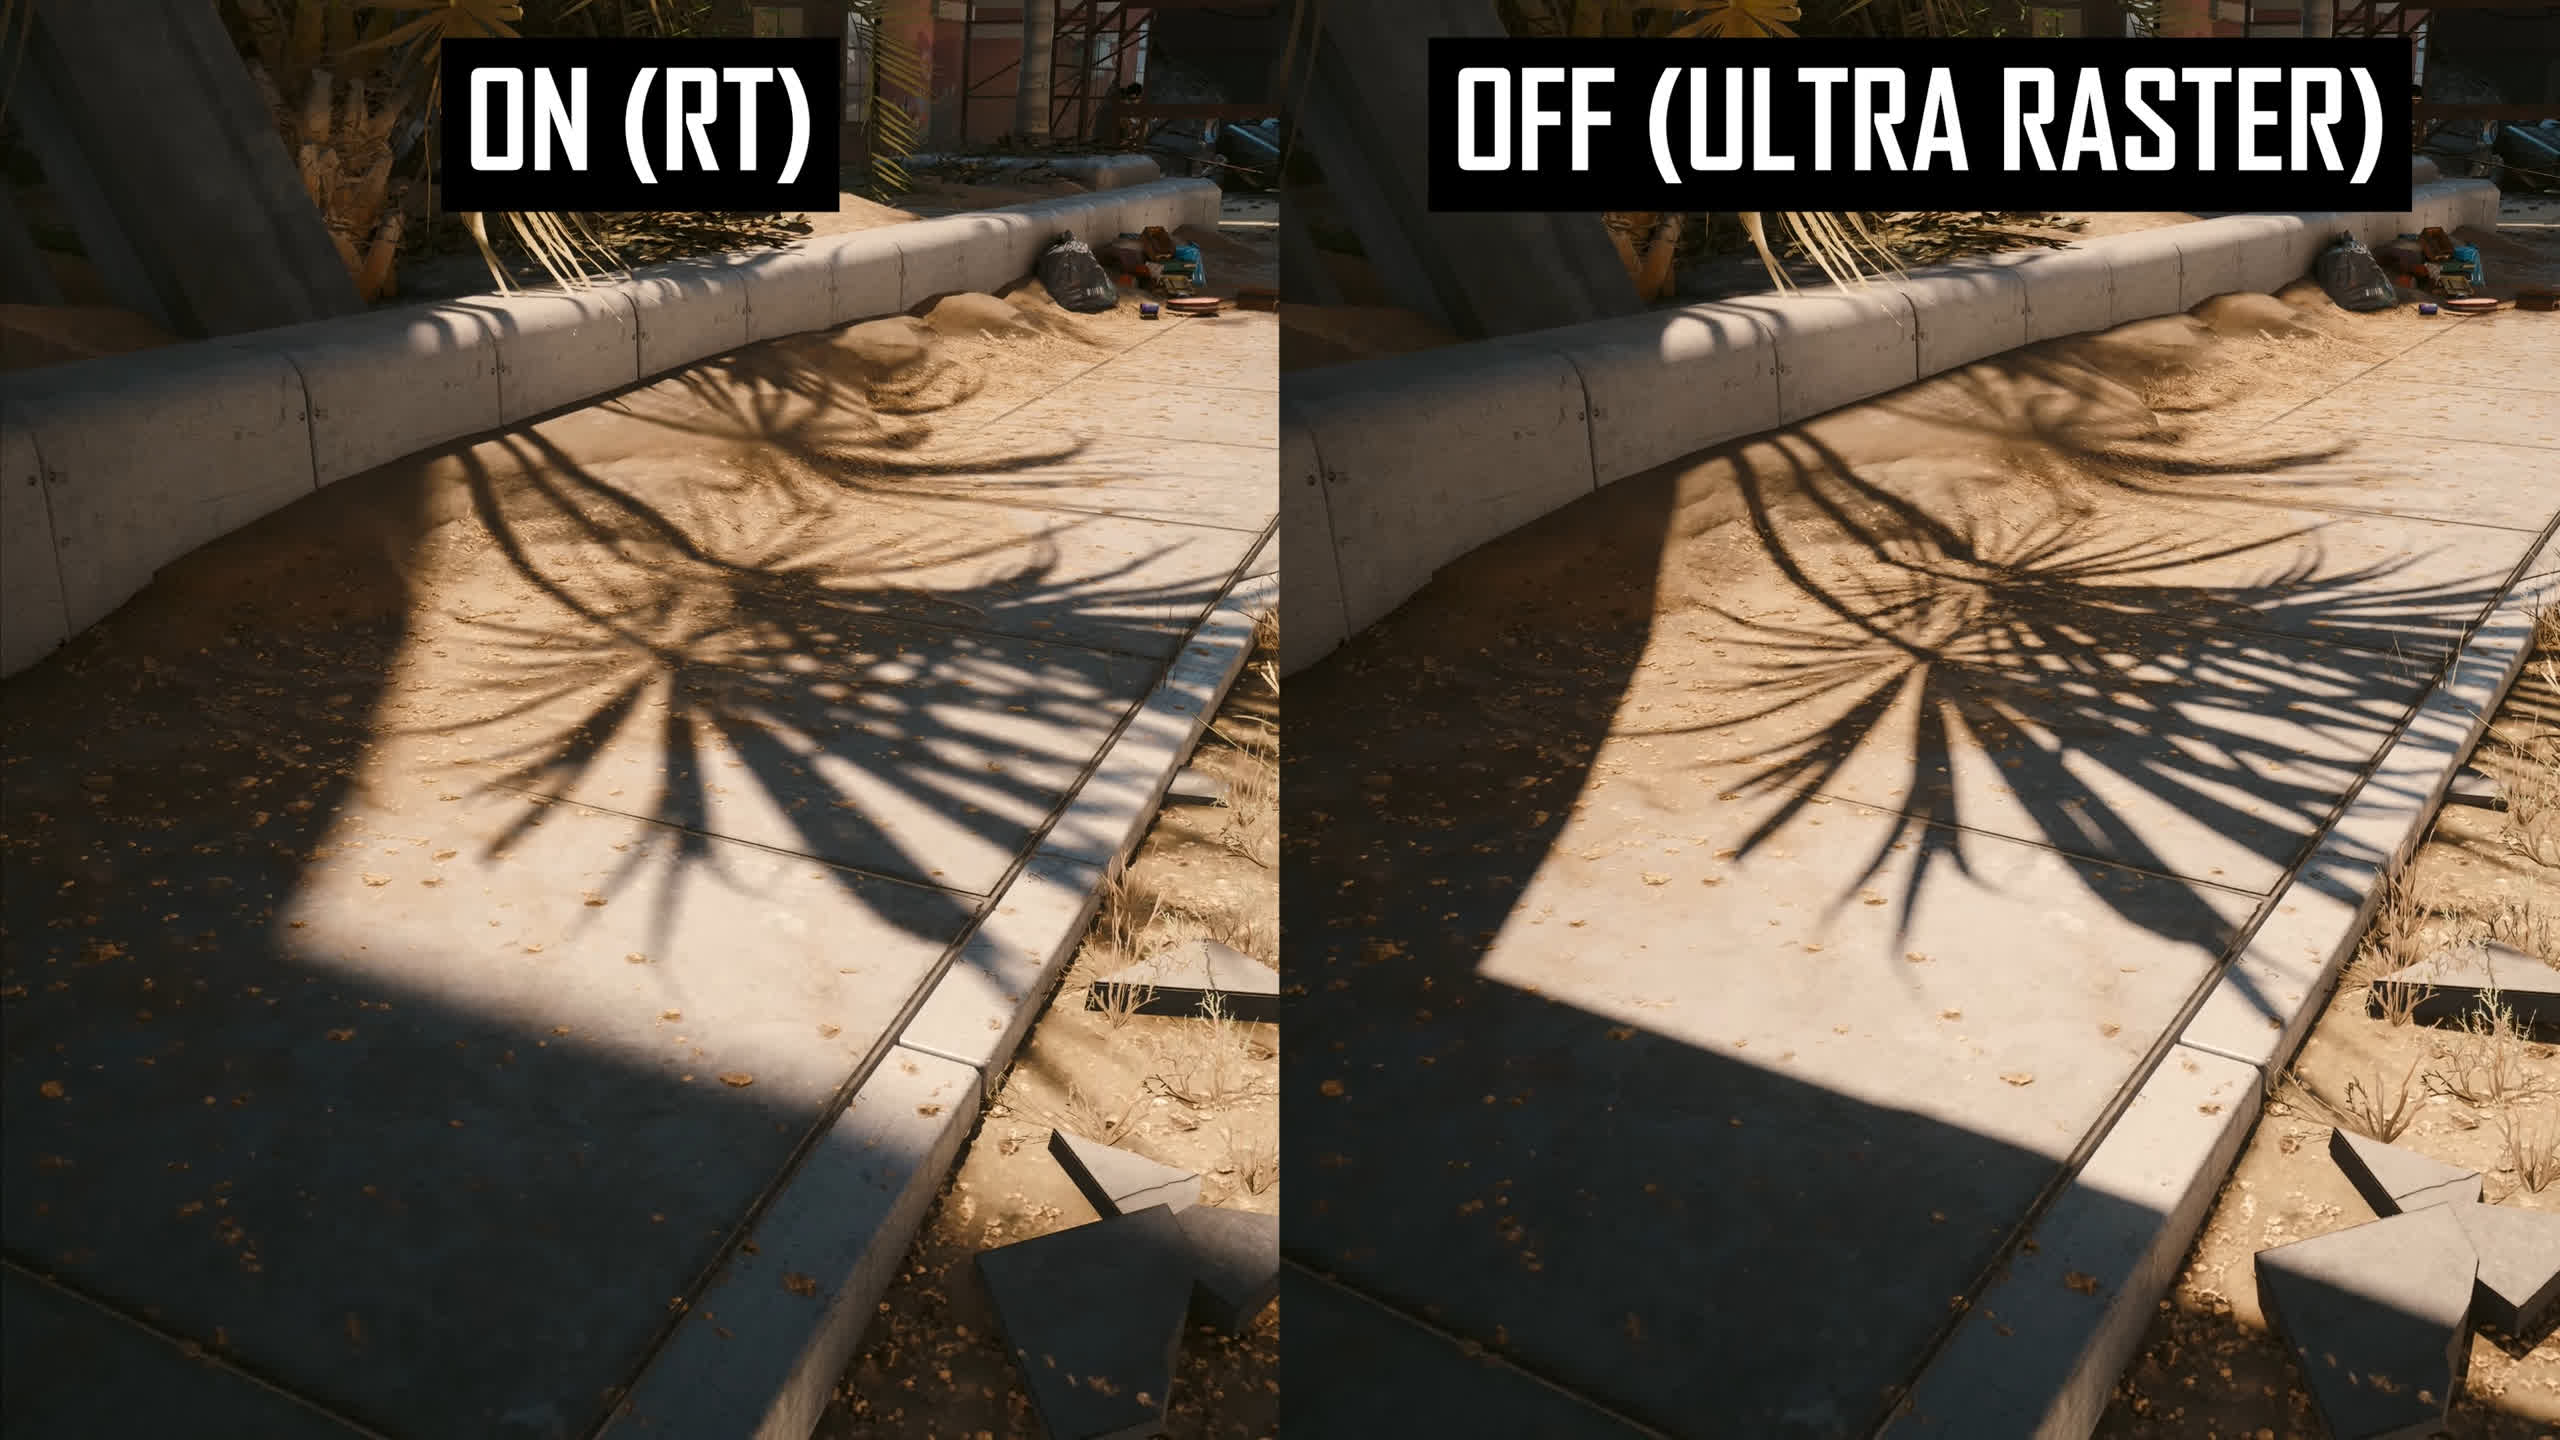
Ray traced sun shadows are supposed to improve the accuracy of shadows in the game, but it ends up just making the presentation look different to ultra rasterized shadows, it doesn’t necessarily make the game look noticeably better in my opinion. Often rasterized shadows are sharper if that’s what you are after, and in many areas ray traced shadows look pretty close to rasterized shadows.

Given that enabling this setting reduced performance by 14 percent, we wouldn’t recommend using it.
Ray Traced Local Shadows
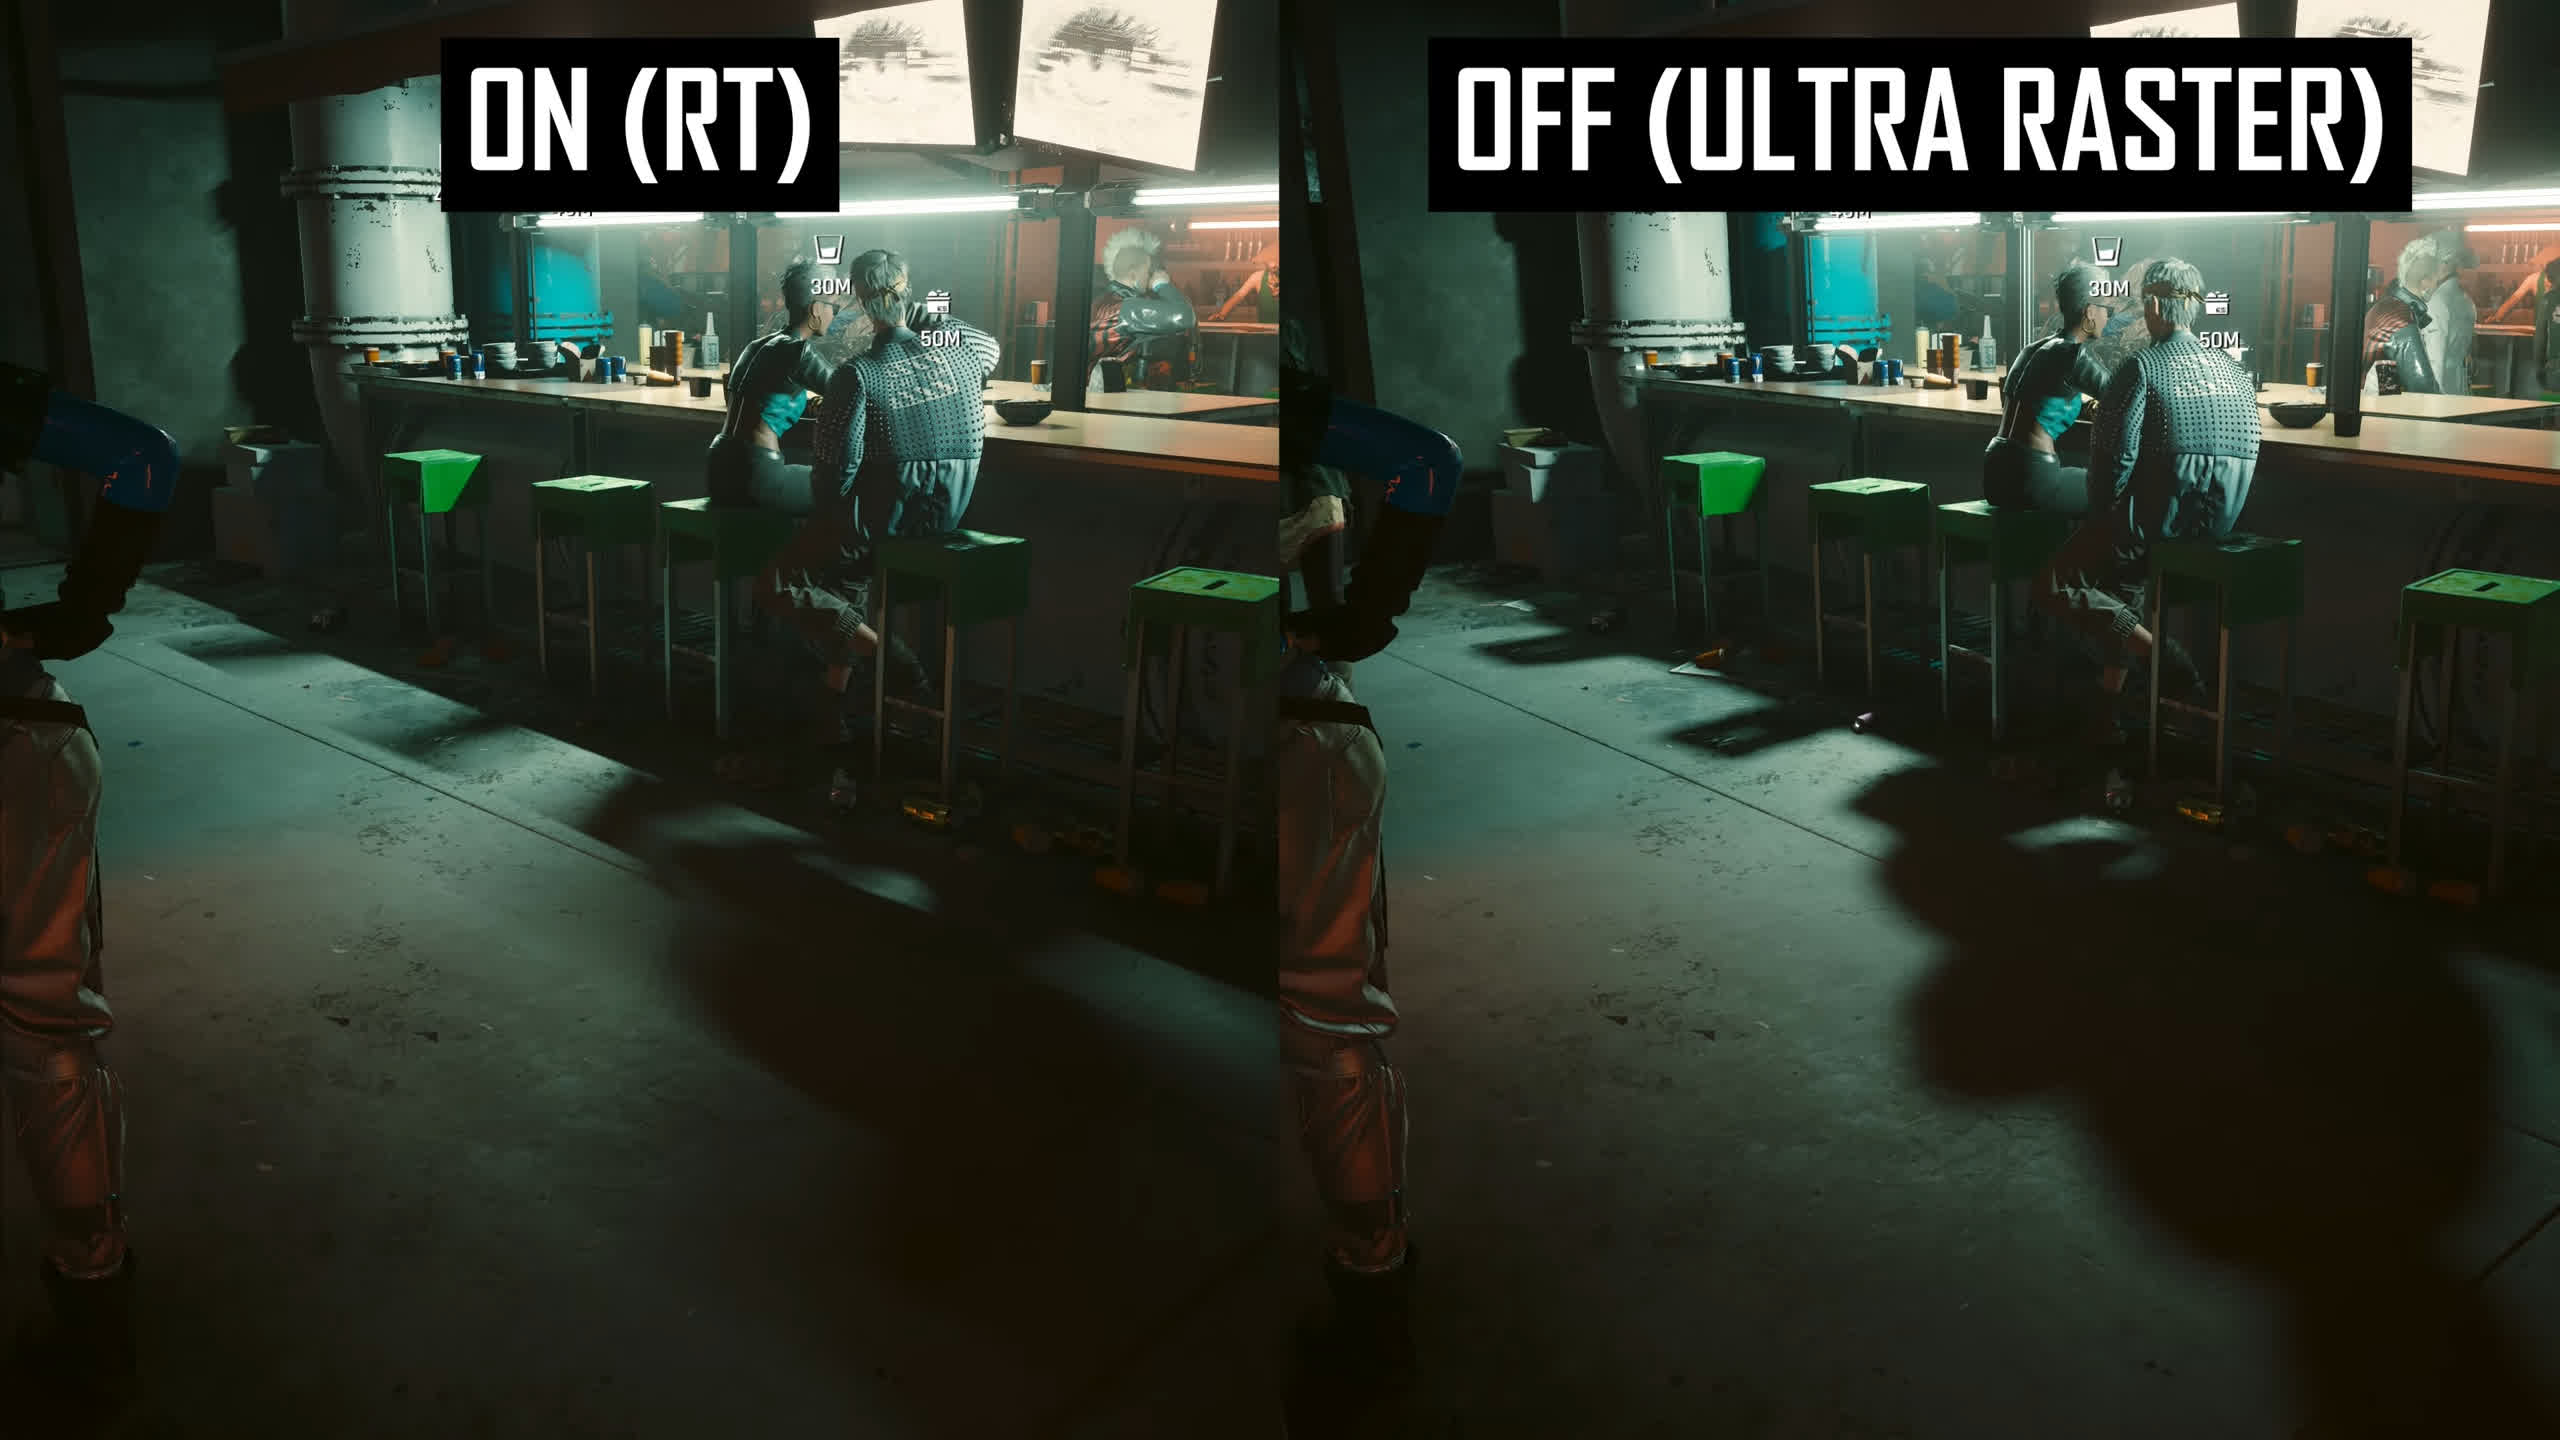
Ray traced local shadows is an interesting one. In some areas I found that RT shadows for artificial lights can make the game look worse. In other areas it can significantly improve accuracy and even provide shadows where previously there weren’t any.

On average in our benchmark pass we found a similar impact from RT local shadows as RT sun shadows, but the visual impact is typically better from local shadows. Running local and sun shadows together isn’t that much more intensive than just running one of the settings, but our preference is local shadows.
Ray Traced Lighting
For a better representation of image quality comparisons, check out the HUB video below:
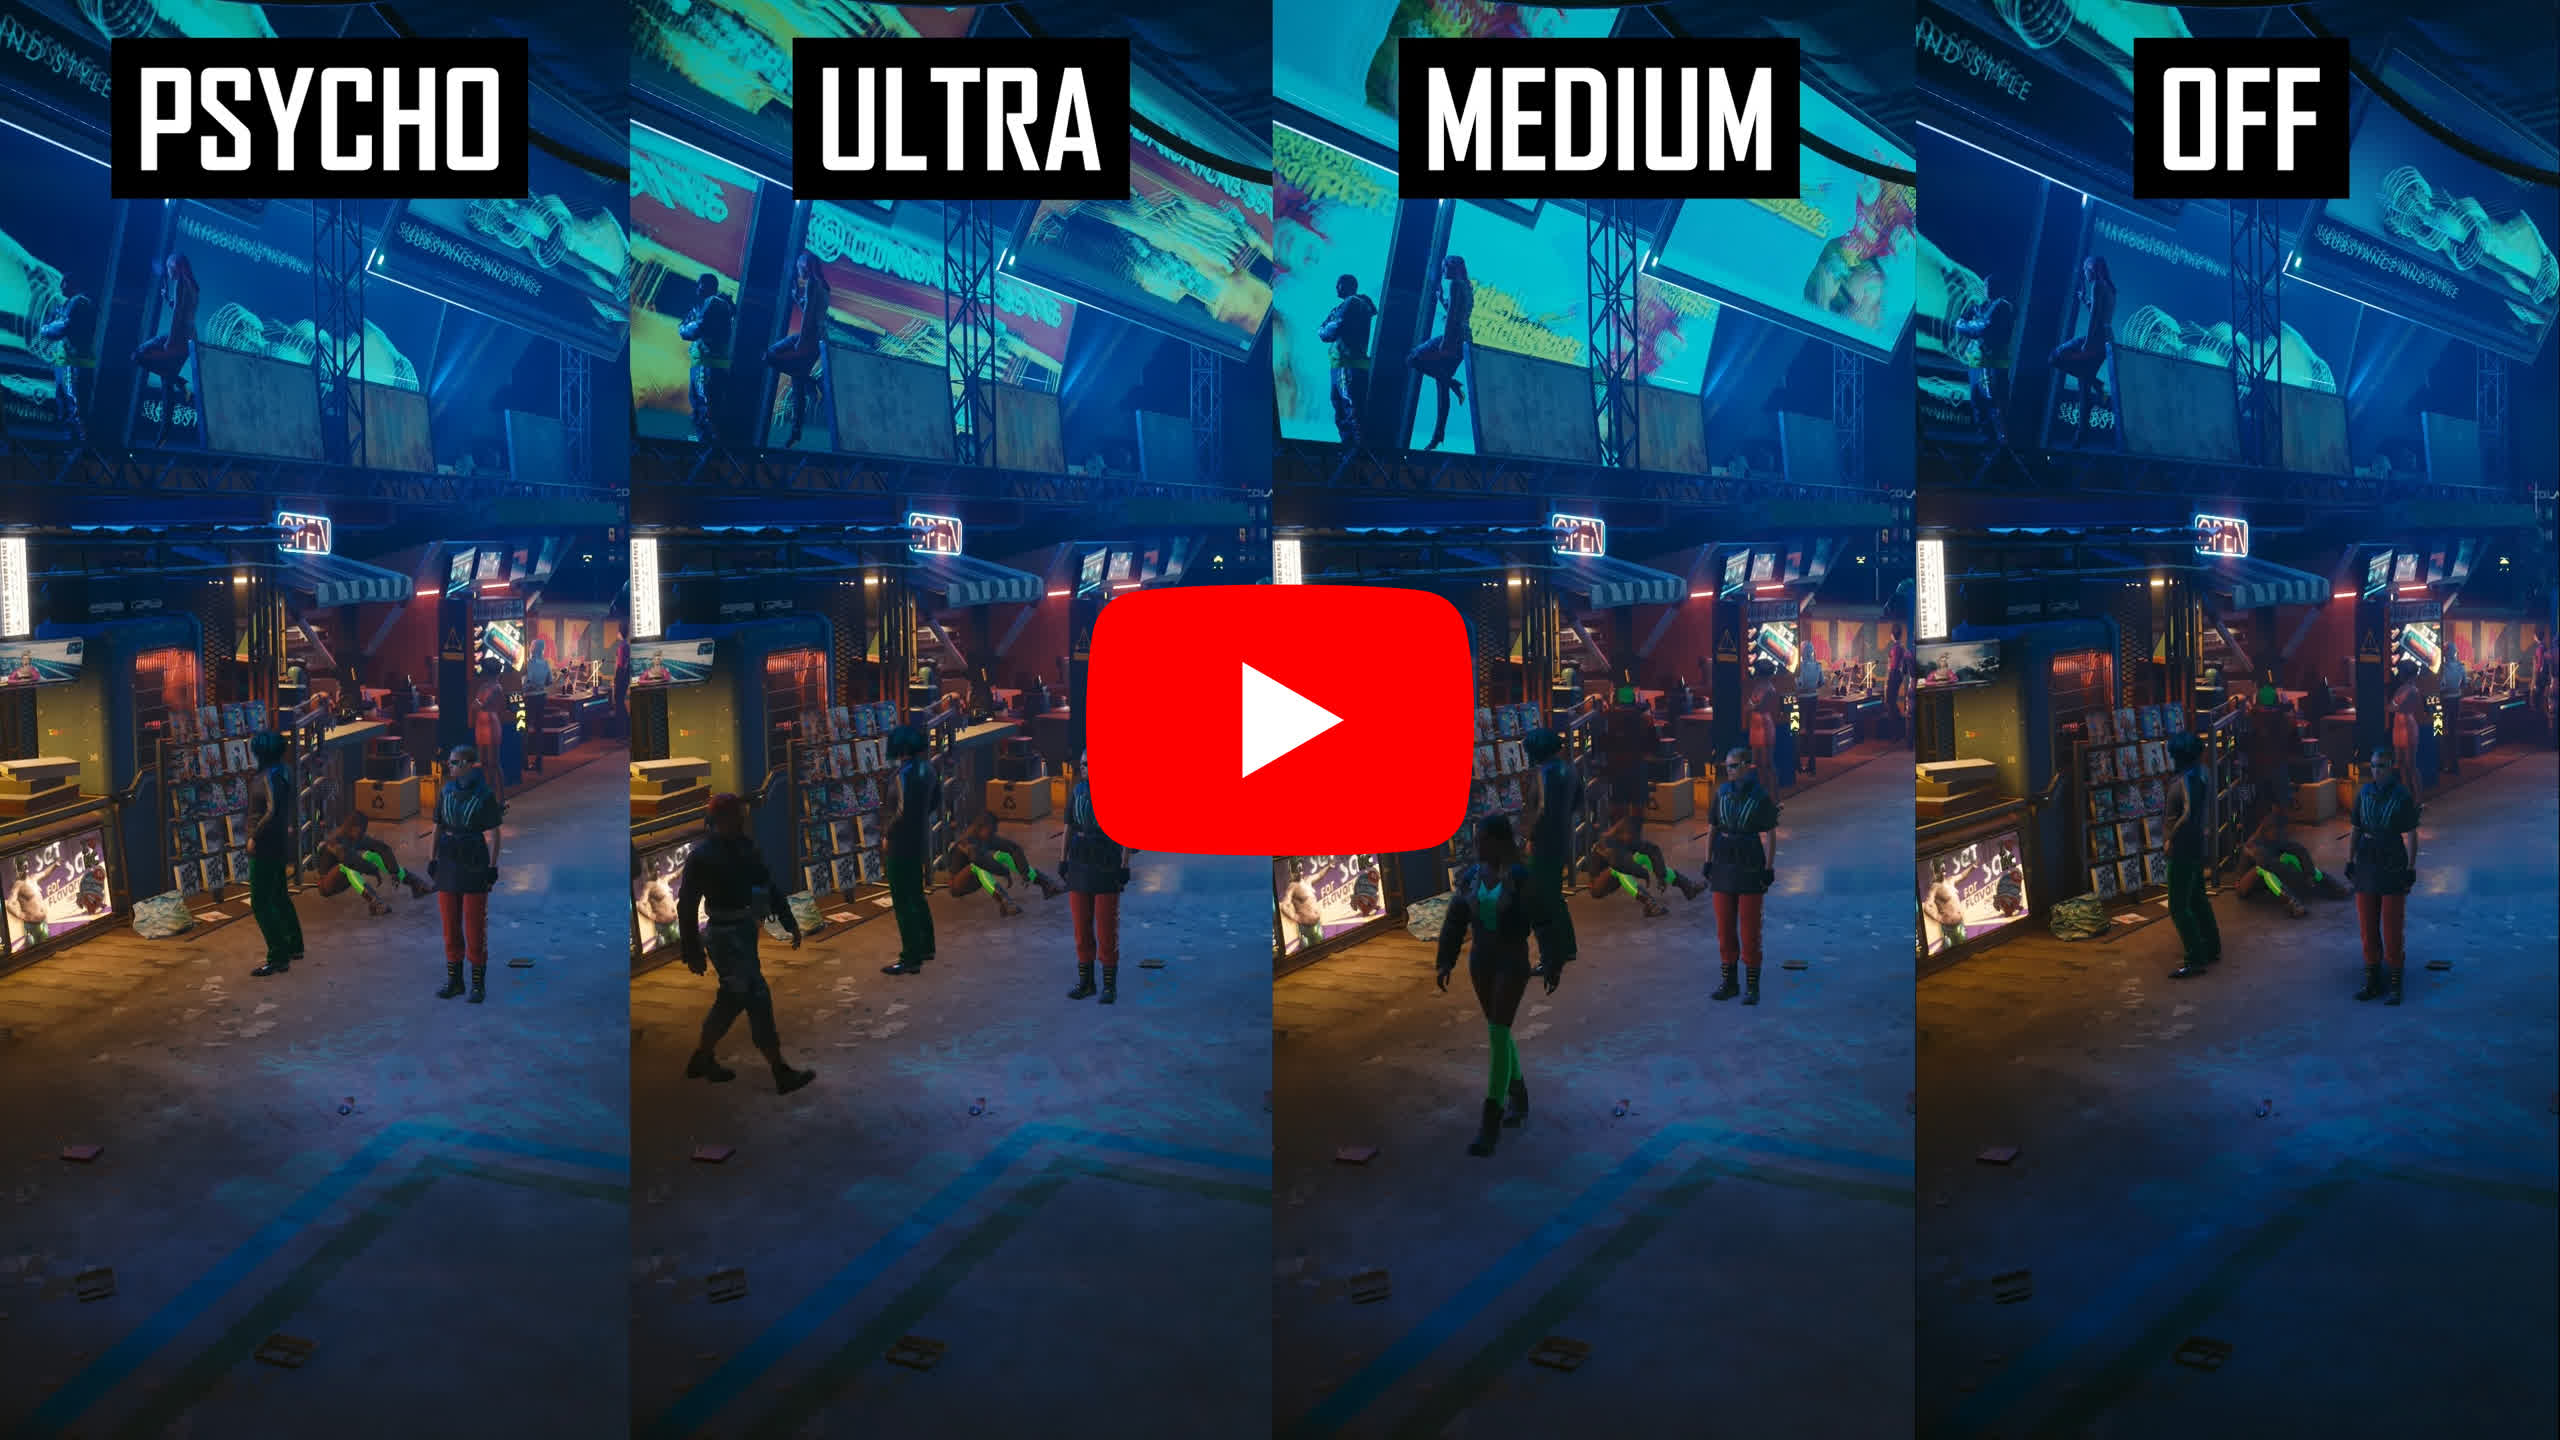
Ray traced lighting affects global illumination and ambient occlusion, with each of the three modes adding additional accuracy. This is a tricky setting to evaluate as a lot of the time, ray traced lighting makes the game look different, but doesn’t necessarily make it look better – especially after you realize it’s not especially accurate compared to the path traced mode.
In many scenes the impact of RT lighting was obvious, but simply affected what objects received shadowing and illumination. In some scenes I found RT lighting to be clearly superior and more accurate, in others it just looked like an artist had gone through and changed the way the game looked, as artists will do for all lighting styles including rasterization.

The differences between RT lighting on medium, Ultra and Psycho were also reasonably subtle and again mostly just changed the way the game looked without making it clearly look better. Personally this is a setting I would experiment with and only enable if you significantly prefer the way the ray traced lighting looks compared to ultra-level rasterization. I find RT lighting looks slightly better in my opinion, though I couldn’t justify using a setting higher than medium.
As for performance impact, RT lighting has the biggest impact of the RT settings outside of path tracing. A 36% impact using medium, 41% using Ultra and 48% using Psycho is quite hard to justify in my opinion. If you only have so much performance to spare, I would much prefer getting the visual impact of RT reflections with a 37% hit relative to medium screen space reflections, compared to a 36% impact for RT lighting versus ultra rasterization.
Path Tracing

There’s also the path traced mode, which we’re not going to cover in-depth here as obviously if you’re looking to optimize performance you won’t be using path tracing.
The game does look significantly better than with either rasterized or normal ray traced visuals, but it will drop performance by 75% versus ultra settings – as in, you’ll get one quarter of the performance you had previously – which makes it virtually unplayable on most mid-range hardware.
This setting is for those who have high end GPUs that don’t care about optimized performance and just want the best visual experience, and fair enough, if you’ve bought an RTX 4090, go ahead and enjoy that path tracing, don’t worry about this guide.

Presets
For a better representation of image quality comparisons, check out the HUB video below:
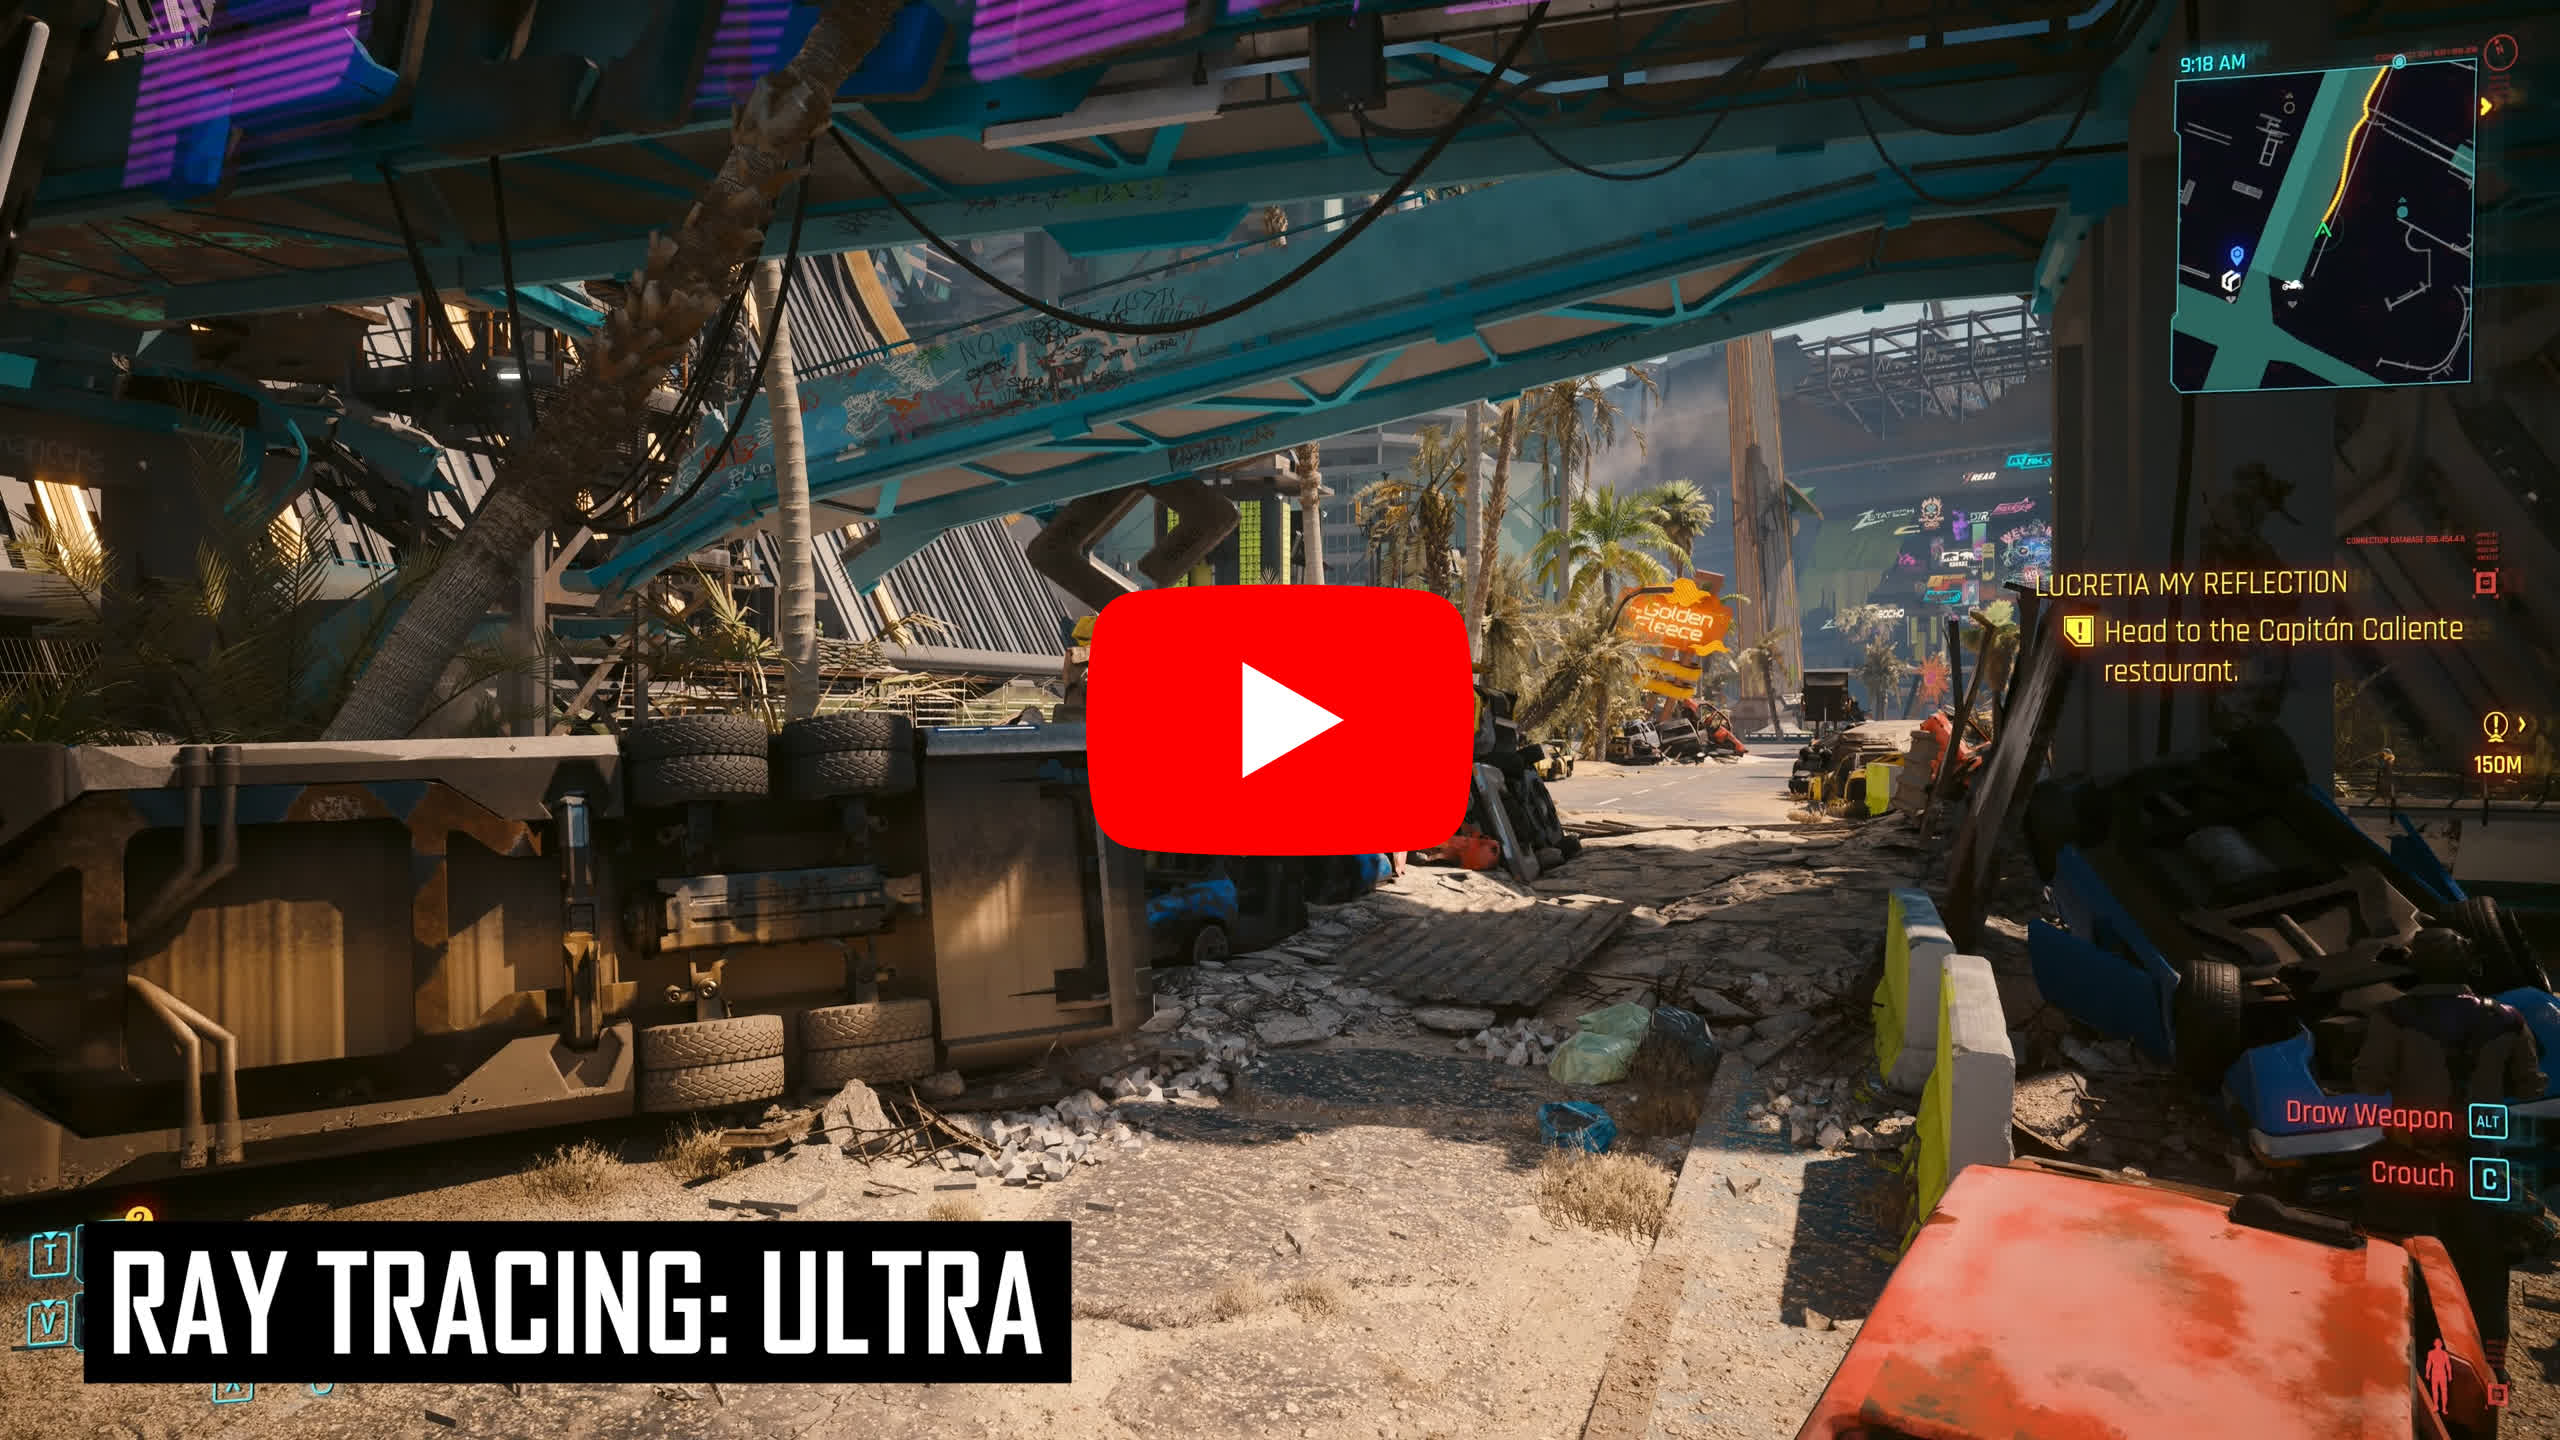
The presets combine all of the different settings we saw before individually. Relative to ultra rasterization, high slightly reduces reflection and fog quality, and cuts crowd density, while maintaining all other effects.
Medium drops texture quality to medium which noticeably hurts the clarity of these textures, while also reducing shadow quality somewhat, it drops reflection quality down to medium for a noticeable impact, and further reduces crowd density. Ambient occlusion quality is identical to ultra, as is the use of contact shadows, so not every area gets cut down using this preset and ultimately I think it still looks good on medium settings.
Low doesn’t actually turn everything to the lowest setting, but it does noticeably cut texture quality, anisotropy is impacted, shadows are lower quality, fog is dropped to the lowest setting that does increase artifacting, ambient occlusion is reduced which makes the game world look flatter, and most other settings are turned down. But given the low setting does not disable shadows, reflections, clouds or ambient occlusion it still looks decent compared to minimum settings.
The Steam Deck preset is one of the best in the game even if you aren’t actually playing it on a Steam Deck. It uses a mixture of high and medium settings while setting FSR to Balanced, but of course you can tweak upscaling to your liking. The key benefits to this preset is that it cranks texture quality up to high, maintains decent quality reflections and fog, and delivers medium quality shadows. In many respects the Steam Deck preset visually is a better option than the medium preset.
As for the ray traced presets, these use ultra settings but begin to introduce ray tracing. RT Low only enables local shadows for a minimal visual impact only in some scenarios. Medium turns on local shadows, sun shadows and lighting on medium but leaves reflections off, not a huge fan of the optimization there for the medium RT preset. Then RT ultra turns every RT feature on and sets lighting to Ultra. RT Overdrive enables path tracing.

Preset performance shows good scaling even without the use of upscaling technologies. High delivers a 14% performance improvement over Ultra, and medium is nearly 40% faster while still looking excellent. The Steam Deck preset is a little more intensive than medium but still offers a 34% gain over Ultra.
Personally, gaming on the Ultra preset is a little pointless when High is so close visually but delivers 14% more performance, while the Steam Deck preset is also a great choice if you want a decent FPS gain without messing around further, just be sure to adjust those upscaling settings.
Meanwhile, the low preset is 77% faster than ultra and honestly, for a lot of gamers with mid-range and lower tier hardware, low is still a great way to play the game as a lot of features remain enabled and the game still looks quite good.

As for the RT presets these are all quite taxing, although RT low only sees a 16% performance impact as it only enables local shadows. Once you get to medium you’ll see a 40% cut to performance, Ultra will halve performance at least, and the overdrive setting will cripple anything but high-end Nvidia graphics cards.
We’ve tested on an RTX 4070, so note that these presets will scale even worse on AMD GPUs, where ray tracing could be very hard to justify outside of flagship RDNA3 GPUs. For optimized performance we wouldn’t use any of these presets, although ray tracing is likely going to be viable on higher end GPUs where there’s a lot more performance headroom.
Recommended and Optimized Settings
Finally, here are our TechSpot Optimized Settings. The TechSpot Quality mode is aimed to be a version of Ultra settings, sacrificing screen space reflection quality and a little bit to volumetric fog to hit much higher frame rates. Relative to ultra pretty much everything else is maintained on the highest setting, including shadow quality, ambient occlusion, textures, and level of detail.
| Setting | TechSpot Quality |
| Texture Quality | High |
| Upscaling | Tune to Liking |
| Motion Blur | Off |
| Contact Shadows | On |
| Improved Facial Lighting Geometry | On |
| Anisotropy | 16 |
| Local Shadow Mesh Quality | Medium |
| Local Shadow Quality | High |
| Cascaded Shadows Range | High |
| Cascaded Shadows Resolution | High |
| Distant Shadows Resolution | High |
| Volumetric Fog Resolution | Medium |
| Volumetric Cloud Quality | Medium |
| Max Dynamic Details | Ultra |
| Screen Space Reflections Quality | Medium |
| Subsurface Scattering Quality | High |
| Ambient Occlusion | High |
| Color Precision | Medium |
| Mirror Quality | Medium |
| Level of Detail | High |
| Crowd Density | High |
The TechSpot Performance mode is for those that need more performance and would typically choose the medium preset. This mode slightly cuts back on shadows and ambient occlusion and further reduces screen space reflections, but maintains high textures and crowd density which are cut when using the built in medium and low presets.
| Setting | TechSpot Performance |
| Texture Quality | High |
| Upscaling | Tune to Liking |
| Motion Blur | Off |
| Contact Shadows | Off |
| Improved Facial Lighting Geometry | On |
| Anisotropy | 16 |
| Local Shadow Mesh Quality | Medium |
| Local Shadow Quality | Medium |
| Cascaded Shadows Range | High |
| Cascaded Shadows Resolution | Medium |
| Distant Shadows Resolution | High |
| Volumetric Fog Resolution | Low |
| Volumetric Cloud Quality | Medium |
| Max Dynamic Details | Ultra |
| Screen Space Reflections Quality | Low |
| Subsurface Scattering Quality | High |
| Ambient Occlusion | Low |
| Color Precision | Medium |
| Mirror Quality | Medium |
| Level of Detail | High |
| Crowd Density | High |
Lastly, we have the ray tracing hierarchy of importance… In Cyberpunk, ray tracing generally delivers a larger performance impact than you will receive in visual benefit, meaning that for most gamers after the best optimization, you would disable ray tracing entirely. However, those with higher end GPUs may want to dabble in ray tracing anyway, in which case I would enable it with the following order of importance.
In my opinion, reflections is the setting you’ll want to use if you use ray tracing at all, followed by local shadows. RT lighting set to medium is of lesser importance but could be worth using if you prefer the way it changes lighting in the game. I wouldn’t bother with RT lighting higher than medium, or RT sun shadows.
Path tracing delivers a big visual improvement at a huge cost to performance, so while the mode is impressive, the mammoth hardware requirements really restrict this to the highest end GPUs, hence why it’s labelled a technology preview.
For a better representation of image quality comparisons, check out the HUB video below:
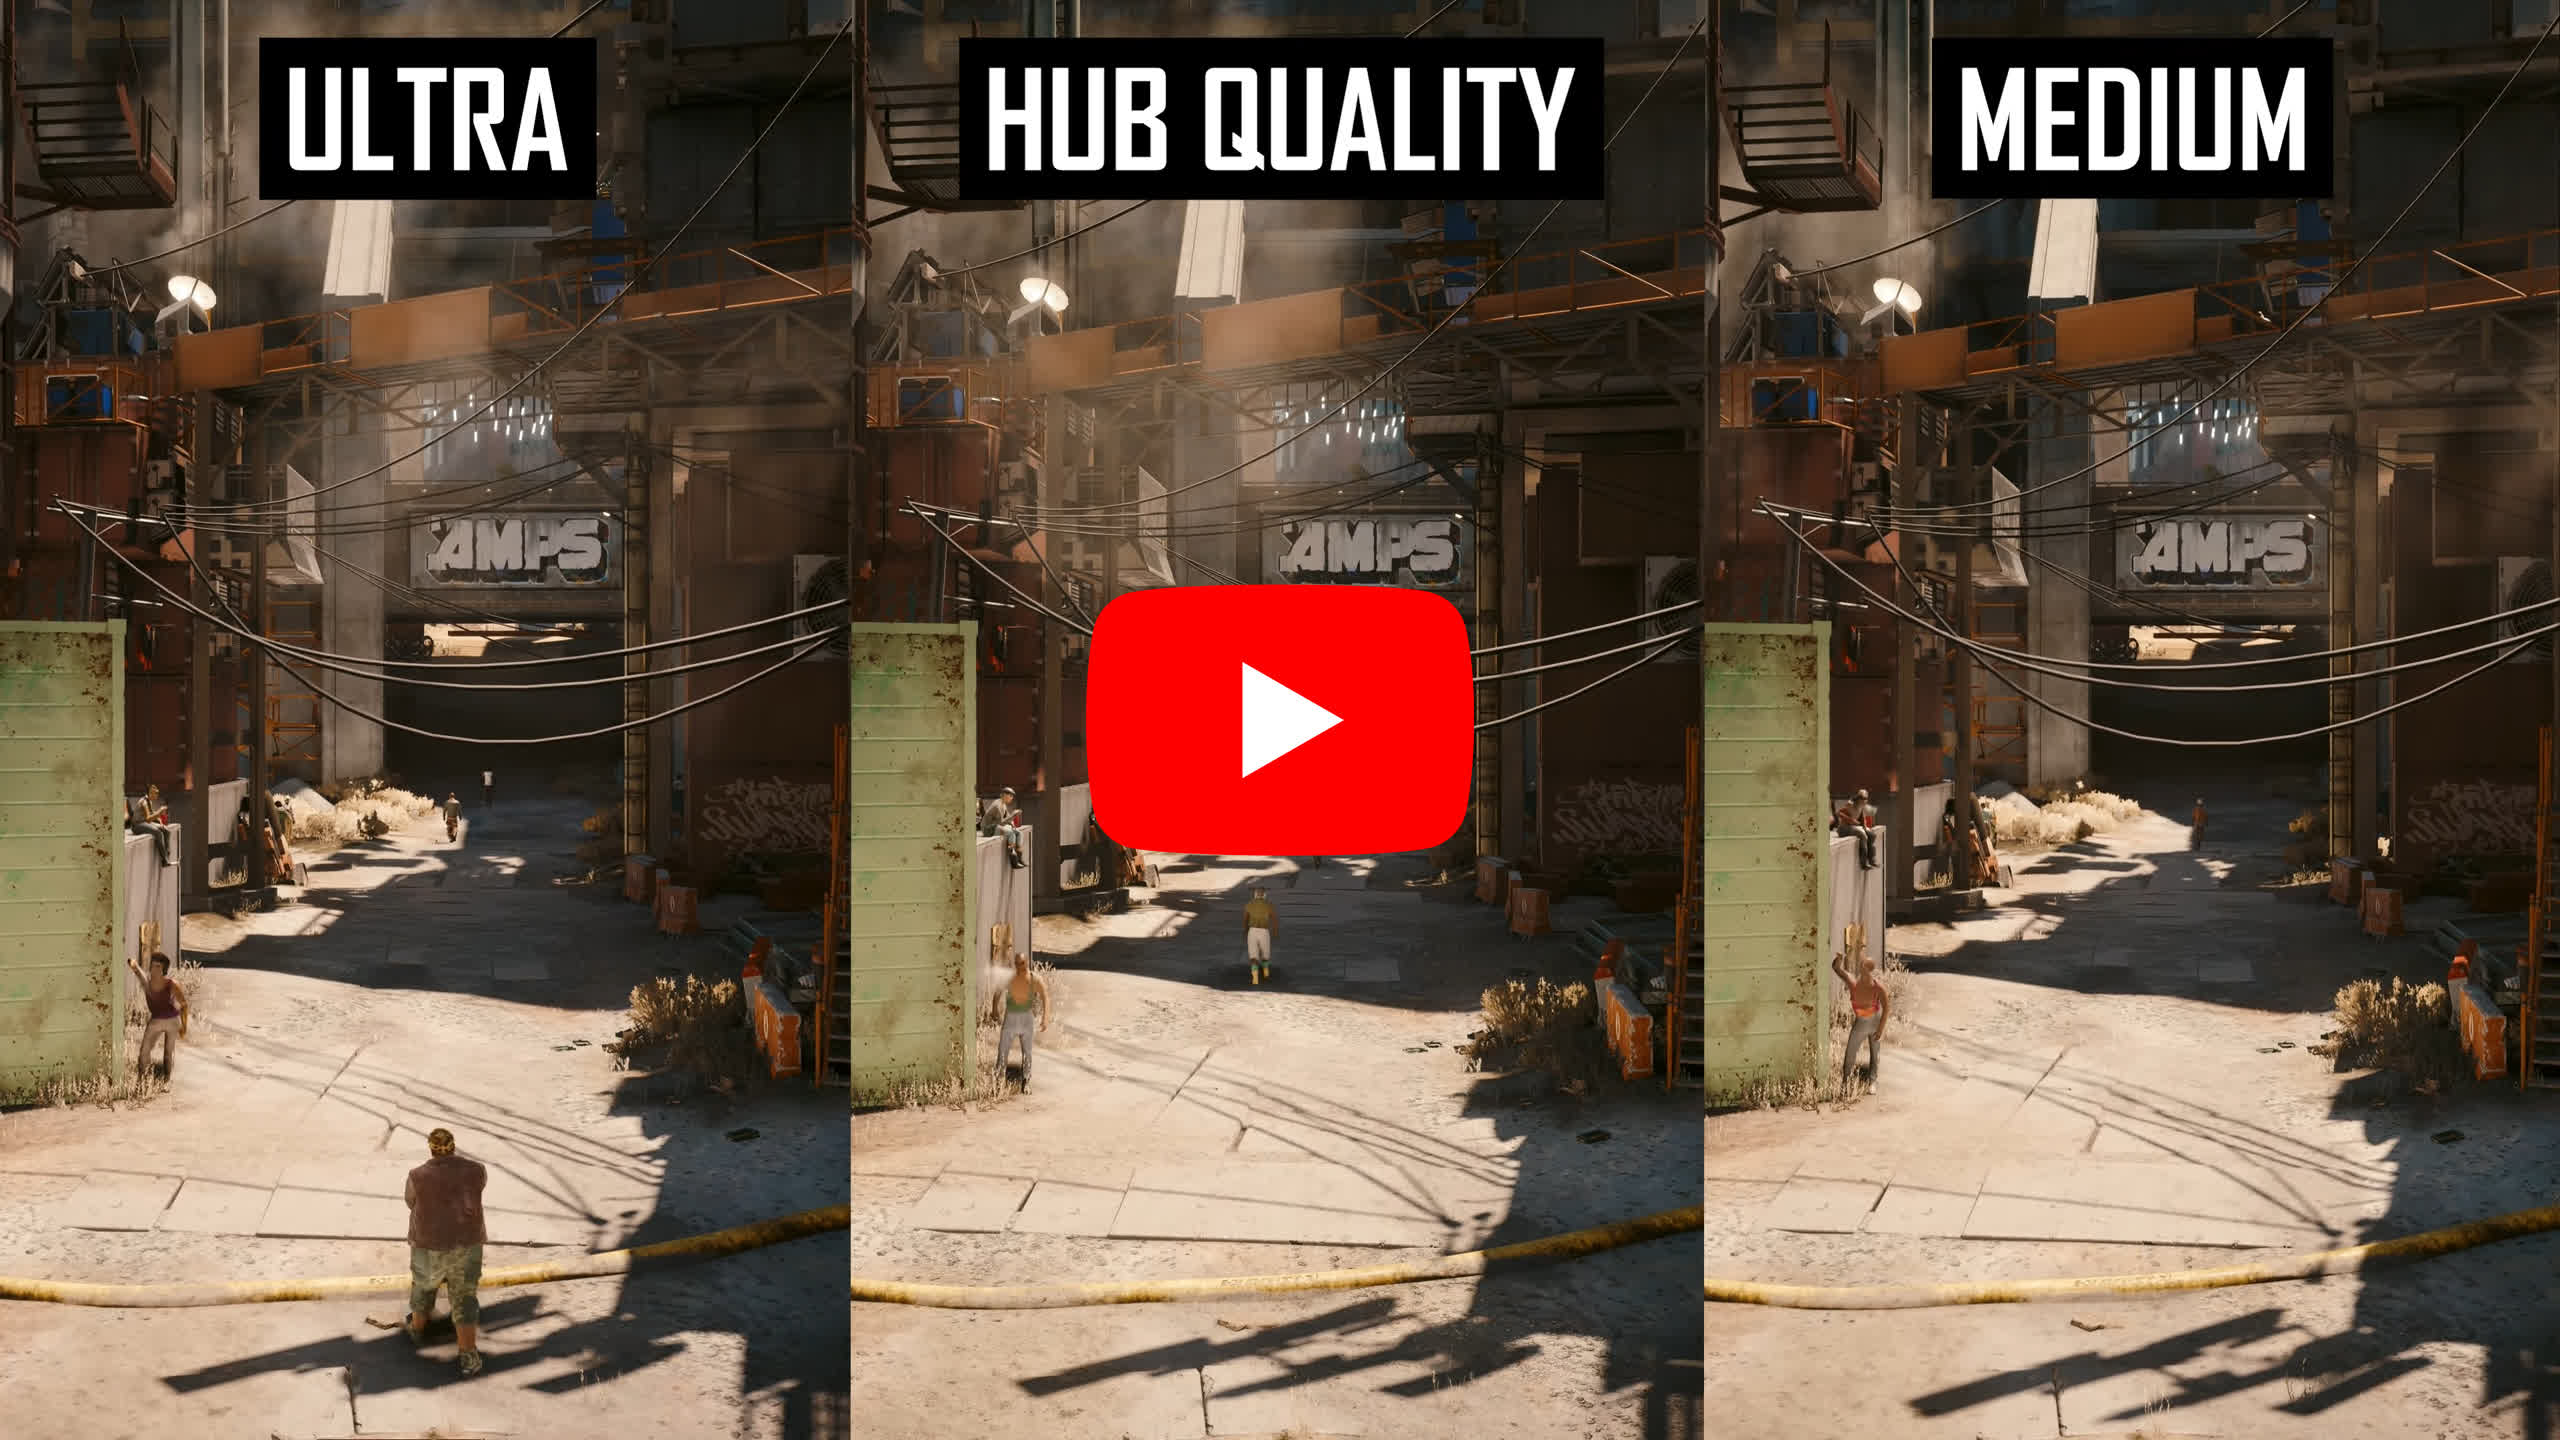
In the video above you can see some examples of our optimized settings in action. The TechSpot Quality mode for the most part looks very similar to ultra, especially when you aren’t stopping to analyze reflections. Cyberpunk scales very well and while the medium preset still looks great in our opinion, using TechSpot Quality instead is even better and really preserves the general high quality experience you should expect from this title.
TechSpot Performance is only downgraded slightly from TechSpot Quality and ends up delivering better image quality than the medium preset in my opinion, due to its higher level of texture quality and increased crowd density. With that said, gamers with weaker CPUs will probably have to reduce crowd density to improve CPU performance. With these sorts of optimizations Cyberpunk is nowhere near as demanding as it first appears when looking at ultra preset benchmarks.
In our test area, we found a 42% performance improvement using TechSpot Quality over the Ultra preset, which ended up delivering similar performance to the medium preset – a great result.
The TechSpot Performance preset delivered 63% more performance than Ultra, and a 15% gain on TechSpot Quality, so it ended up sitting between medium and low with superior image quality.
This should take any GPU that normally runs Cyberpunk at around 60 FPS using Ultra settings, and transform it into an 85+ FPS experience. Those only getting around 40 FPS should now be hitting much closer to 60 FPS, especially using TechSpot Performance.
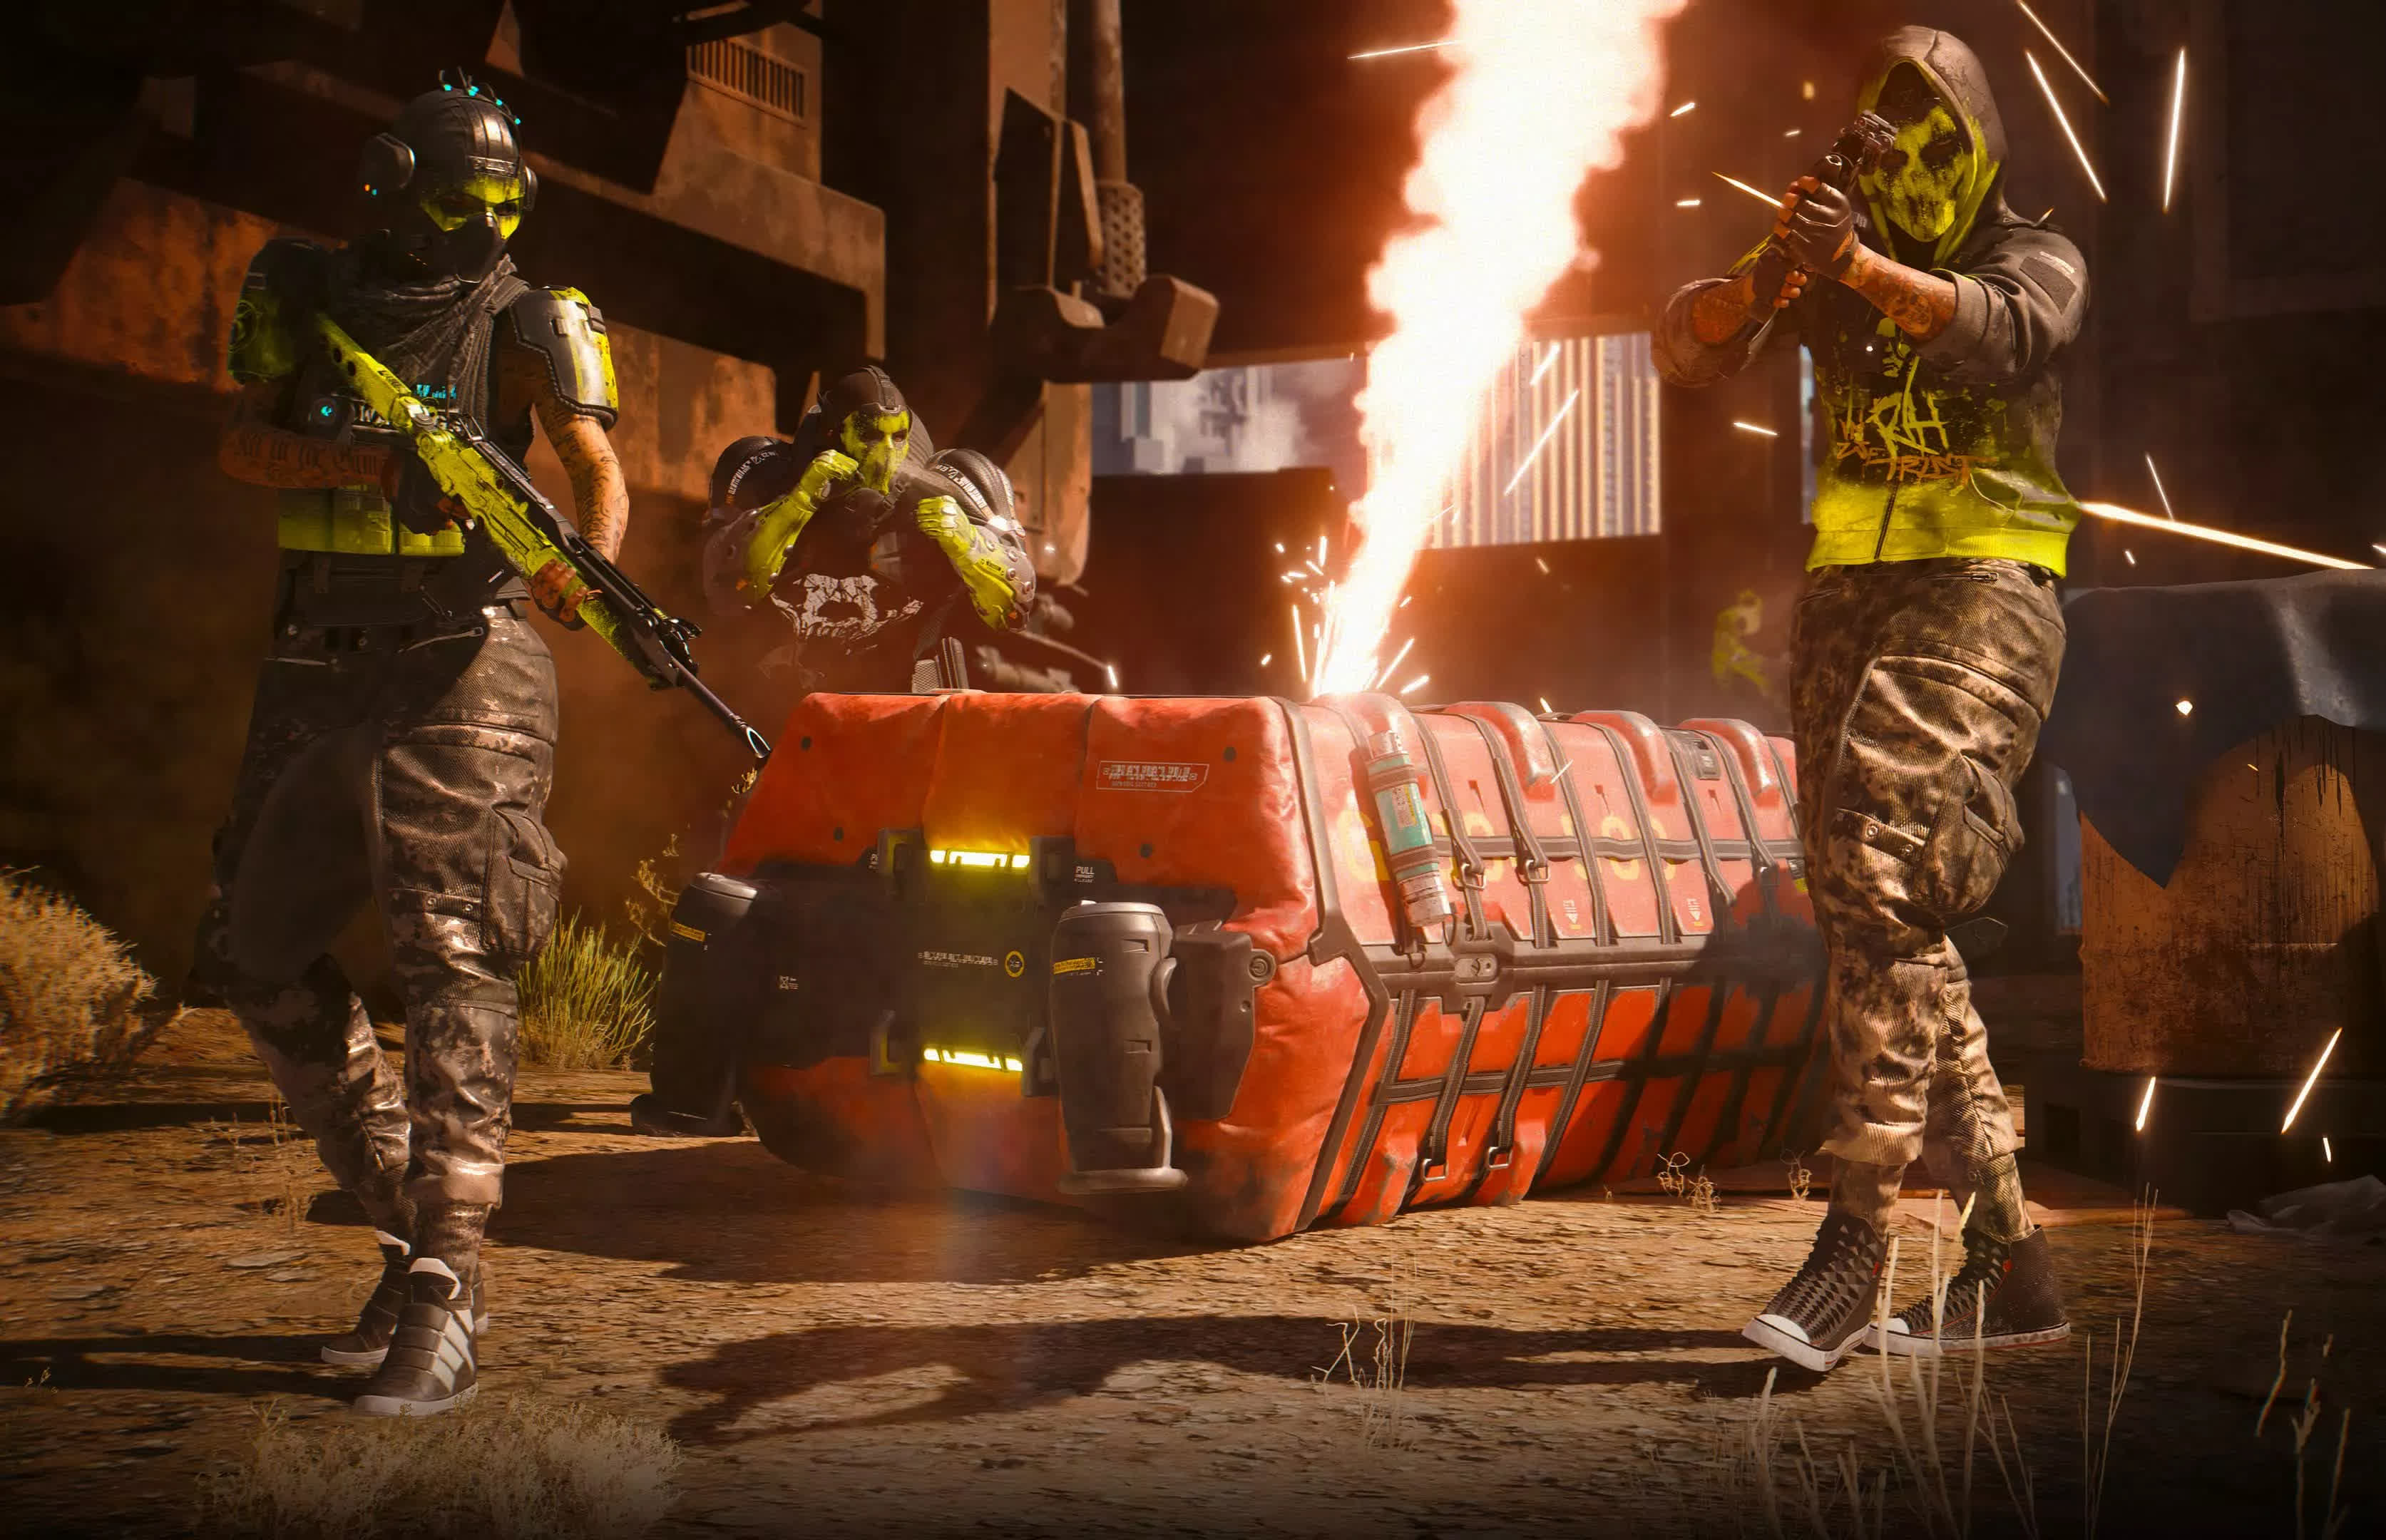
So there you have it… Cyberpunk 2077 Phantom Liberty optimized settings with a focus on the new area of the game – which itself is stunning from a visual, design and art direction perspective.
Having now been worked on for several years after its release, Cyberpunk is in a better state than ever on PC and continues to be one of the best looking games you can play right now. It’s also generally well optimized, the 2.0 update is certainly far better than Star Wars Jedi Survivor or Starfield, for example.

The best aspect to Cyberpunk on PC is there’s a wealth of quality settings that range anywhere from spectacular path tracing to high quality rasterization. Some people may feel they are missing out on the ray traced experience in Cyberpunk if their hardware can’t handle it but honestly we don’t feel that’s the case, even on medium and low settings this game holds up nicely, it looks excellent all while delivering a solid level of performance. Just from preset scaling alone there’s a 70% performance gain on the table and that’s without disabling key features like reflections.
The only criticism of the game’s visuals that we have is that texture quality and draw distance could be improved, especially as high end GPUs these days feature 16GB or more of VRAM and Cyberpunk does little to fill that sort of VRAM buffer. An ultra texture quality setting would be much appreciated for those with RTX 4090s that will be enjoying the path tracing mode the transforms the game’s lighting without transforming its level of detail.
Shopping Shortcuts:
- Nvidia GeForce RTX 4070 on Amazon
- Nvidia GeForce RTX 4060 Ti on Amazon
- Nvidia GeForce RTX 4070 Ti on Amazon
- Nvidia GeForce RTX 4080 on Amazon
- Nvidia GeForce RTX 4090 on Amazon
- AMD Ryzen 7 7800X3D on Amazon
- AMD Radeon RX 7800 XT on Amazon
- AMD Radeon RX 7900 XTX on Amazon

